I’ve recently completed a postgraduate programme in Scottish History at the University of Dundee in the UK and my dissertation for the Masters of Letters degree involved an in-depth study of the men in their guilds who controlled the earliest hand knitting enterprises known in Scotland.
Here’s an abstract of the study:
This study examines the male-dominated hand-knitting industry in Scotland from the earliest bonnetmaker guild formation in the late fifteenth century through the introduction of machine knitting in the latter half of the nineteenth century. Specifically, a comparison is made between the bonnetmaking guilds of the burgh of Dundee and the small Ayrshire town of Stewarton in respect of their management of members, products and markets. The two guilds were chosen as subjects for this research as they were the only incorporations in Scotland that exclusively produced headwear.
The flat, oversized blue bonnet so popular with the Scottish working man, which was their original product was likely copied from similar headwear worn by French clerics who travelled between the European continent and Dundee. The bonnetmakers of Dundee relied excessively on the domestic market for their income, and when that market declined, so did their fortunes. The Stewarton craftsmen, on the other hand responded to the market decline with the introduction of a new product – the nightcap – to address changing consumer preferences and later were able to capture the lucrative market in military headgear, showing additional ability to adapt. Their success continued with the export of their popular products to new markets in North America during the latter years of the eighteenth century. Bonnetmaking by hand came to an end in the second half of the nineteenth century, when knitting by machine took precedence.
Available documents from the period – including guild and court records and wills and testaments, for example – were consulted in considering the reasons for the downturn in bonnetmaking in Dundee in the mid-eighteenth century and the upsurge of production in Stewarton. Weaknesses in the Dundee organisation and a lack of entrepreneurial spirit – in failing to consider new products and markets – are compared to the better-organised guild in Stewarton and its successes in introducing products to meet changing demand and seeking additional domestic and international markets.
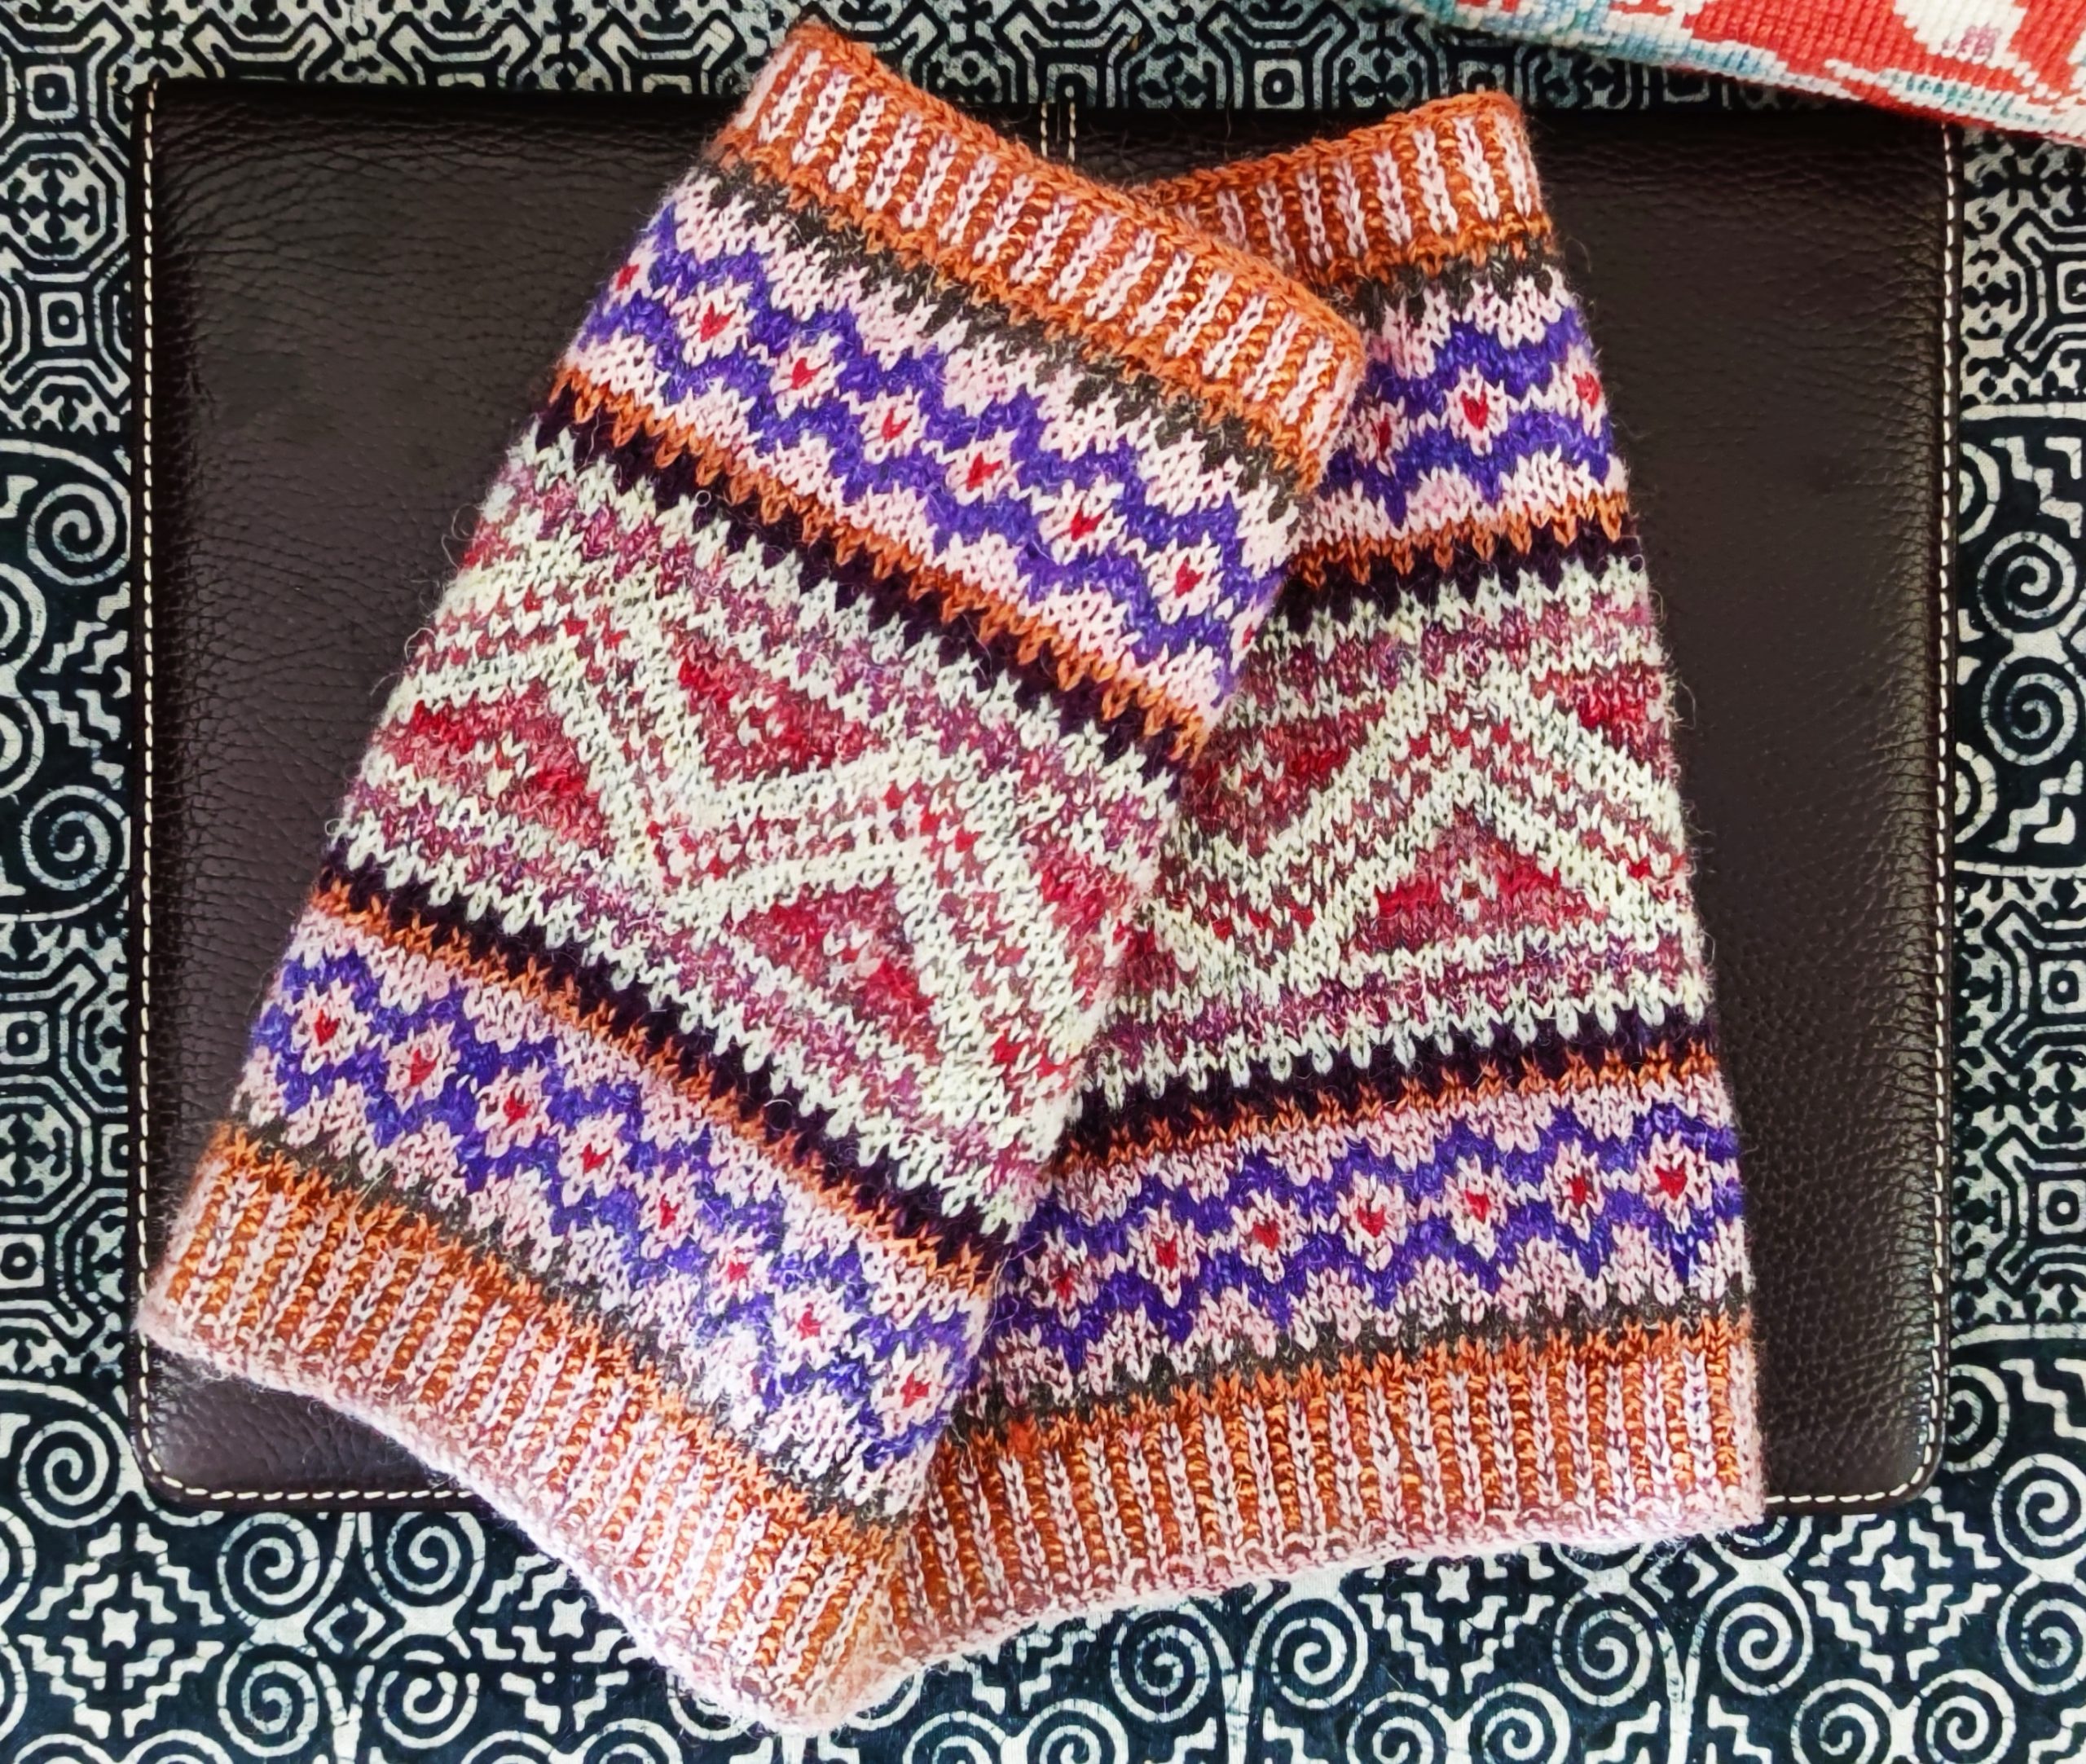
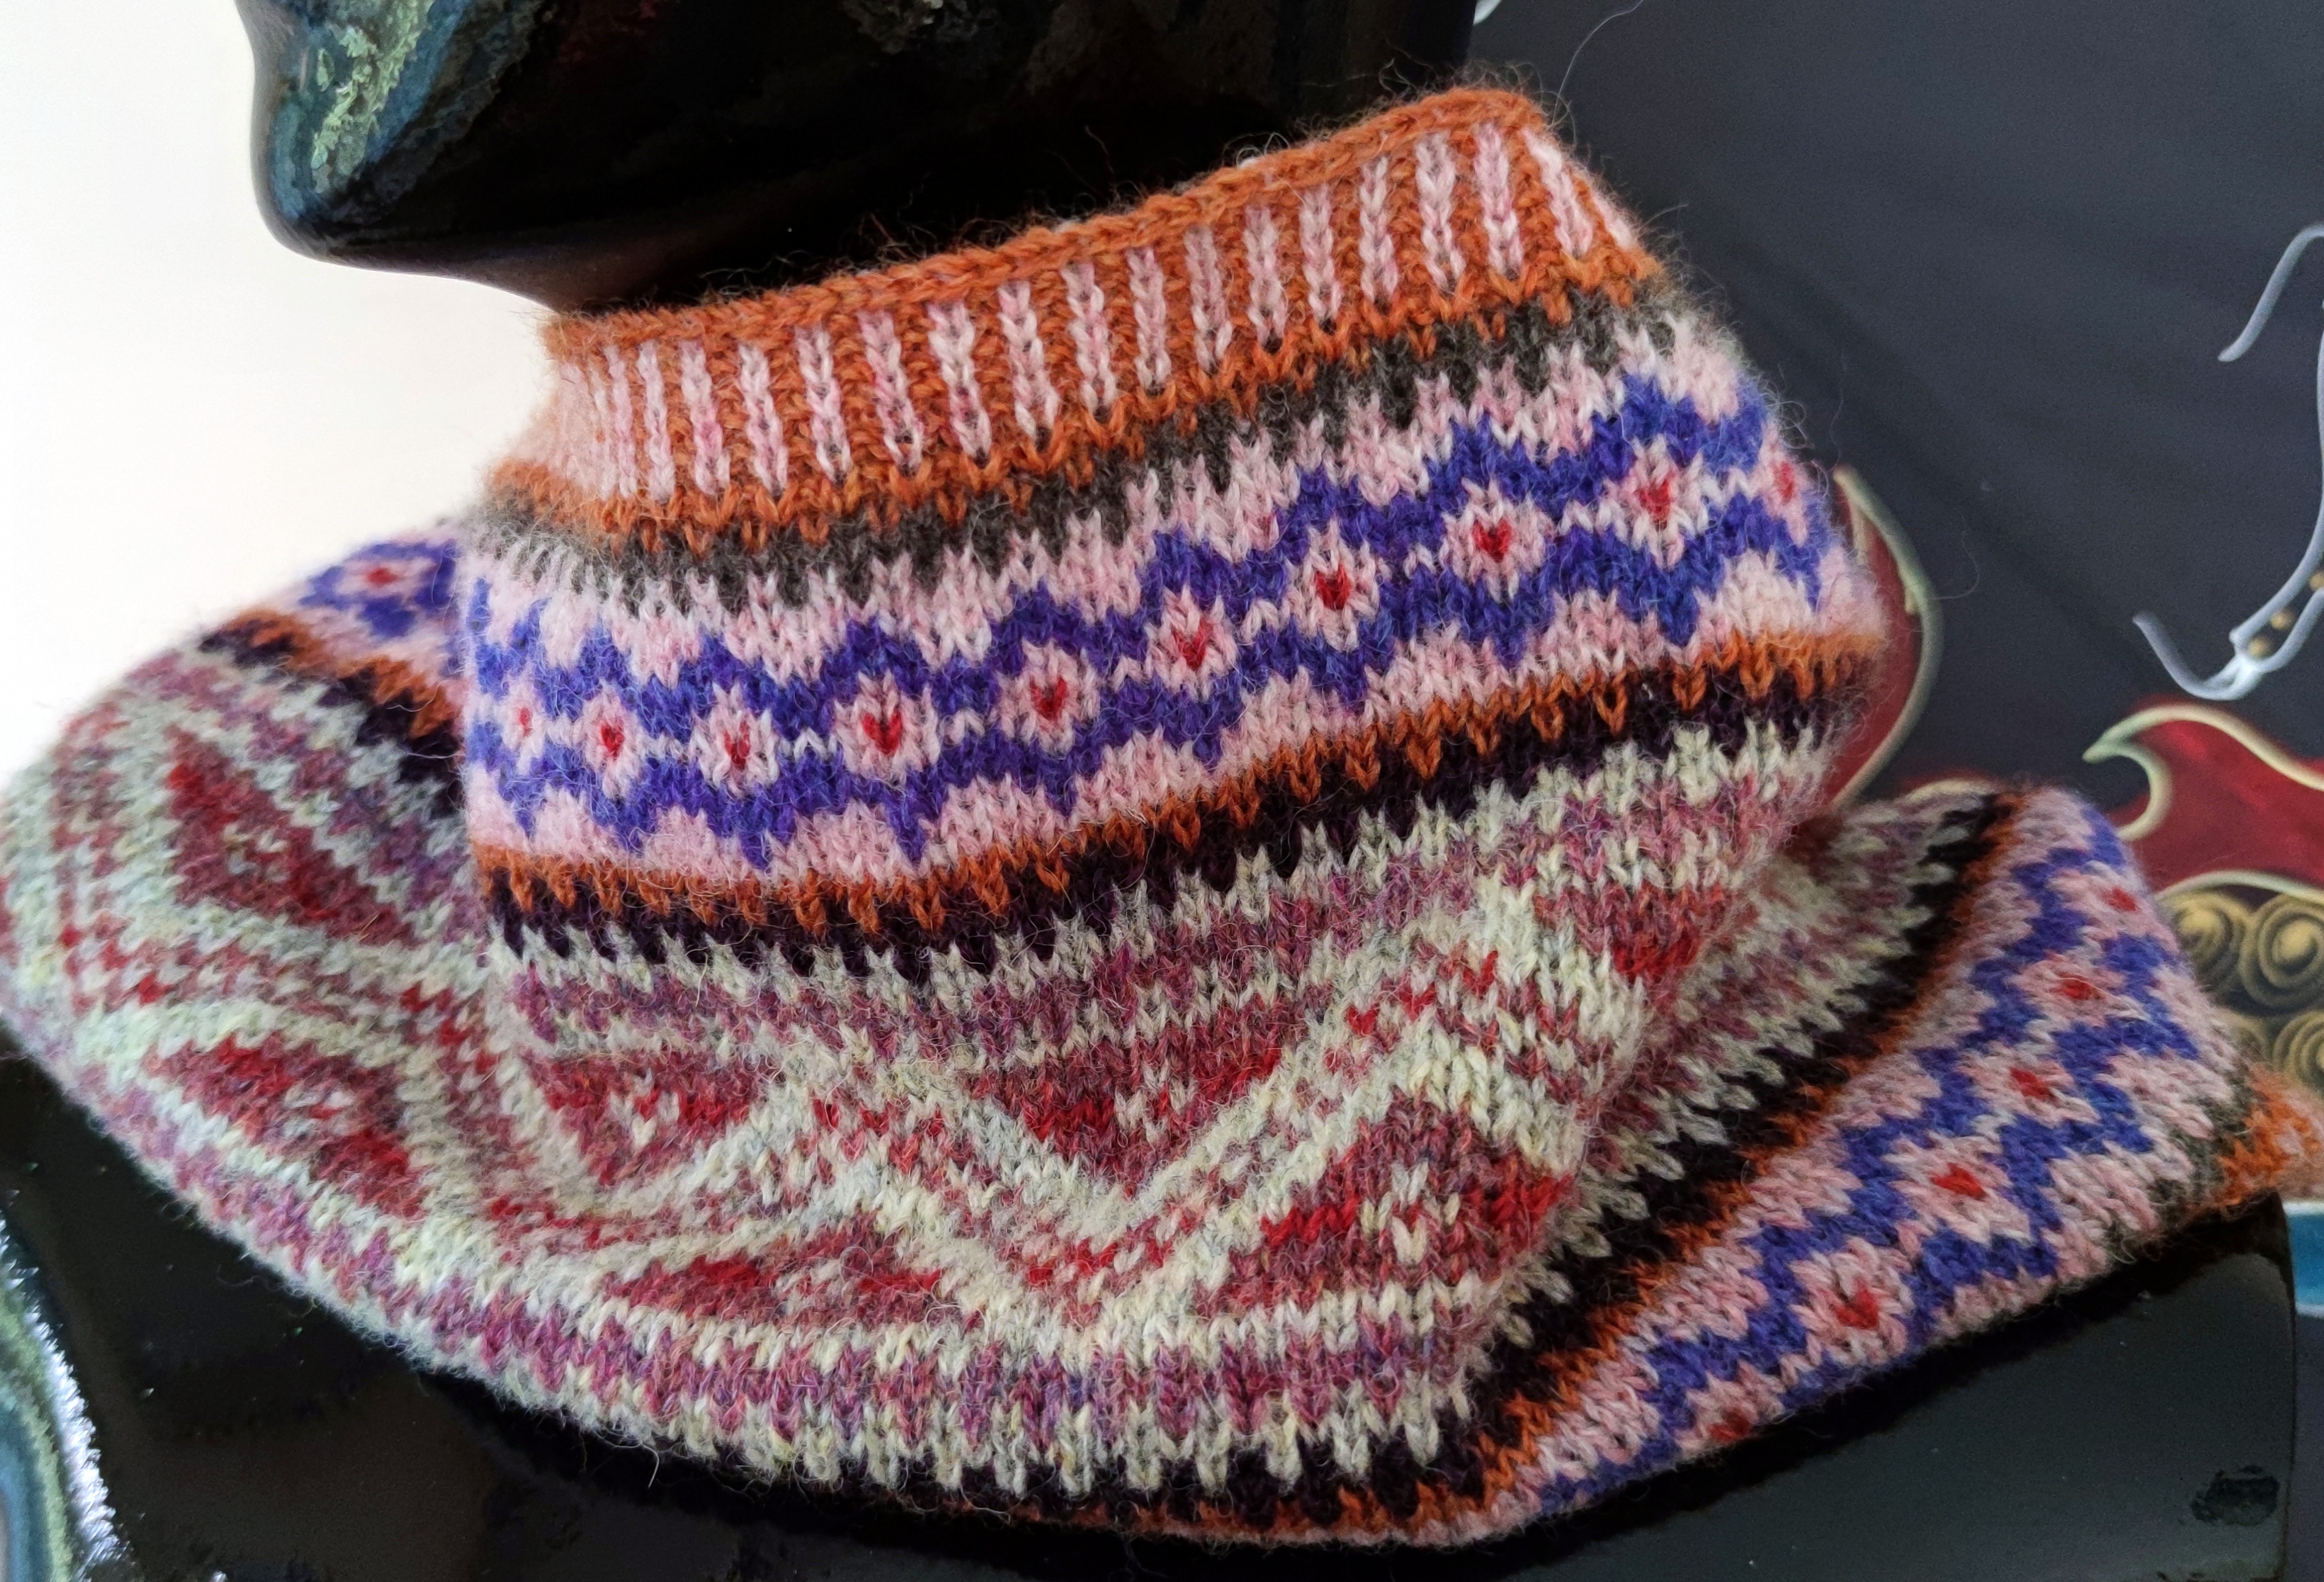
Visit our store which currently features cowls and neck warmers designed and hand knit by me.
Traveling is an integral part of my knitting life
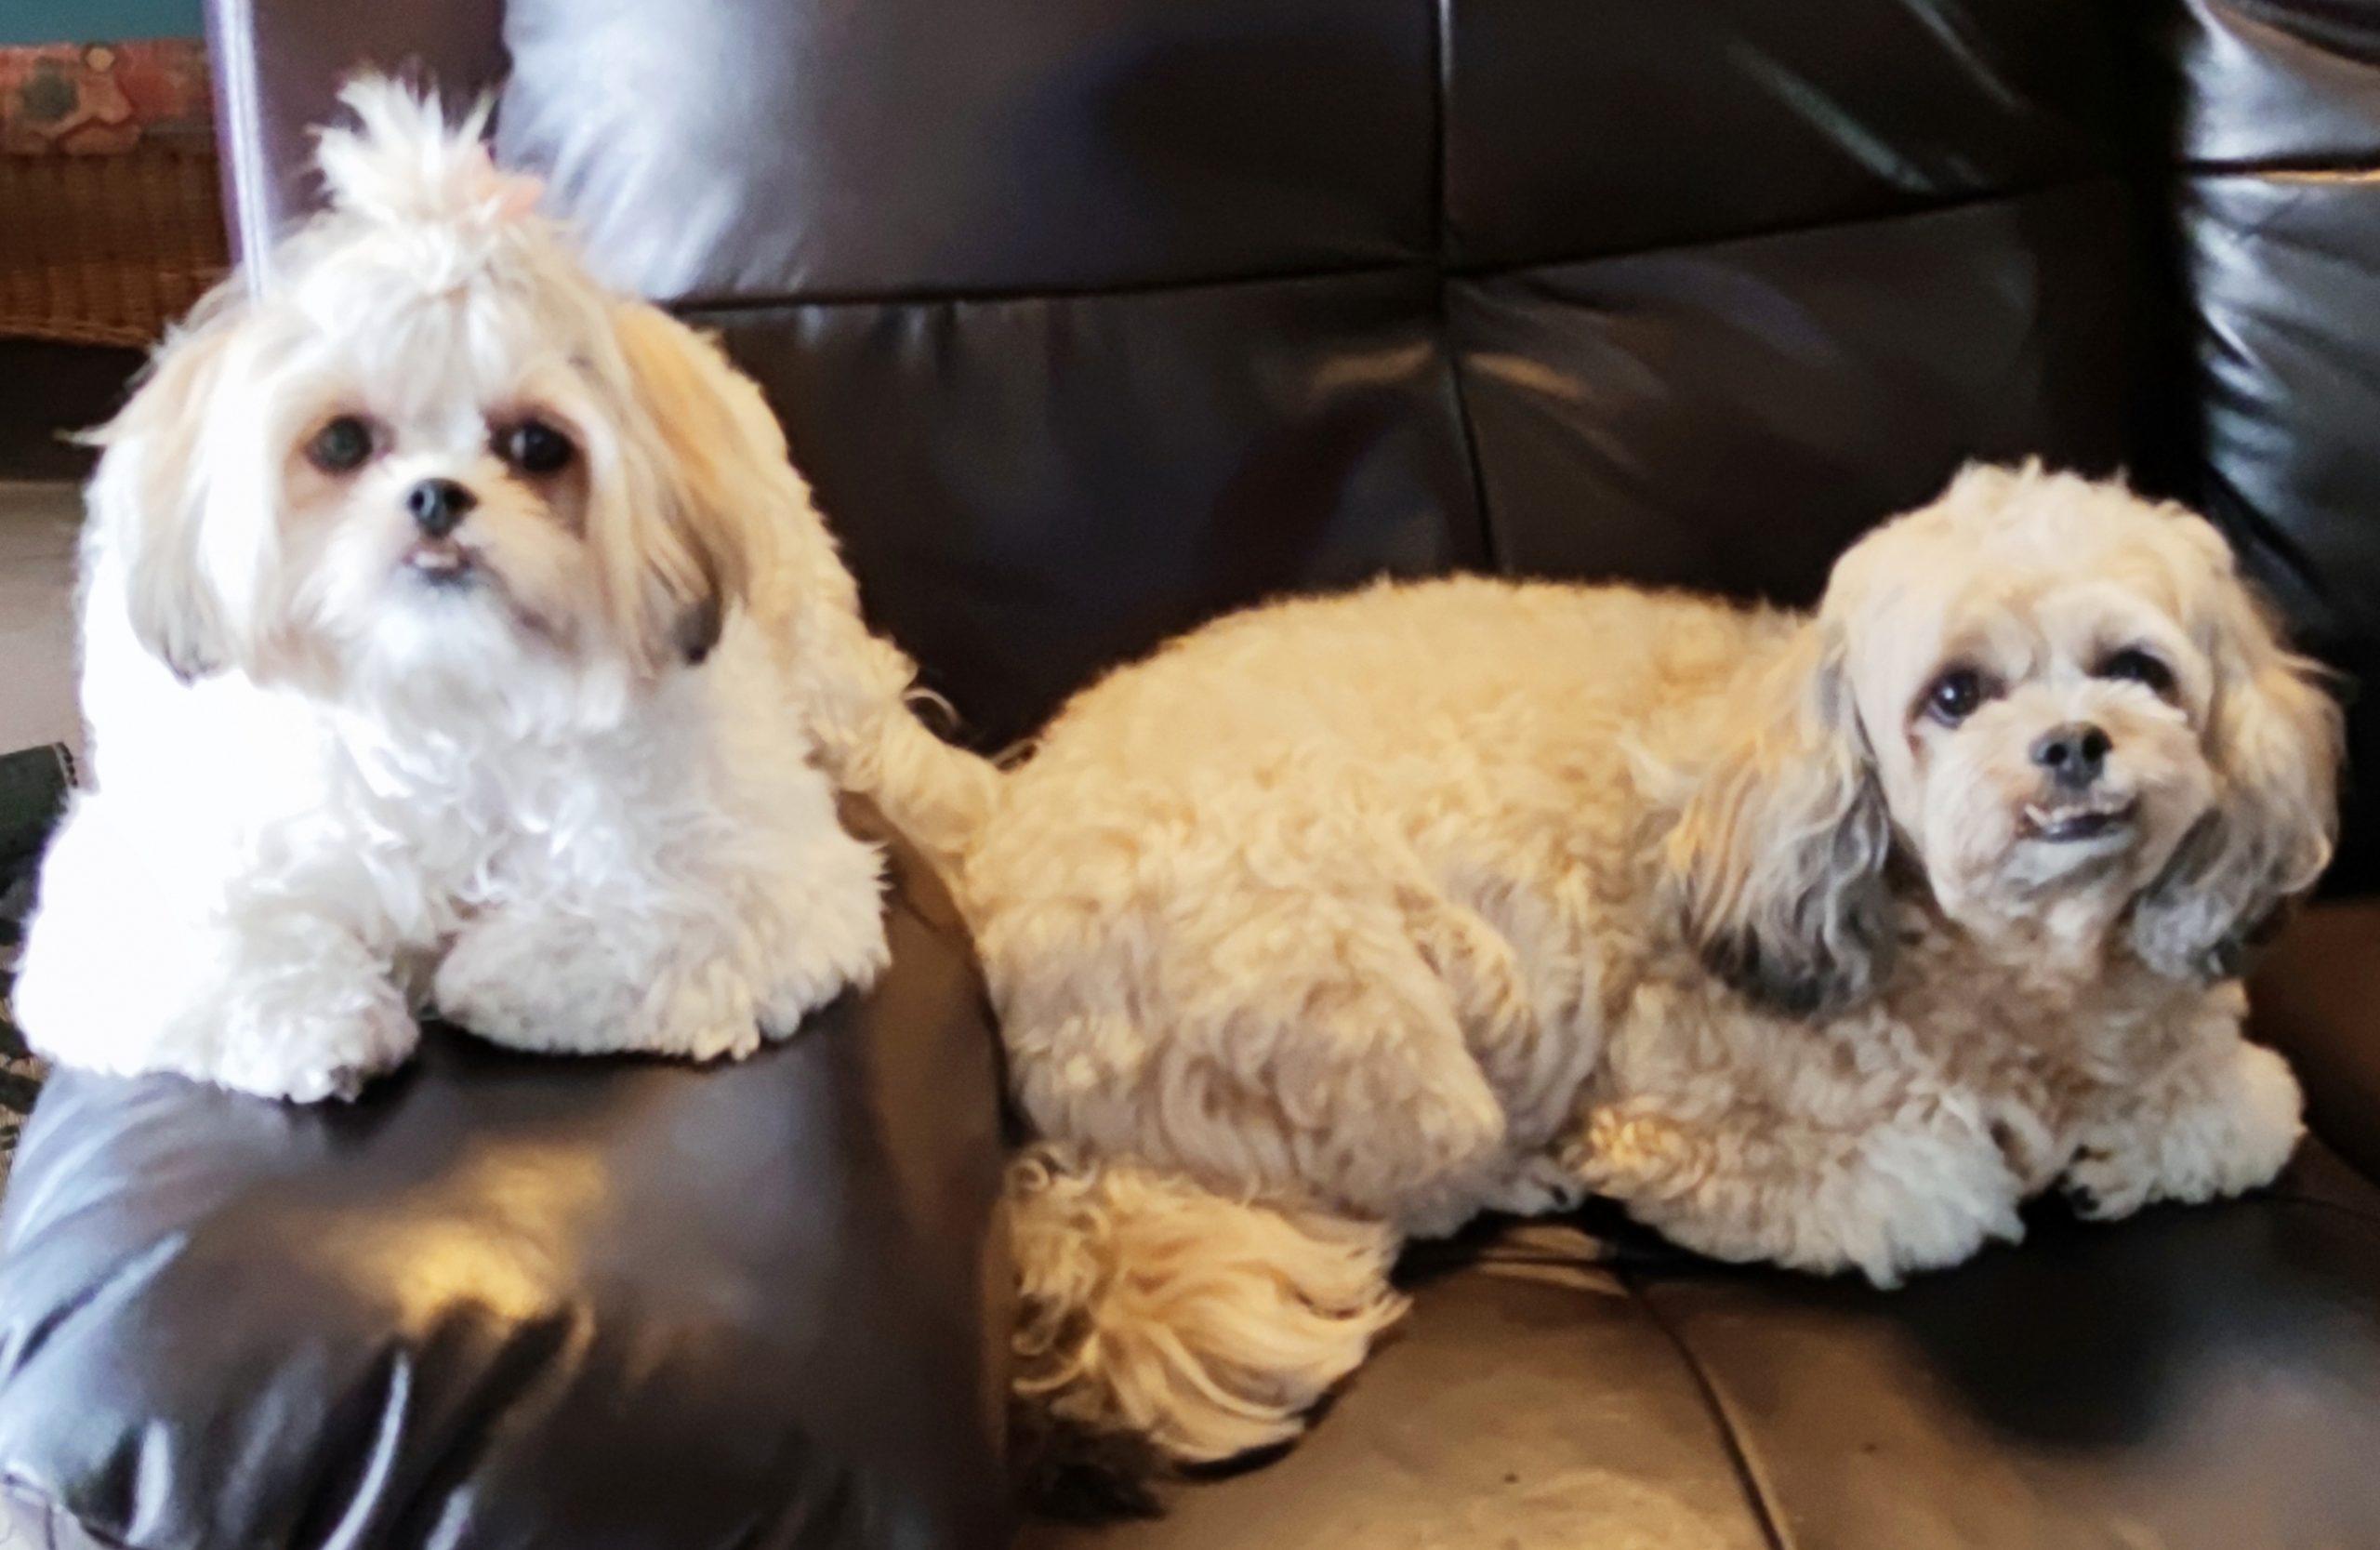
I know that I’m a lucky man. I love my home life and I love to travel – and I’ve come to realize that my knitting life spans and enhances the two. Our family unit is a small one: in addition to a wonderful spouse I have two devoted dogs – who you can see below.
Bella and Mac
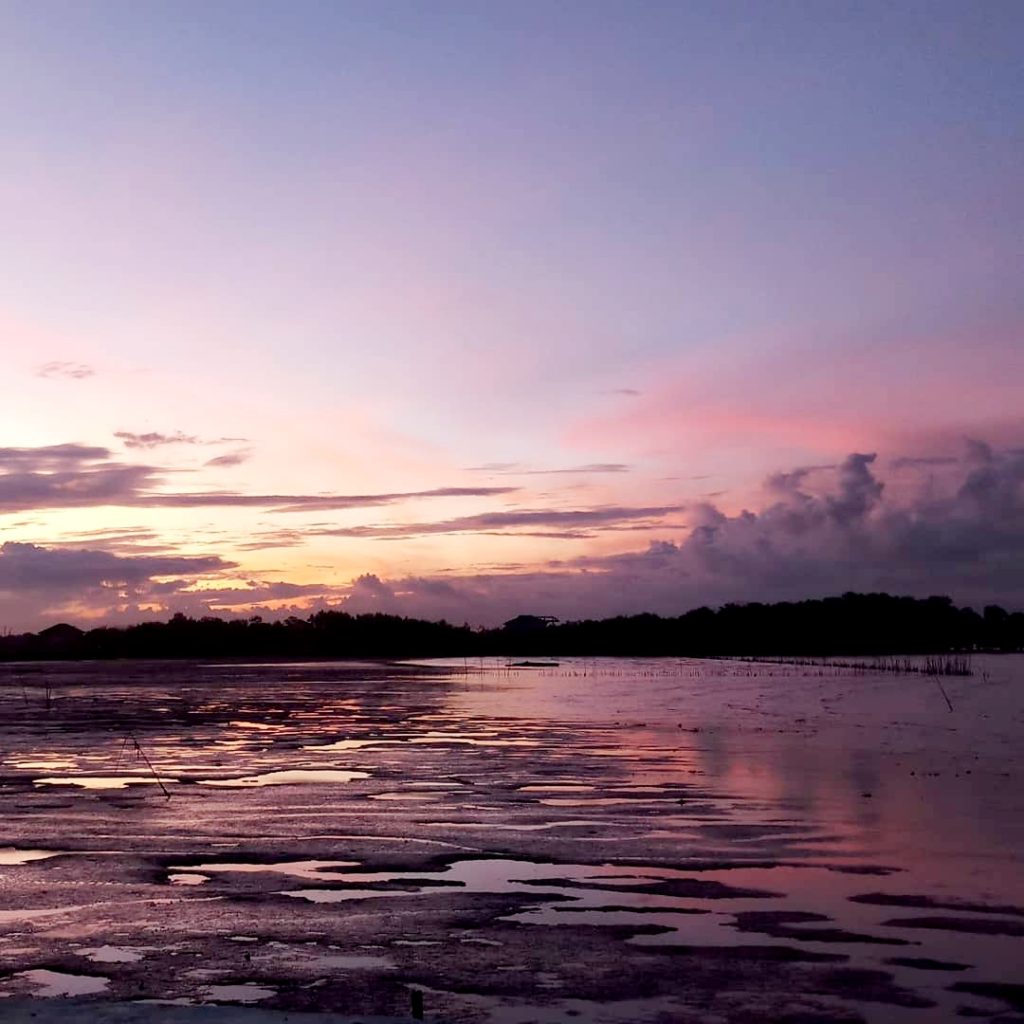
For the best part of the last 20 years I’ve lived in Thailand and it has certainly become home. After working in Bangkok for many years, I’m fortunate now to be able to spend half of the week in the big city and the other half at our house by the sea – about an hour’s drive from Bangkok. From the photo below you can see the view I enjoy from where I knit.
Gulf of Thailand – view from our living room
My interest in knitting began when I was a child and my mother showed me the basics – when I was about nine years old. However, living on a farm, in that part of the northeastern US, and at that time, knitting was not one of the approved pastimes for a young boy, so the needles were put aside – for many years, in fact.
I have loved to travel all my life. I began to do some serious traveling in my 20s but in my imagination I had traveled the world from the time I was a young boy. So, although knitting wasn’t to be a part of my early life, the seed was planted – and instead I spent a lot of time with a globe of the world dreaming about the lives and cultures of people in faraway places.
Several years ago I started to knit again and it quickly became an integral part of my daily life. I bought lots of books and learned a wide range of techniques. Then I bought more books and experimented with lace, texture, and colorwork stitch patterns.
It wasn’t long before I decided to write out the instructions for my designs so I could share them with others (and remember them) – and soon discovered I could upload them to the internet. I was off on a new adventure!
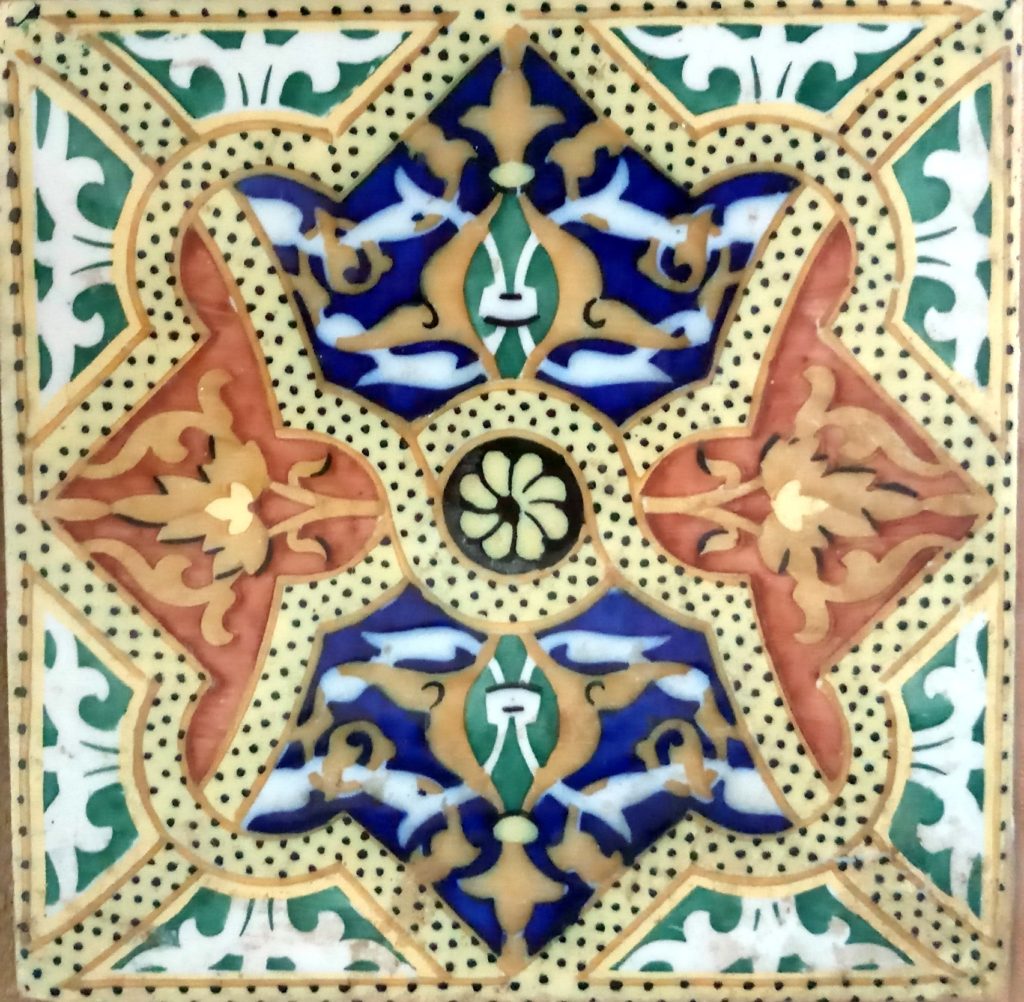
Years ago I spent the better part of a year in Central America and was captivated by the colorful work of artisans in Mexico and Guatemala. Many years later my travels took me to Africa, where I was enthralled by the magic and mystery of Egypt and Morocco, and the talented artisans of South Africa.
A tile from Morocco that will be the basis for a future design
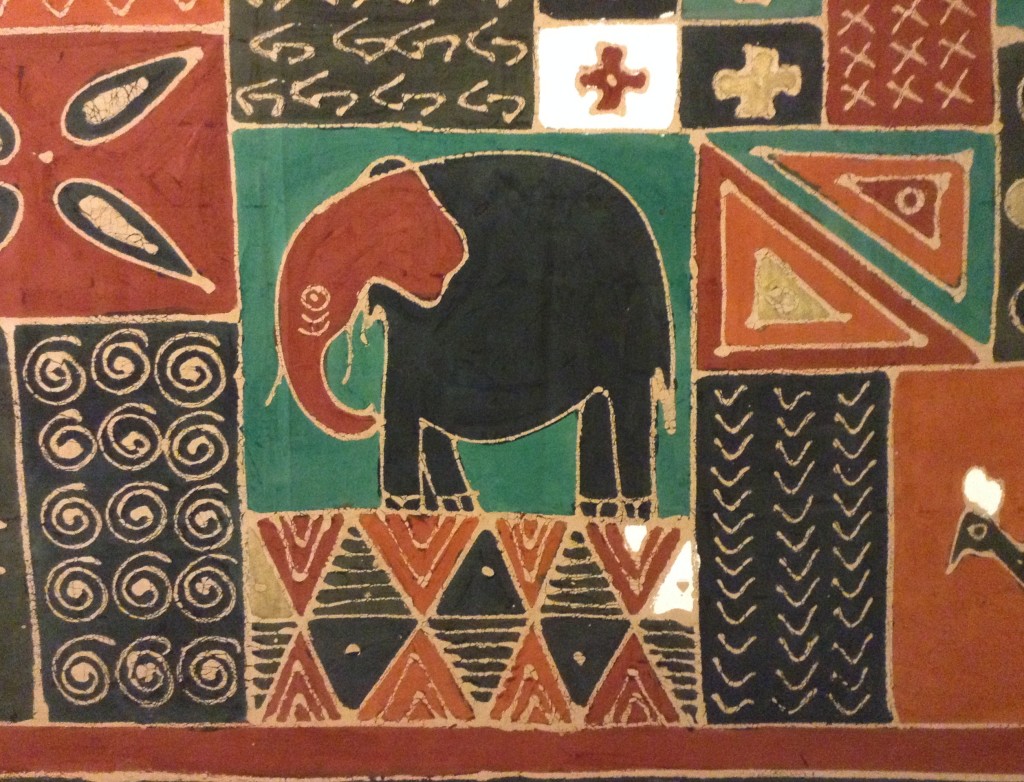
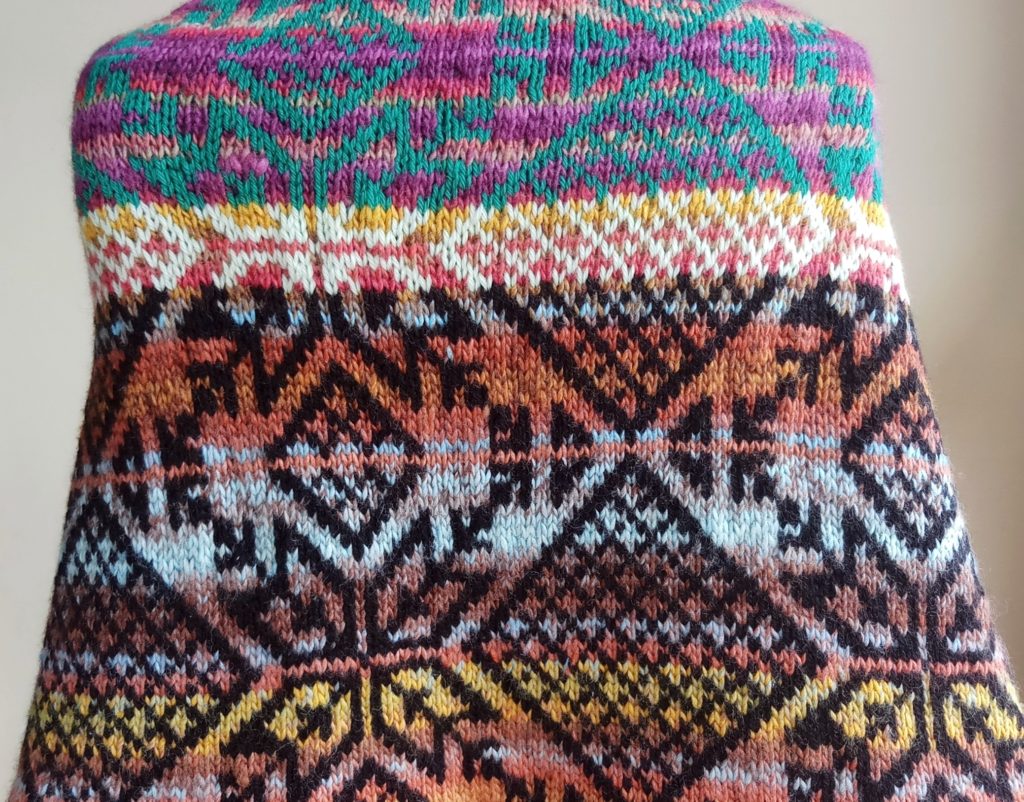
I have been fascinated by the designs of rugs in Turkey and the embroidery I’ve come across in China. There’s such an amazing wealth of hand-crafted riches throughout the world – and I certainly enjoy travels of discovery. The photo below shows part of a painted cloth I bought in South Africa that became the inspiration for my first knitting pattern, called Tribal Traces African Sampler Shawl.
Lower central section of a hand painted cloth purchased in South Africa
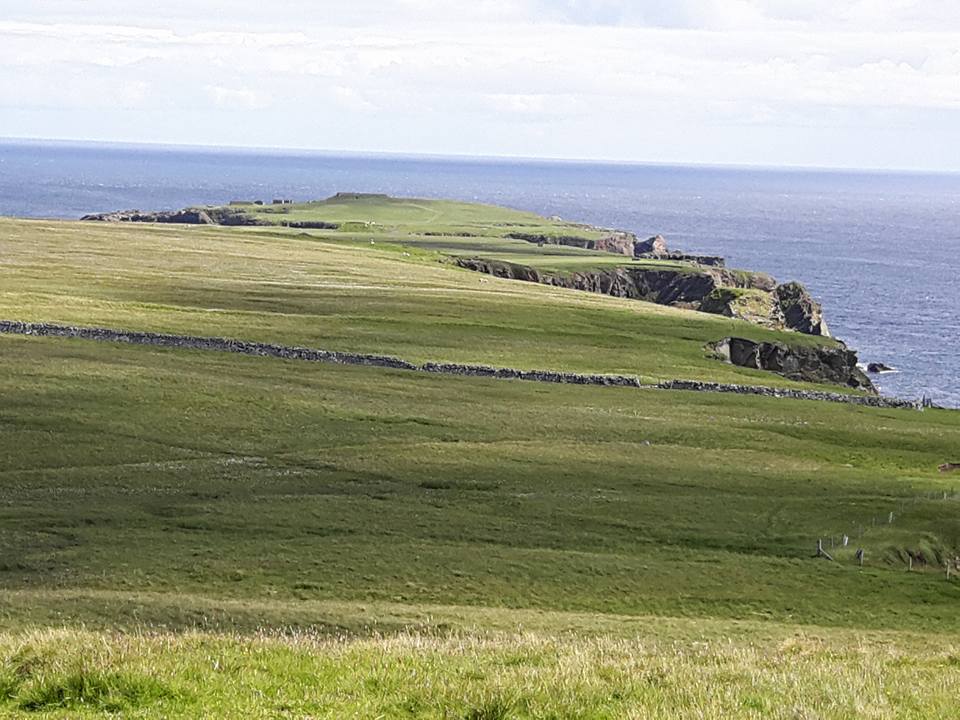
A couple of summers ago, we visited the Shetland Islands – long an inspiration to me – both for the knitted lace from the northern island of Unst, and the magically colorful patterns of Fair Isle. Shetland became prominent on the knitting map in the 19th century, for its Unst lace and Fair Isle color-stranded knitting.
The northern tip of the island of Unst – closer to Norway than the Scottish mainland
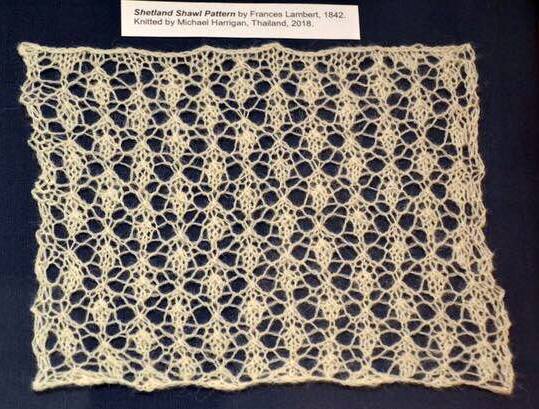
We took the ferries to Unst, the northernmost island, where I learned more about traditional lace patterns. The previous year I had knit samples for a research project on the authenticity of 19th-century stitch patterns that had been called Shetland lace. It was really gratifying to see some of my work on display at the Shetland Museum in Lerwick.
One of the lace samples I knit for the Shetland Museum research project
In Lerwick, Shetland’s population center, I also met Mary McGregor, the author of a book on traditional Fair Isle patterns: I bought the book and bought a fair amount of yarn for Fair Isle knitting at Jamieson’s of Shetland as well. Lerwick is the perfect place to buy Shetland yarn, of course, and in particular the 2-ply yarn that is so widely used in traditional color-stranded knitting. The photos below show a Shetland lace shawl I knit and of some of my Fair Isle and other stranded colorwork – most made with Shetland yarn.
A lace shawl with Unst patterning I knit using a 2-ply Shetland lace weight yarnA sampling of my color-stranded knitting, including Fair Isle and Latvian stitch patterns
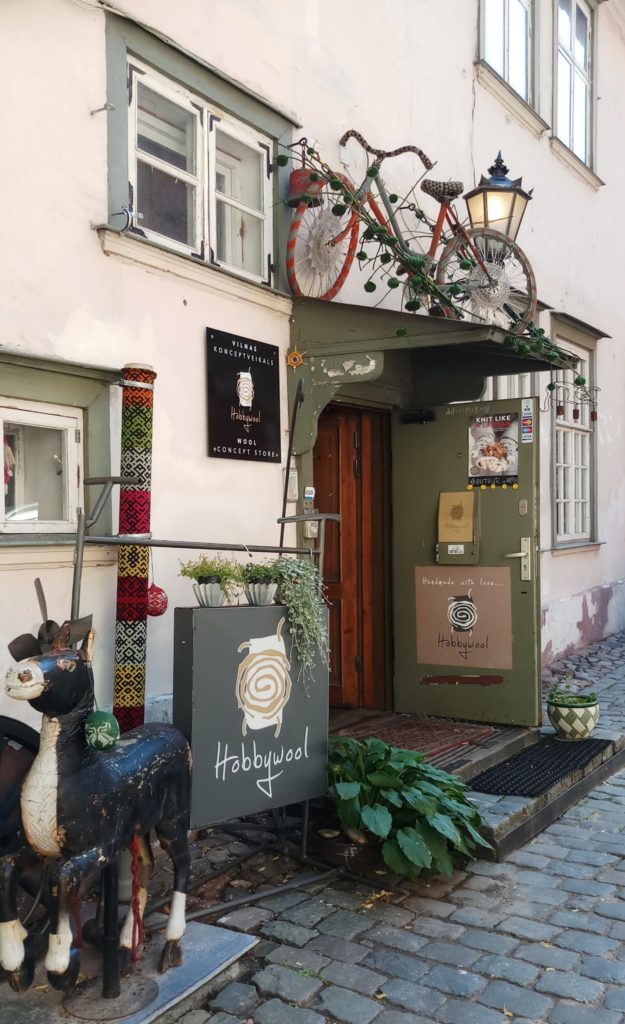
On a trip to Estonia, Latvia, Lithuania, and St. Petersburg, Russia earlier this year, we had a chance to take in the scenic beauty of a part of the world that was new to us. I also had the opportunity to get some hands-on advice on color-stranding knitting technique at a popular shop in Riga, Latvia.
Hobbywool in Riga, Latvia, where I learned more about color stranding
Although working two colors of yarn on a given row or round is something I’m comfortable doing, adding a third or fourth color has always been puzzling. Now I know how to do it!
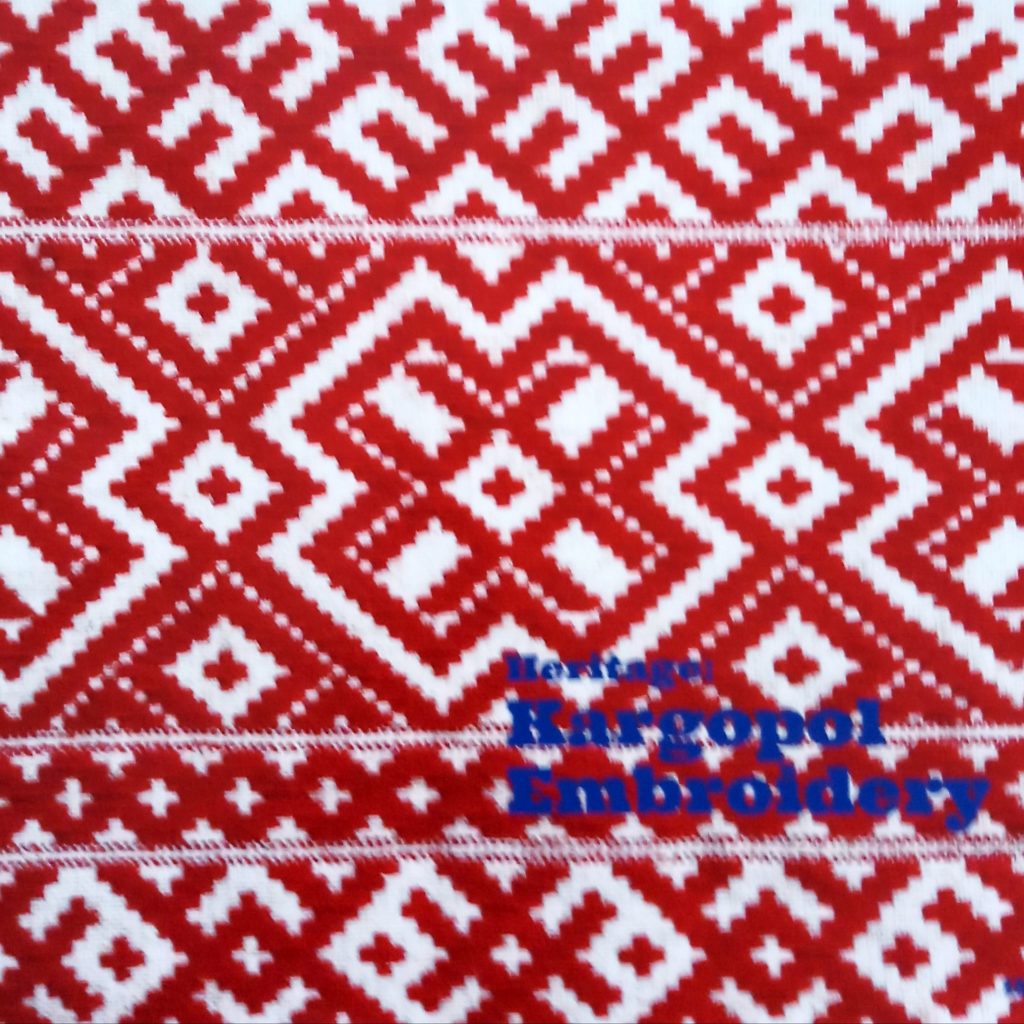
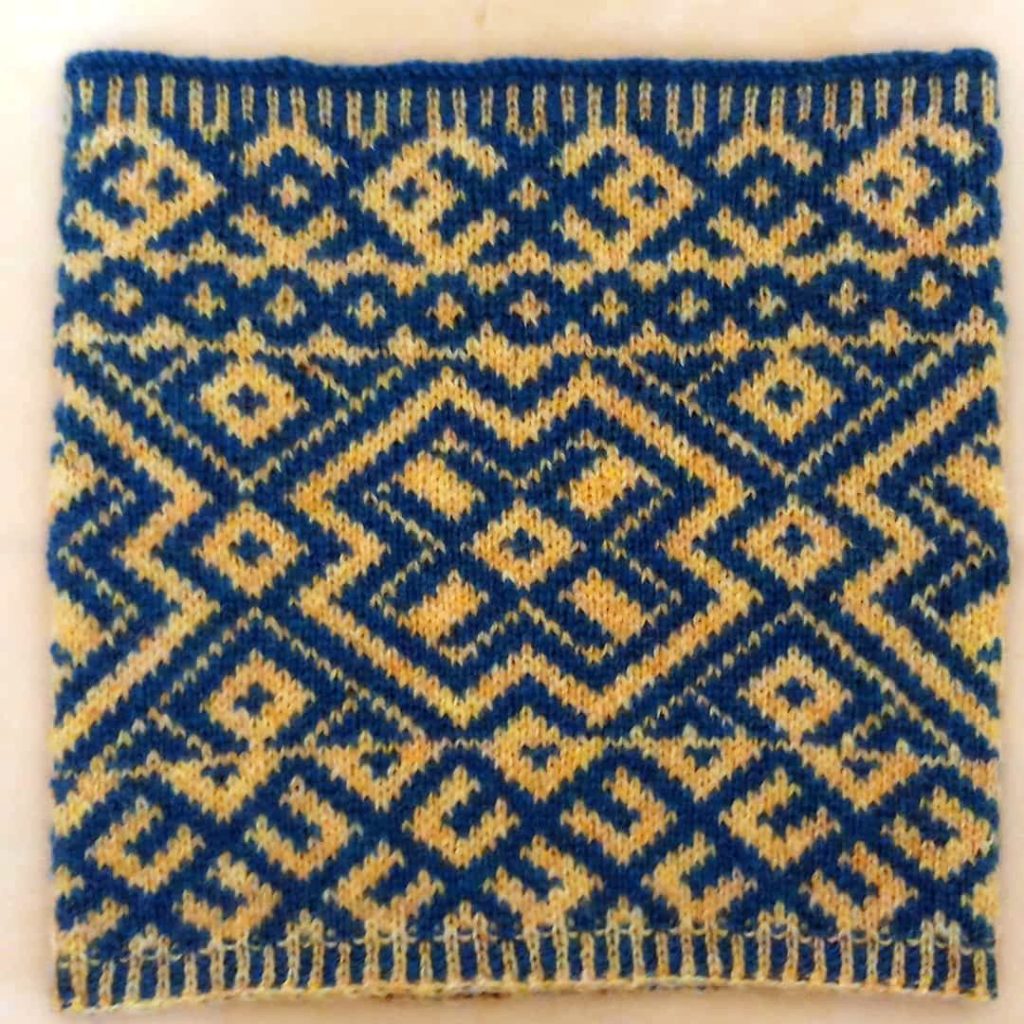
At the end of that trip, on a visit to the Russian National Museum in St. Petersburg, I found inspiration for a new colorwork design based on a piece of ethnic embroidery.
Russian (ethnic Kargopol) embroidery: design inspiration for me My cowl design based on the embroidery above
When we travel I like to spend time in historic urban settings, visiting local artisan markets and bazaars, and admiring landscapes and natural features. I try to recreate what I have seen in stitch patterns – interpreting elements of nature, landmarks, and textiles I have encountered.
I knit because it is an integral part of my life – from days I spend by the sea at home to the time I spend visiting countries around the world. It is the way I express myself best and a means for continuing to grow as an artisan into my later years. And for that I am truly grateful.
About me: My name is Michael Harrigan and I’m a knitwear accessory designer based in Bangkok, Thailand. I enjoy traveling the world for inspiration for my designs. My main areas of interest are lace knitting and stranded colorwork. You can find my patterns on Ravelry and lovecrafts.com.
Over the past several years I have designed lace patterns for accessories, such as scarves and cowls, shawls, other types of wraps, and hats. Many have been self-published, several have been produced for major yarn companies, and others have featured in online and print magazines.
I have been certified by The Knitting Guild Association as a Master Knitter, Knitting Technical Editor, and Knitting Judge.
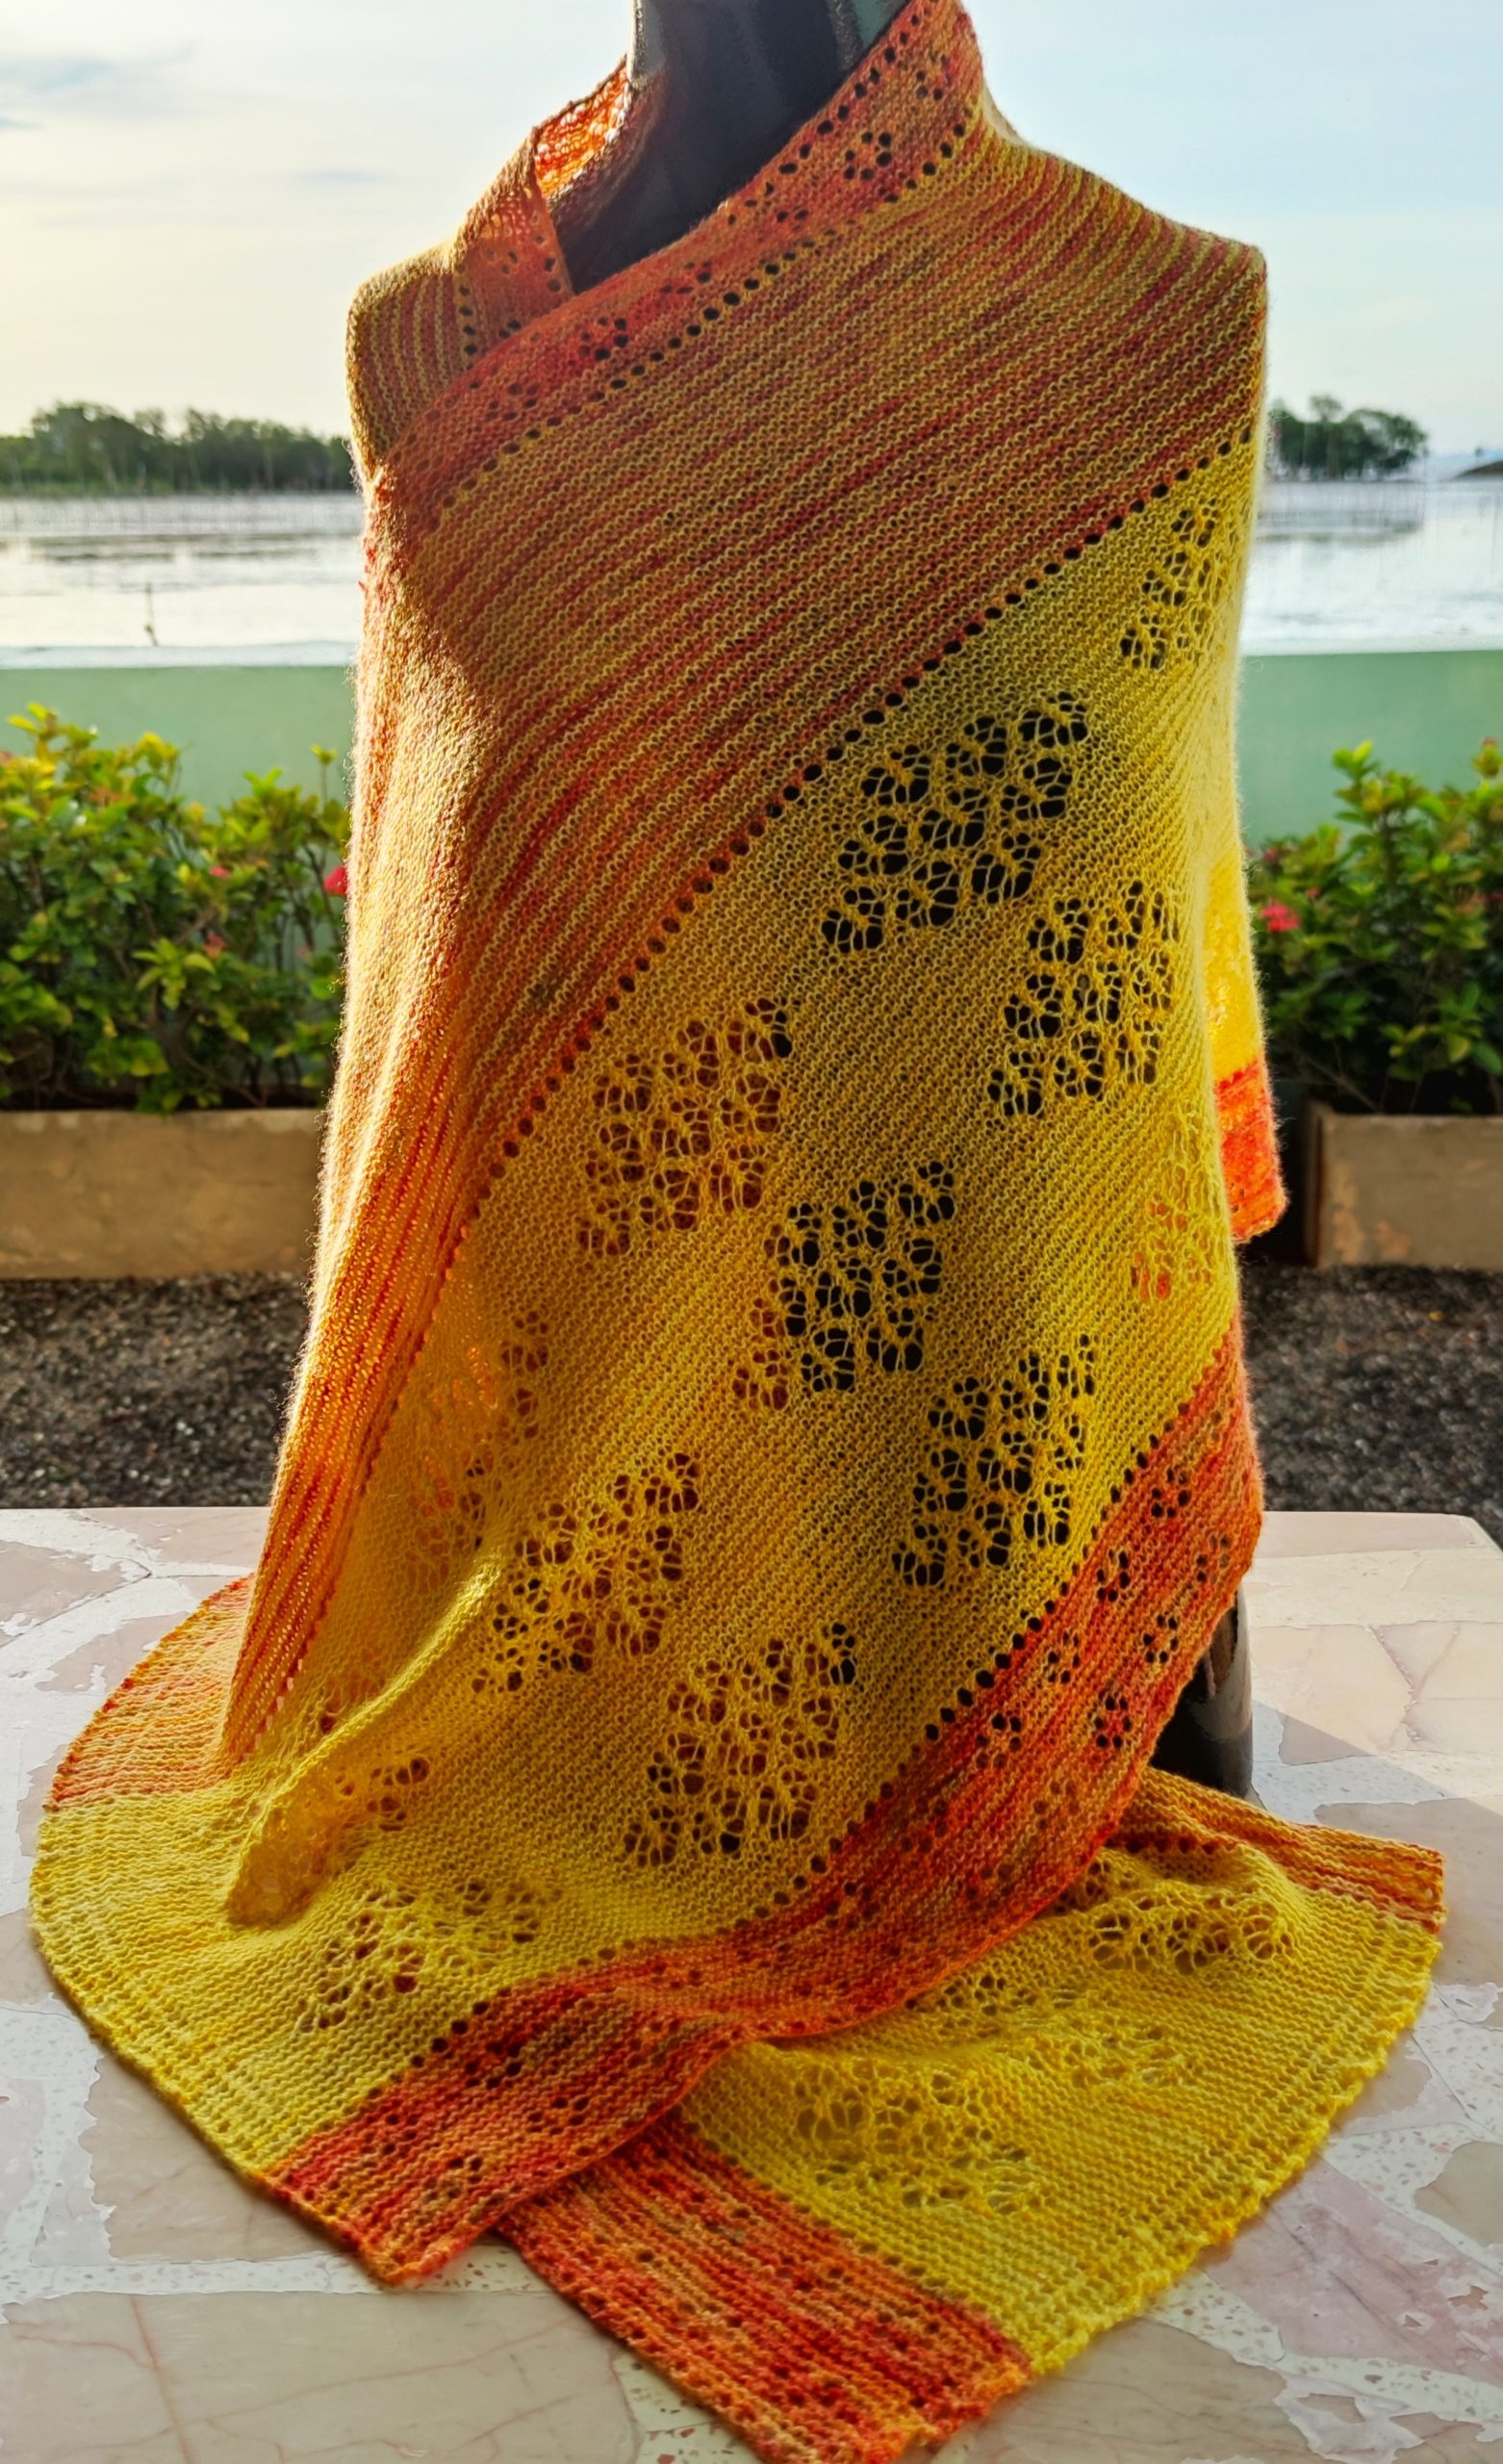
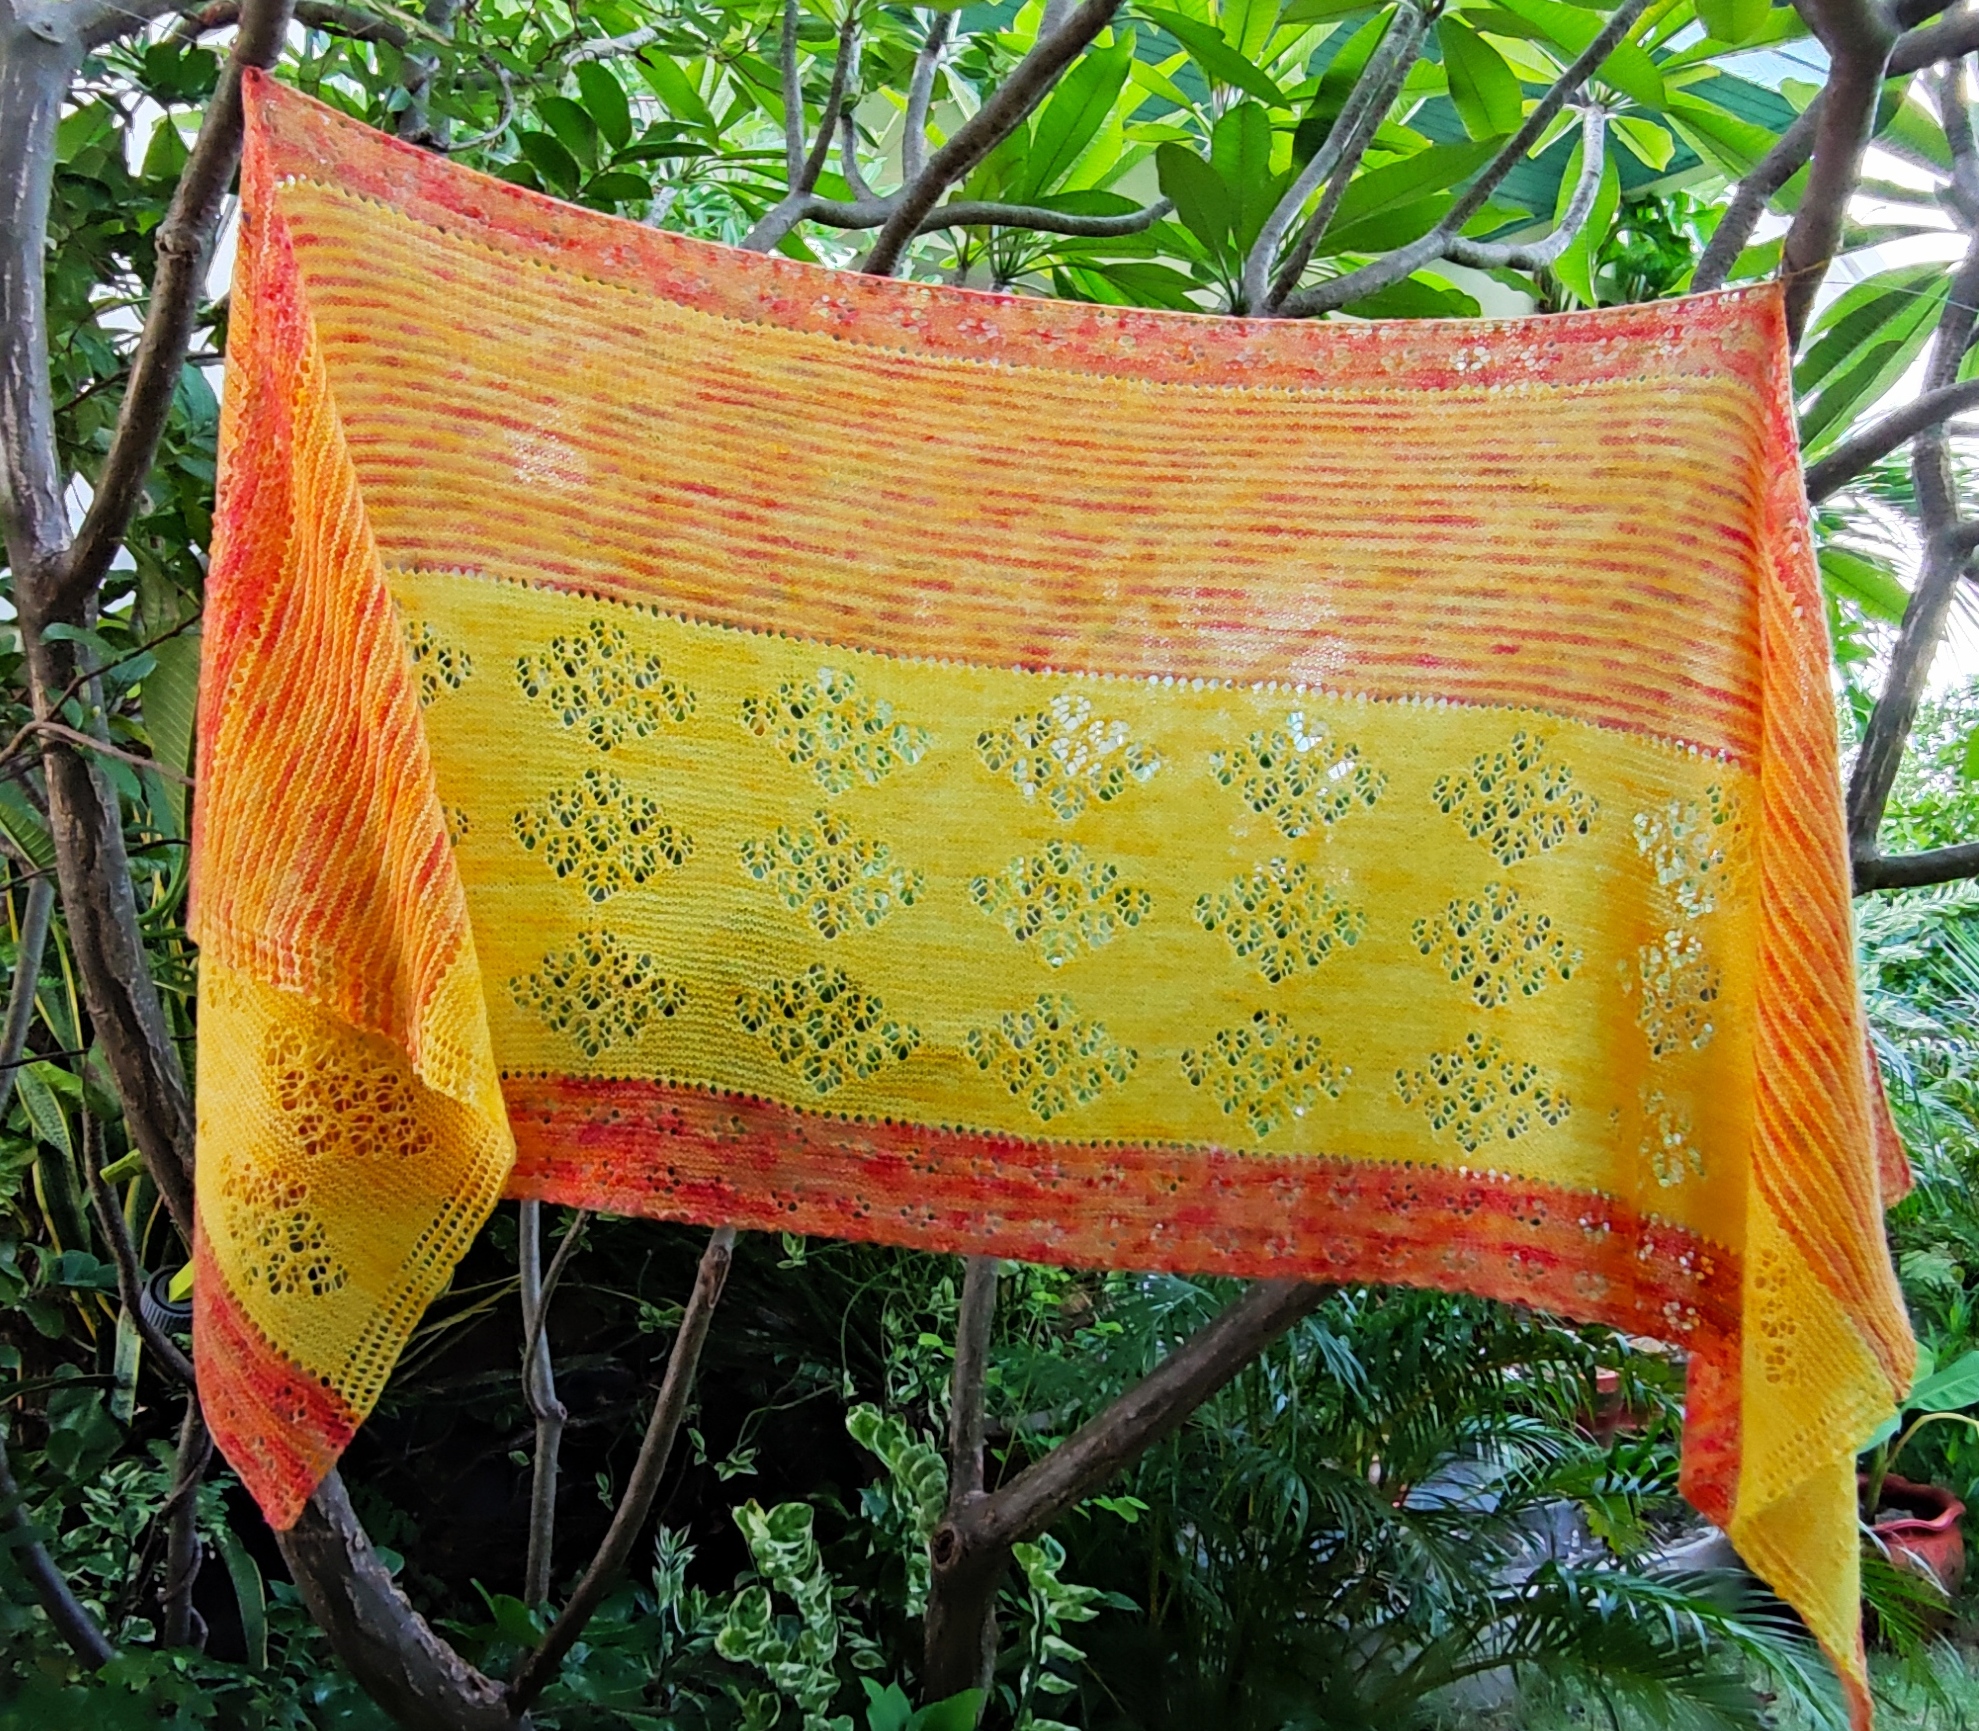
The inspiration for this rectangular lace wrap came from a corner of our garden. The colors were too much to resist, so I found an indie dyer in the UK to match the colorways for me. The design incorporates two traditional Shetland lace stitch patterns – Honeybees and Cats Paws – worked on a garter stitch background.
If you’d like to knit this with the colorways shown, there are contact details in the pattern for the indie dyer I worked with. Otherwise, any lace-weight or light fingering weight yarns of your choice could be substituted.
The wrap required less that one skein of each colorway.
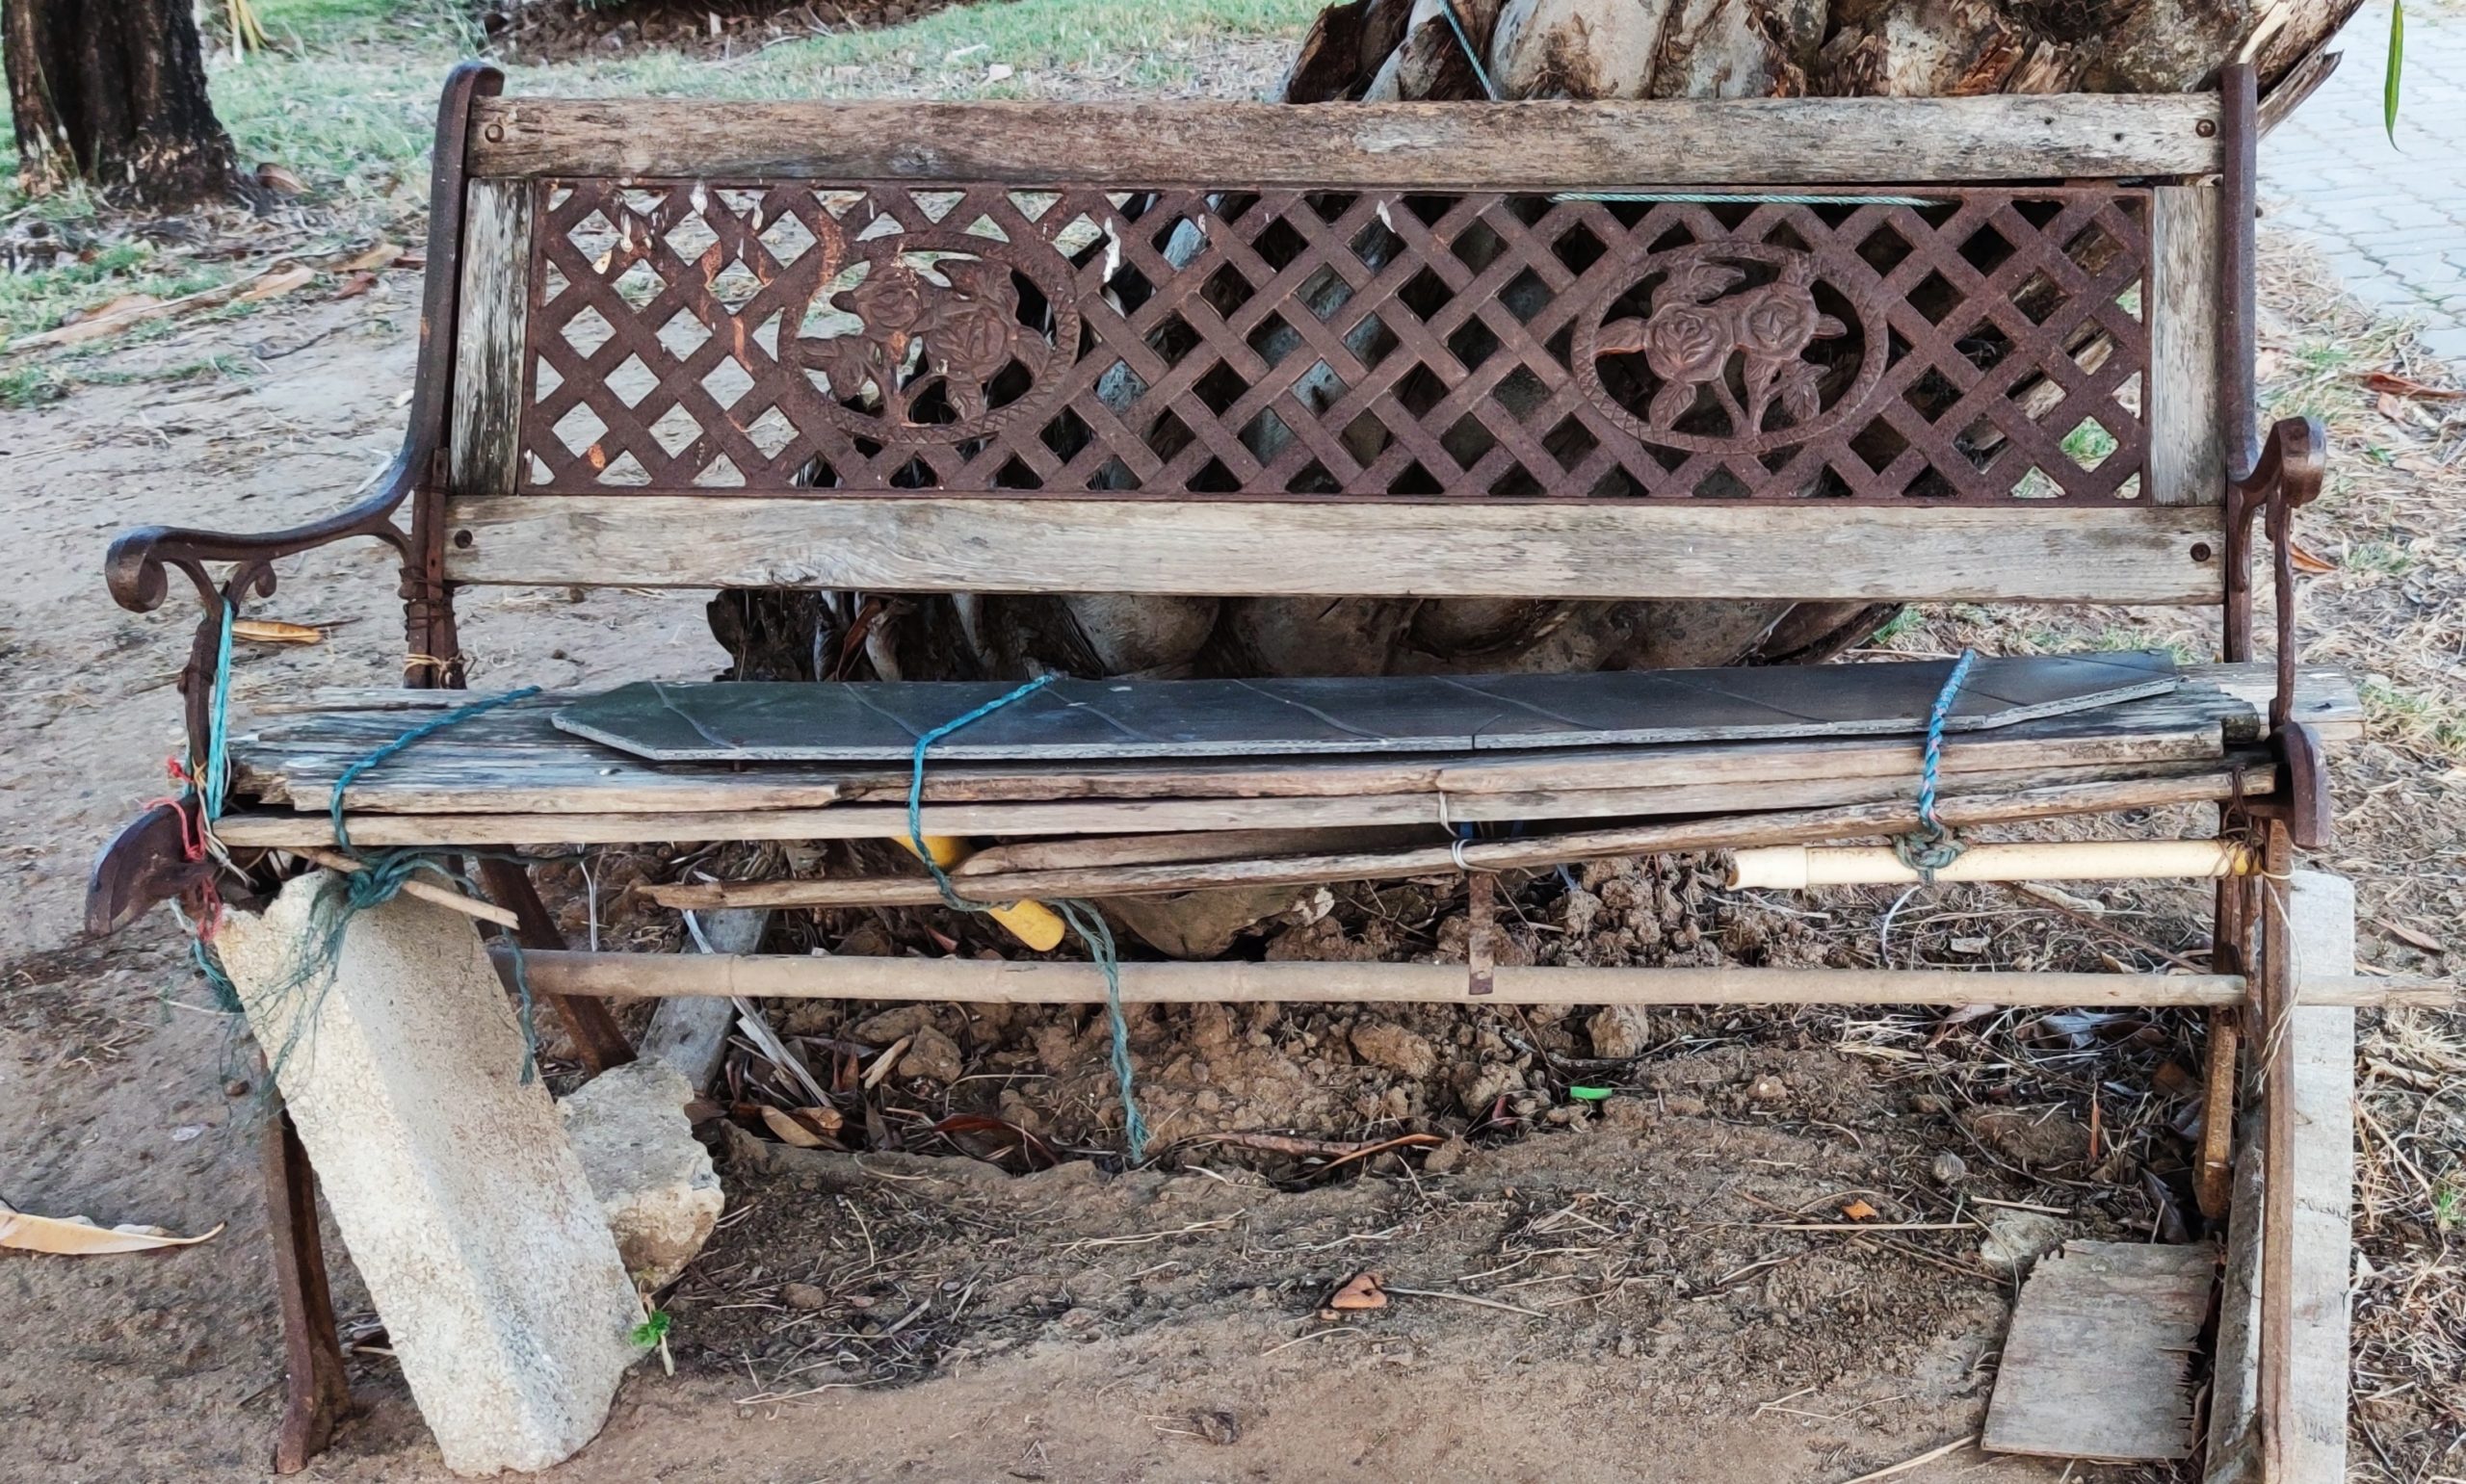
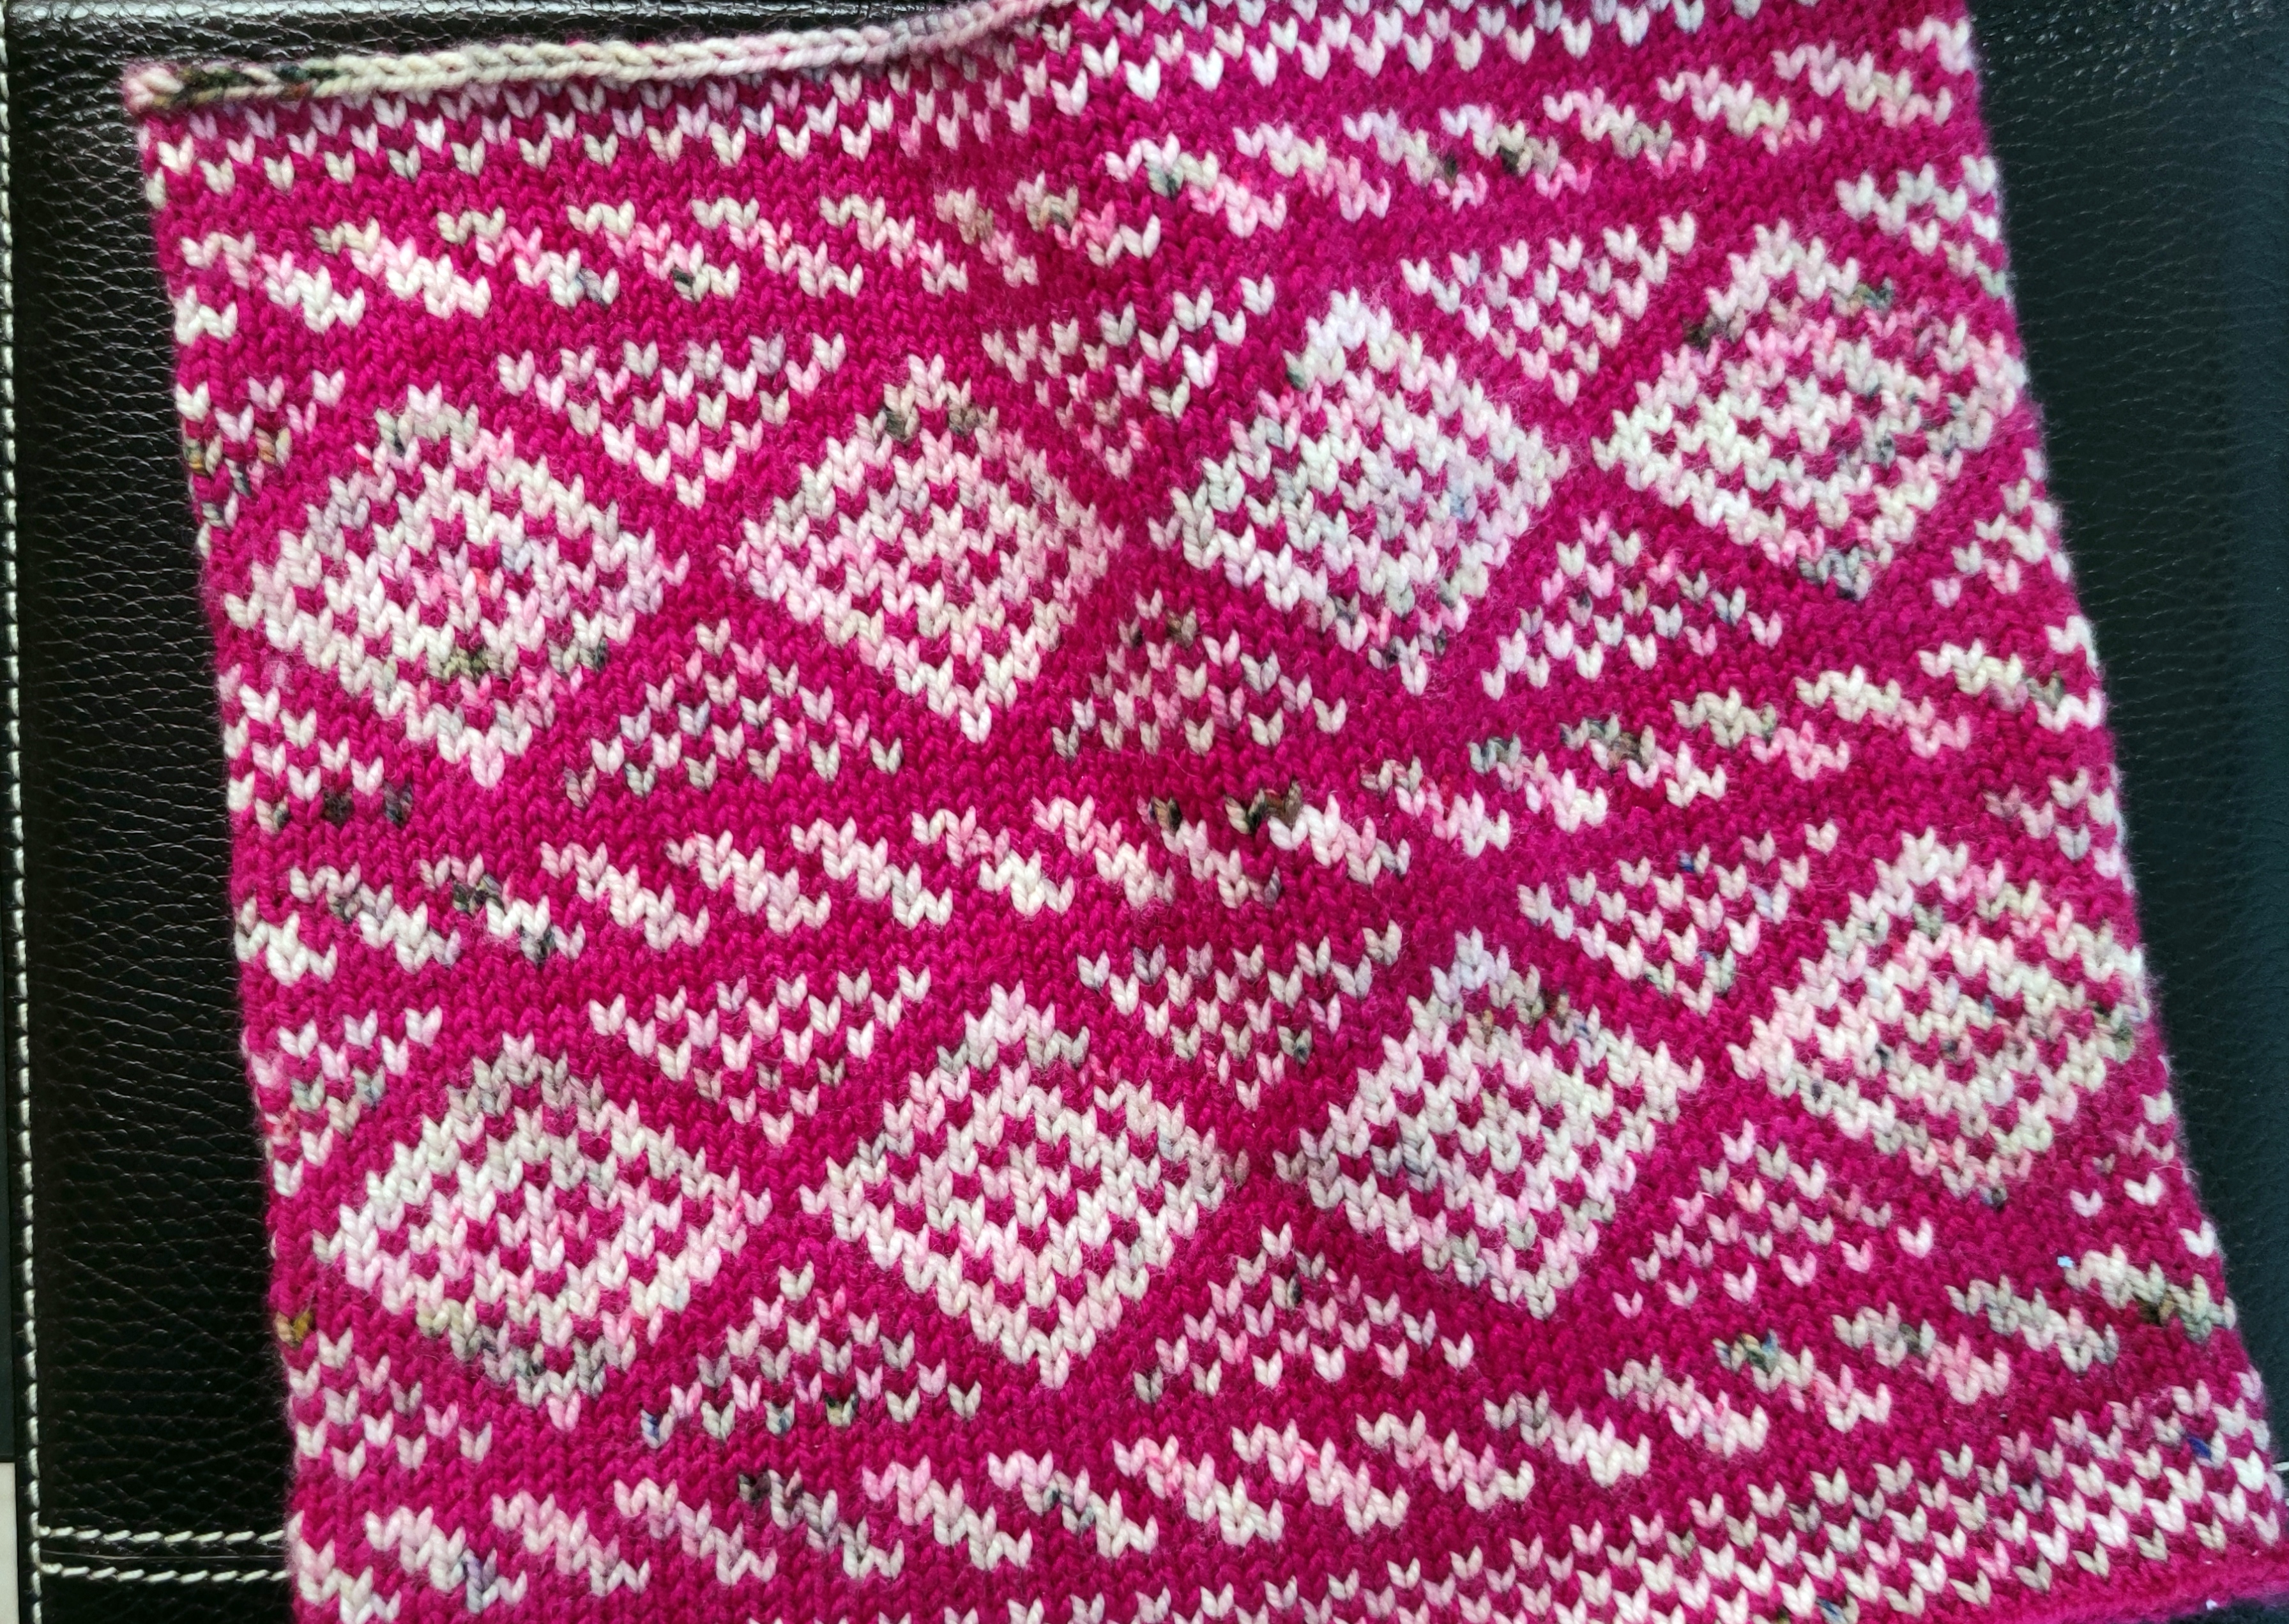
A knitting friend of mine saw my photo of a “visibly mended” park bench and pointed out the diamond pattern in the metalwork. I happened to be working on this accessory and was in need of a name – and that’s how it became Park Bench.
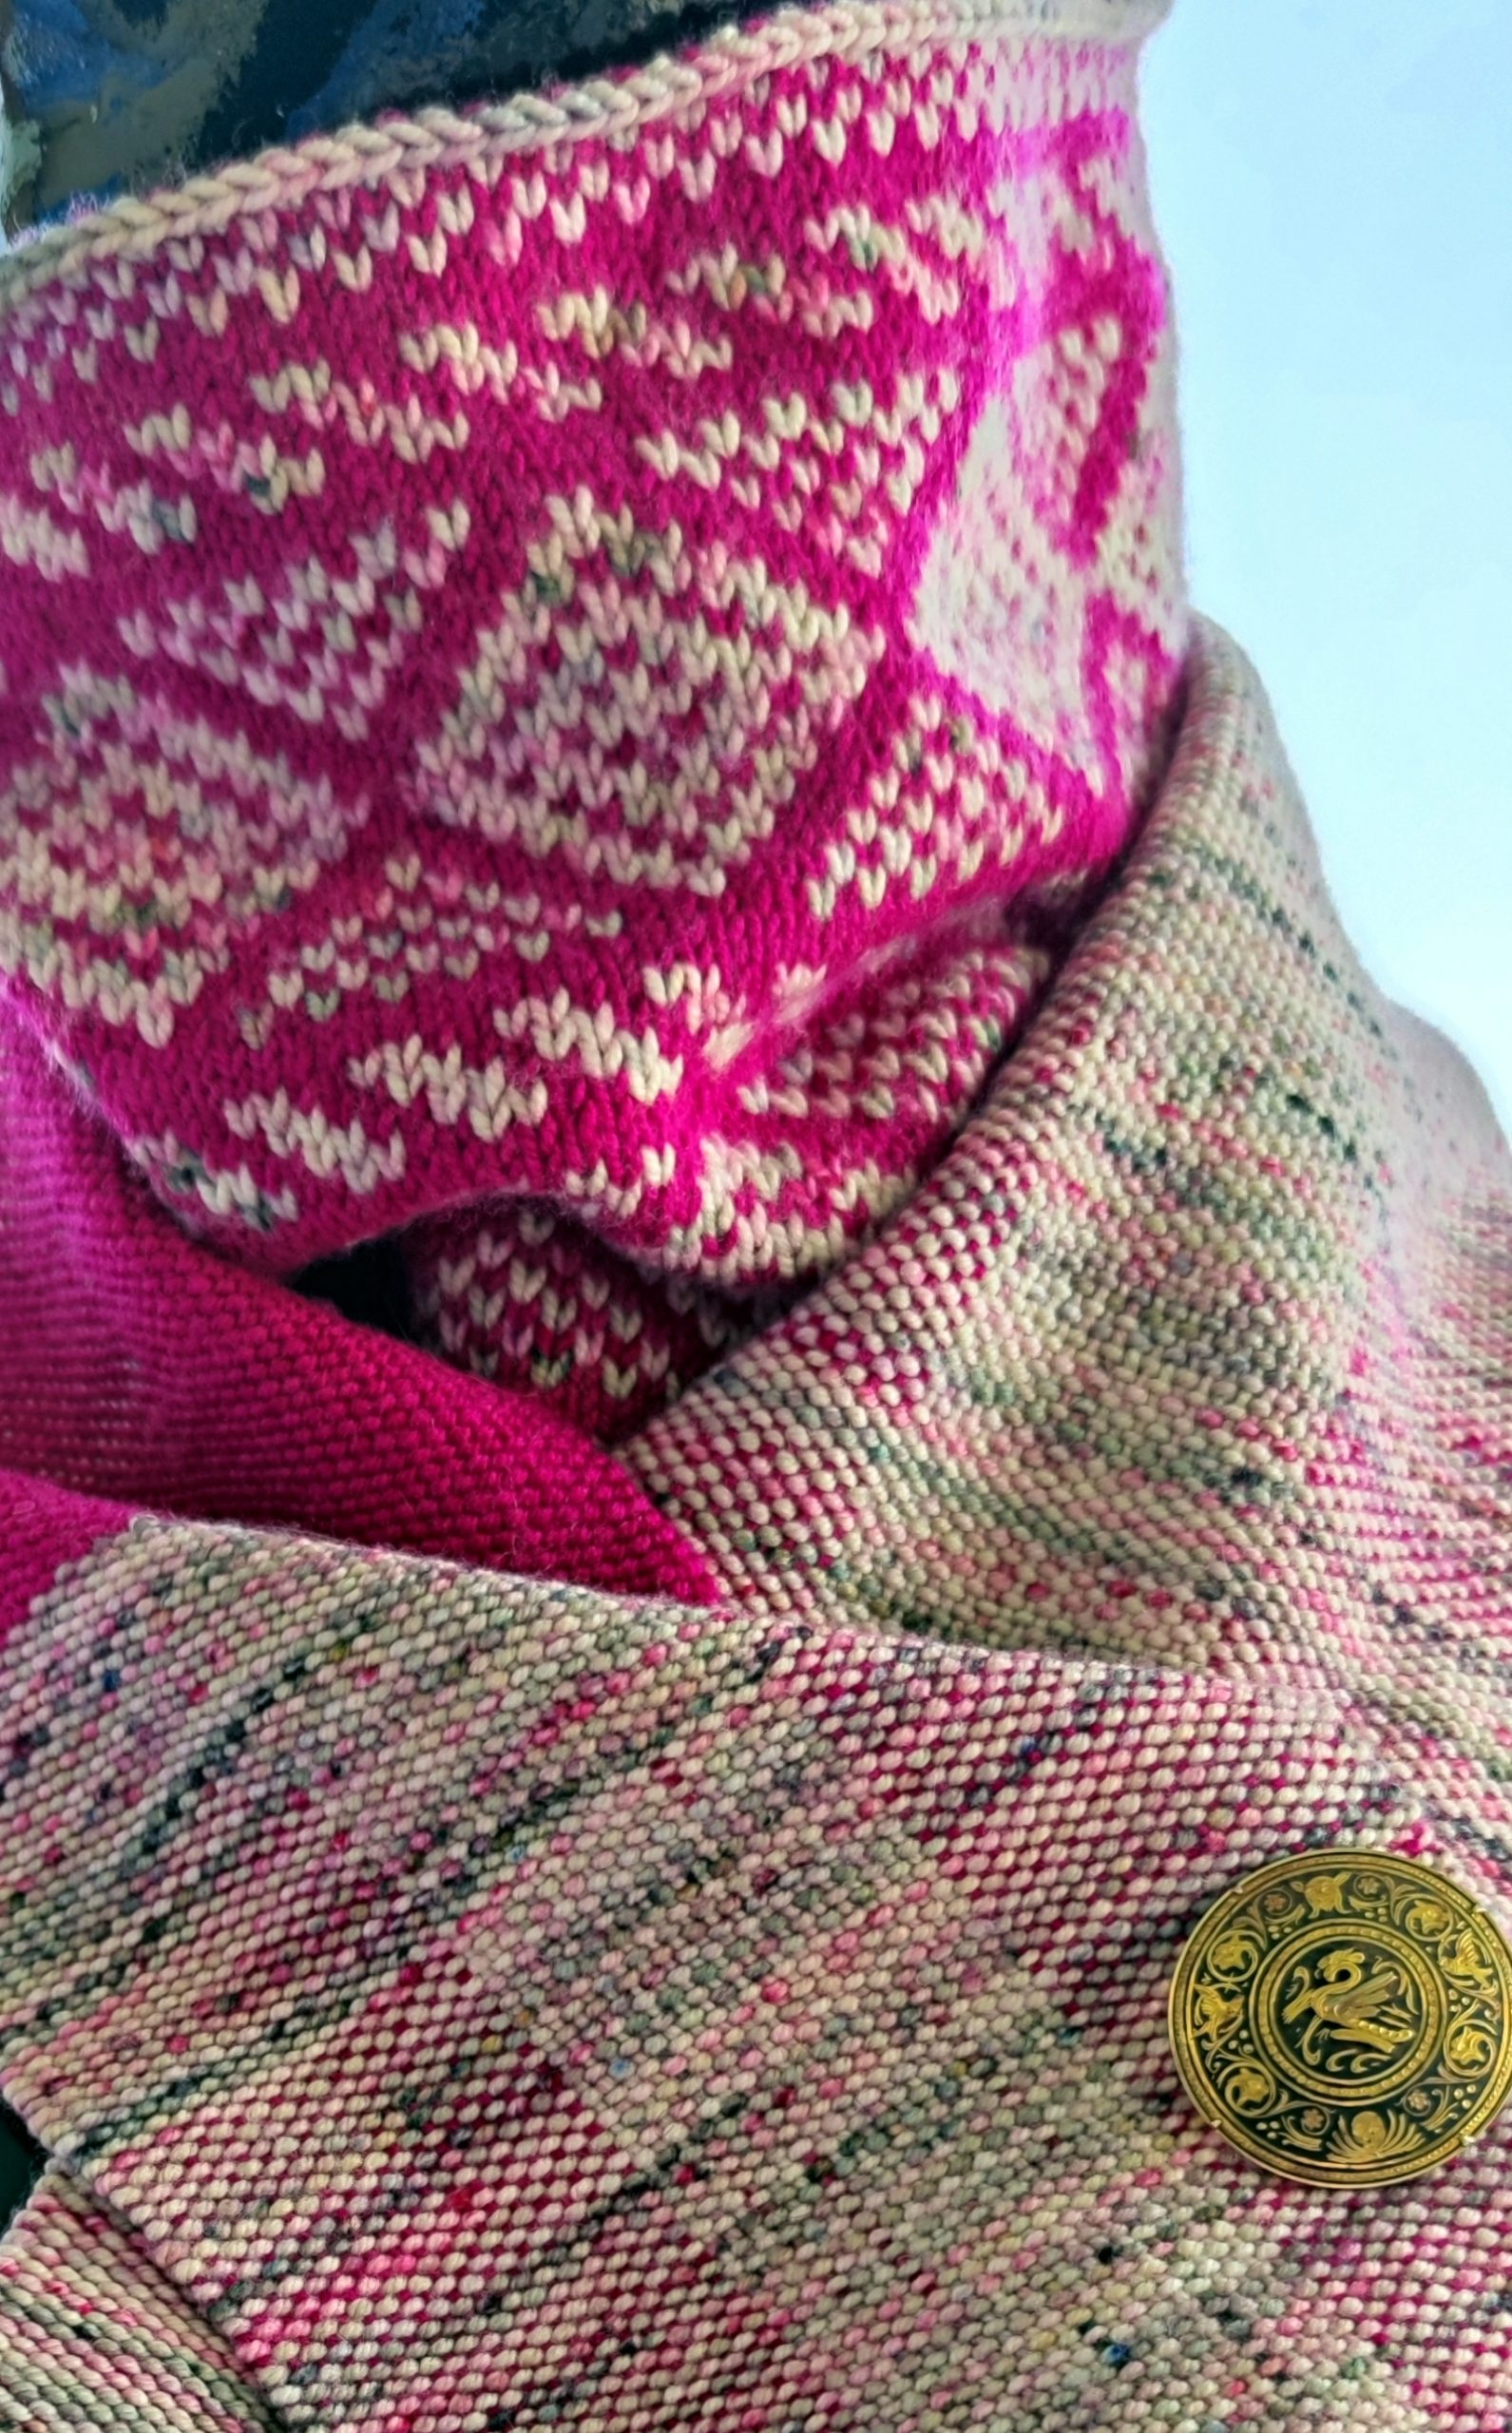
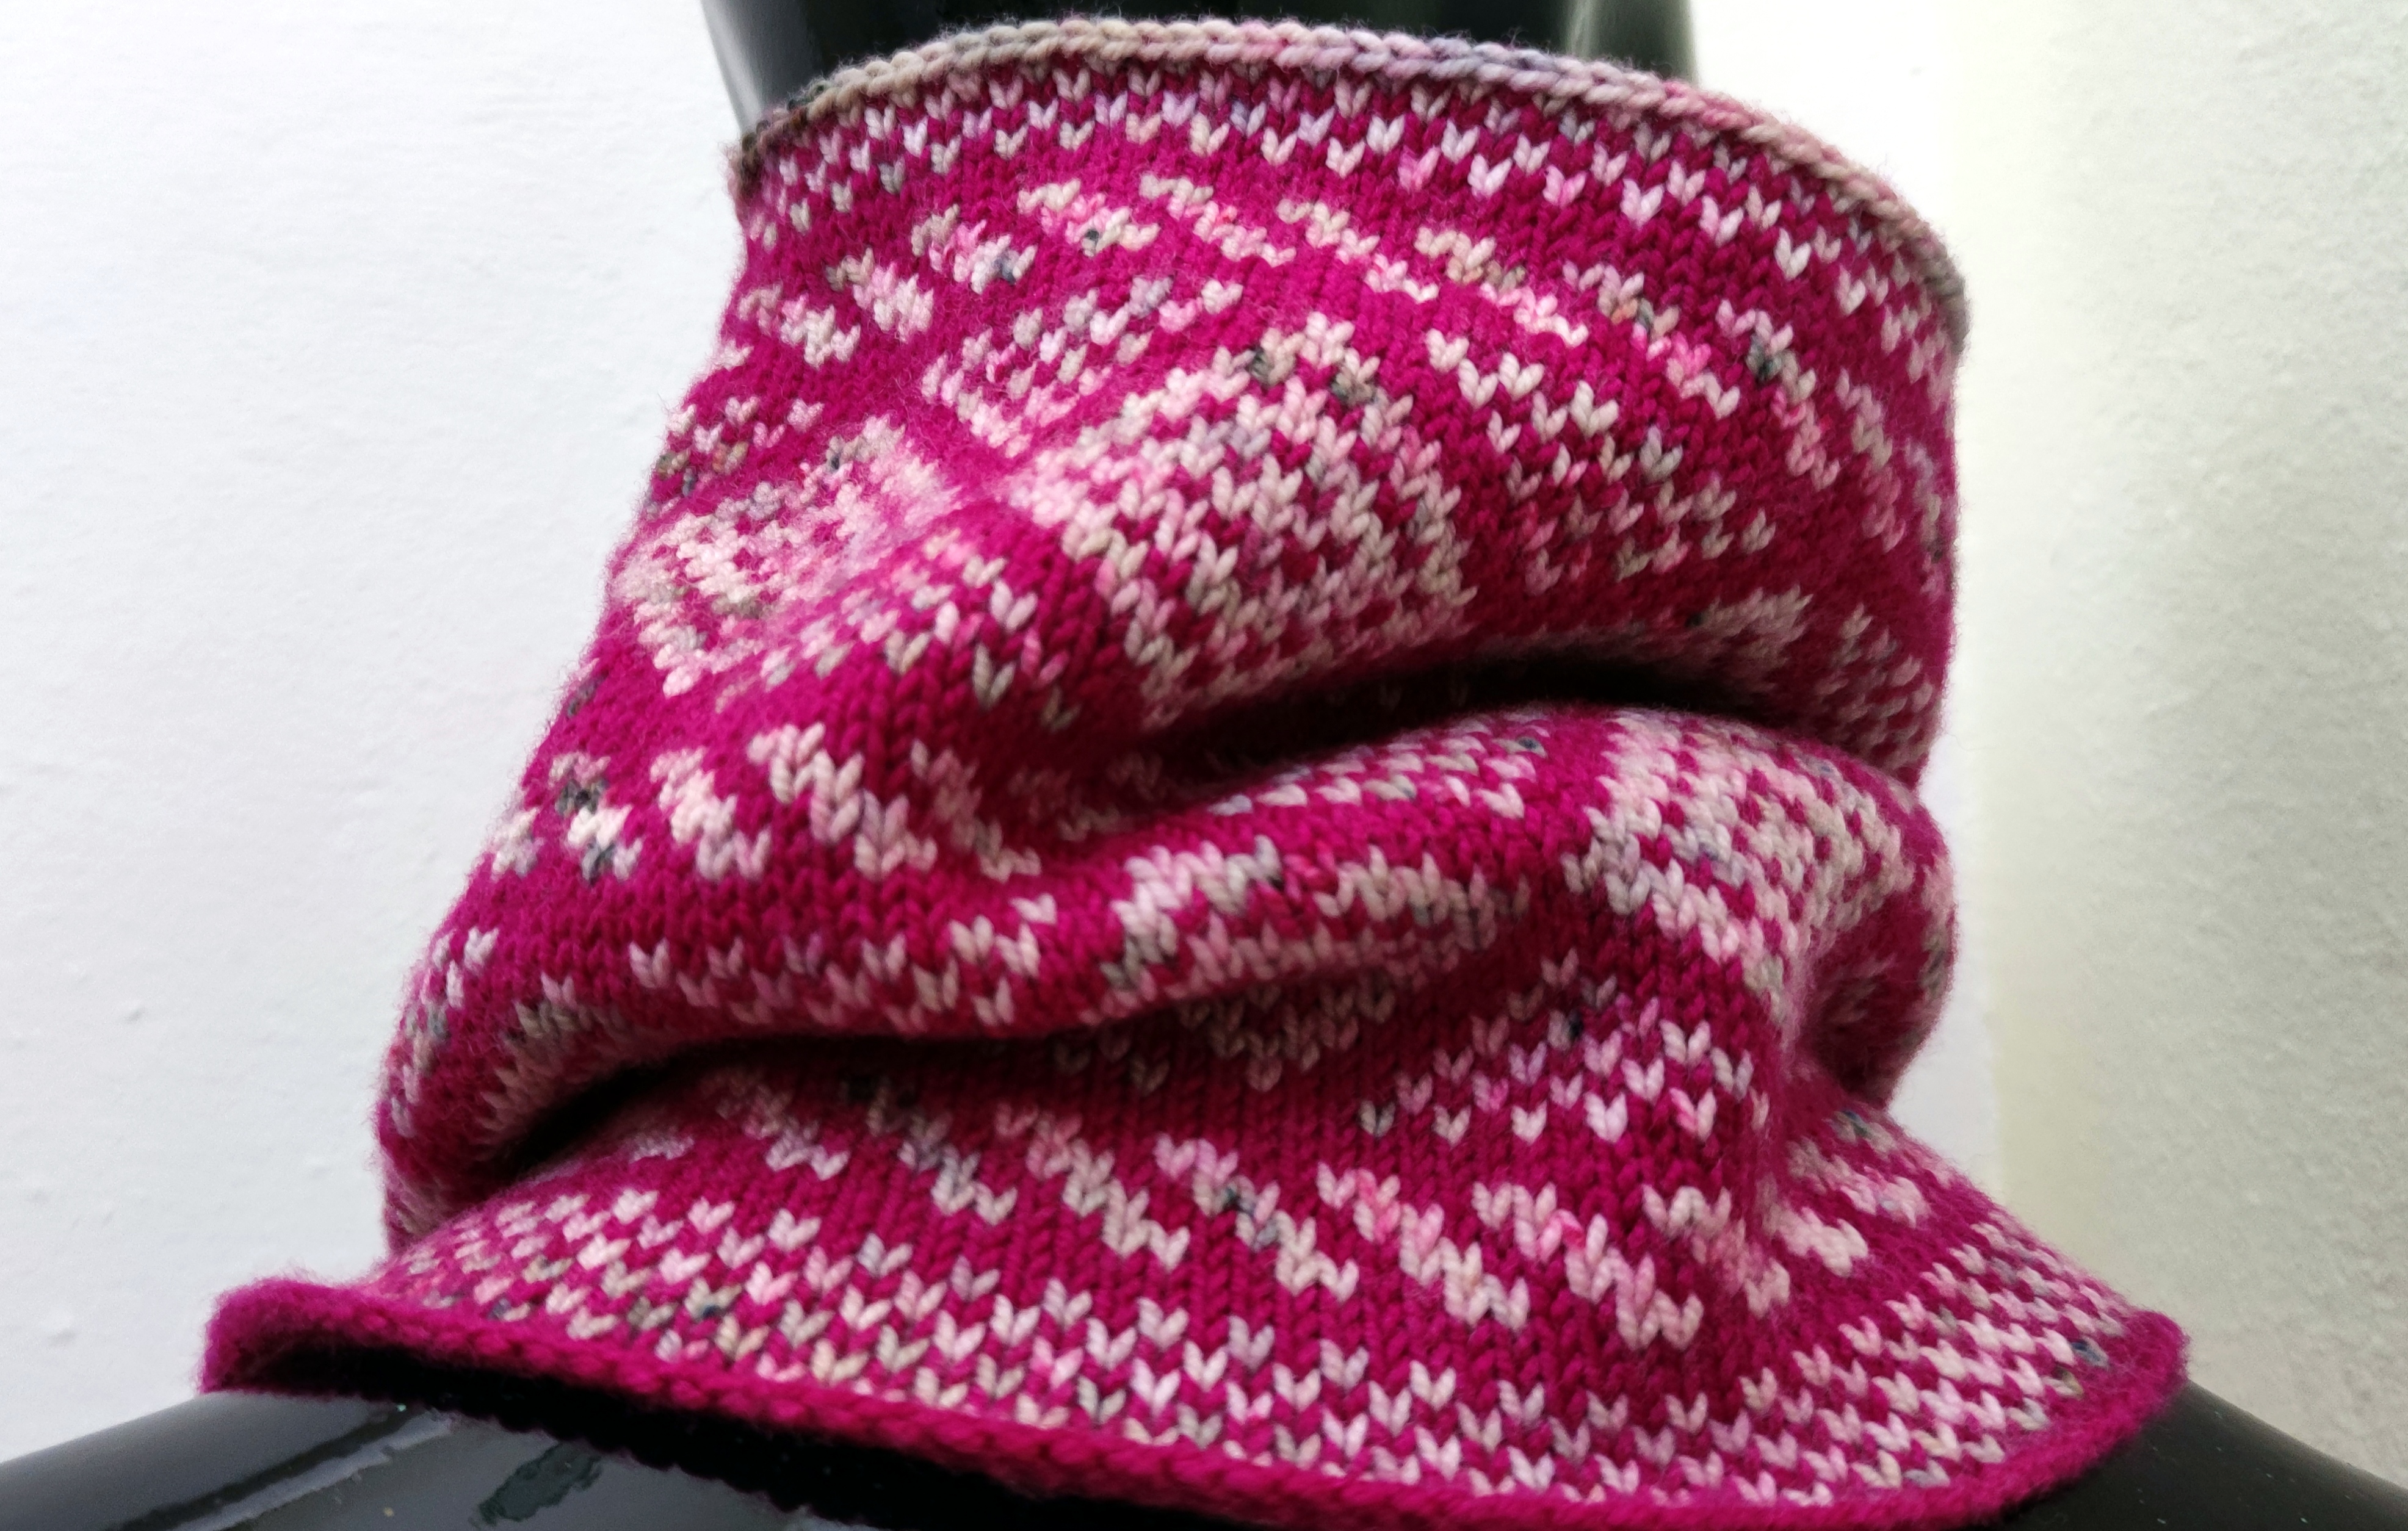
The pattern calls for two colorways of Miss Babs KAWEAH: Floyd and Apple Season. You’ll need about half a skein of each for one cowl. If you wish you could knit a second cowl reversing the colors in the chart – and have one for yourself and one for a gift!
I used the remaining yarn to weave a two-color scarf on my rigid heddle loom, which you’ll see in one of the photos.
I love these colors and as always, love working with Miss Babs yarns.
The pattern for this accessory is available on Ravelry.
I enjoy designing cowls because it’s a great way to try out stitch pattern and color combinations – and also because so many knitters like a fairly quick project that doesn’t require a lot of yarn.
The second cowl I’ve recently completed is called “Not Another Cowl” — that’s what a friend of mine said when he saw it!
I was recently asked if knitting cowls ever gets boring (as it seems that I have produced quite a few cowl patterns). My reply: it’s never boring! A cowl is a relatively small canvas that allows for experimenting with stitch patterns and a variety of colorways – so how could it ever be boring?
This design was a challenge to myself: dip into the Shetland wool drawer and come up with a pleasing and somewhat subtle selection of colors that would suit the stitch patterns I had chosen.
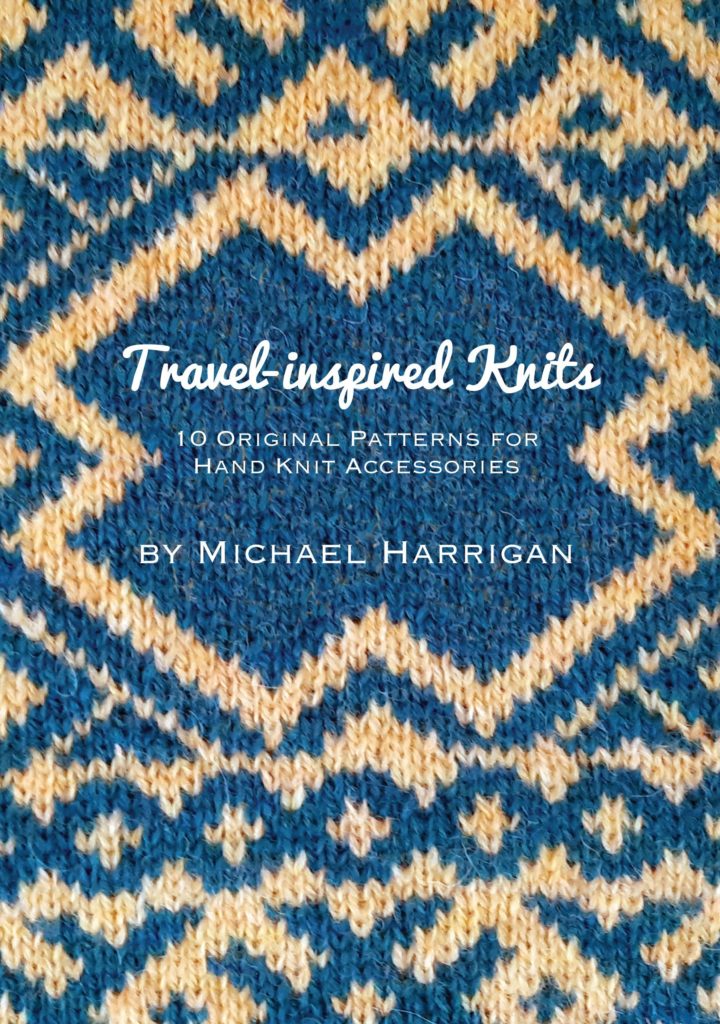
I am so pleased to announce that Travel-inspired Knits: 10 Original Patterns for Hand Knit Accessories was published on September 15, 2020. The print edition is available on the publisher’s website at: https://anchorandbee.bigcartel.com/product/travel-inspired-knits
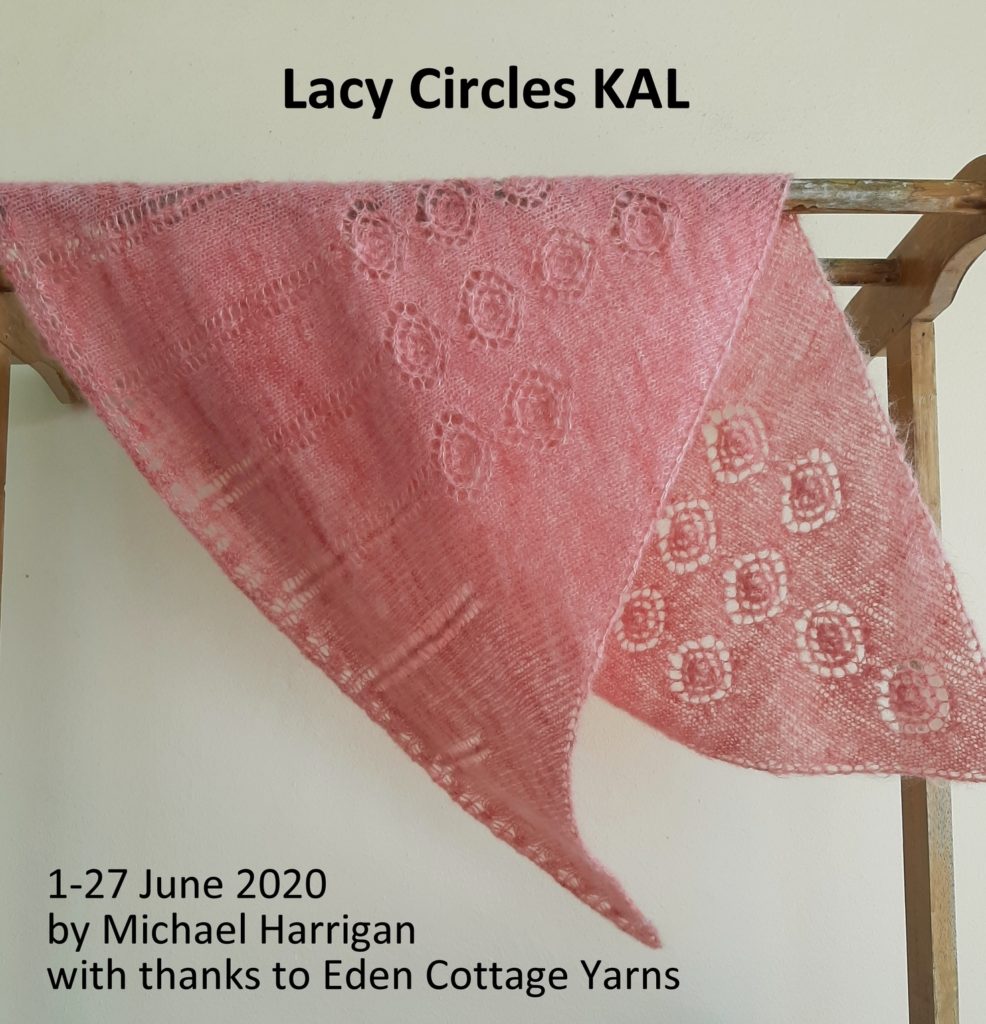
Welcome to the Lacy Circles KAL. I wanted to get us started by showing you how some of the more technically complex stitches in the Circles Motif are worked – and here’s a photo of me so you’ll know who I am!
As you’ll see I’m using a smooth and heavier weight yarn and larger-sized needles for this demo (photo credits: Wiboon Tantirittisak). On Row 1 of the Circles pattern chart you ‘ll see an unusual symbol that takes in the three center stitches. This is known as a cluster3 and here are the three steps involved:
Keeping your yarn in back, slip 3 stitches to the right needle, purlwise.Bring your yarn to the front.Slip the 3 stitches back to the left needle. Move the yarn to the back and knit the 3 stitches.
On Row 3 and Row 5, there’s a central double increase (cdi) worked on the center stitch – the 8th stitch of the 15-stitch pattern. Here’s how it’s done:
First, you’ll knit through the back loop of the center stitch.Next, you’ll knit through the front of the stitch.Then, you need to look for the vertical bar that’s been formed by these last 2 steps..Insert the tip of your left needle behind the vertical bar, and then insert your right needle and knit it through the back loop.
Tip: When purling the wrong-side rows it’s a good idea to remember what you did on the right-side, and to count your stitches, ensuring that you have 15 for each pattern multiple. With the fuzzy lace weight yarn the stitches can become clumped together when you’re doing the increases and you need to be sure to purl in each one of them on the wrong side.
The next stitch that is a bit unusual is the inc1 that you’ll work on Rows 13 and 15 (twice on each of these rows).
First you’ll insert your right needle down through the purl bump of the first stitch on the left needle. Knit into the back of that stitch.Knit through the front of the stitch to complete the increase.
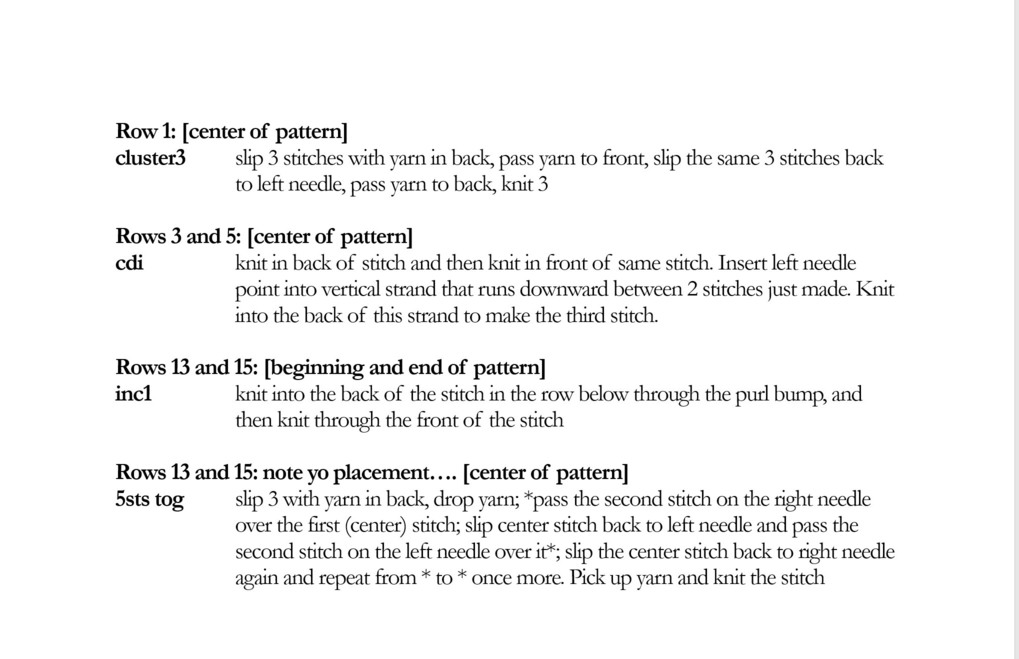
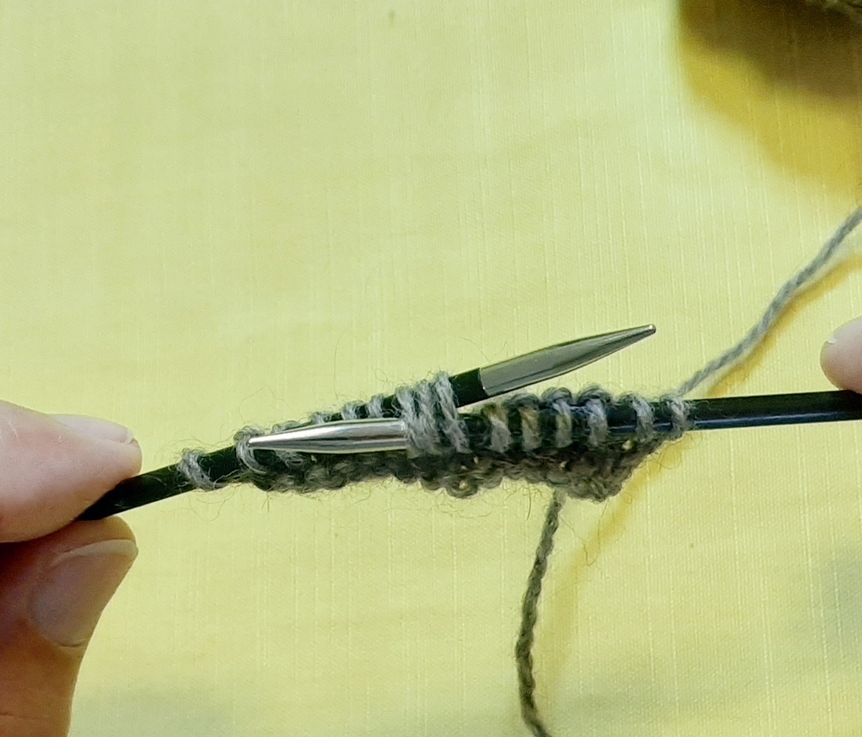
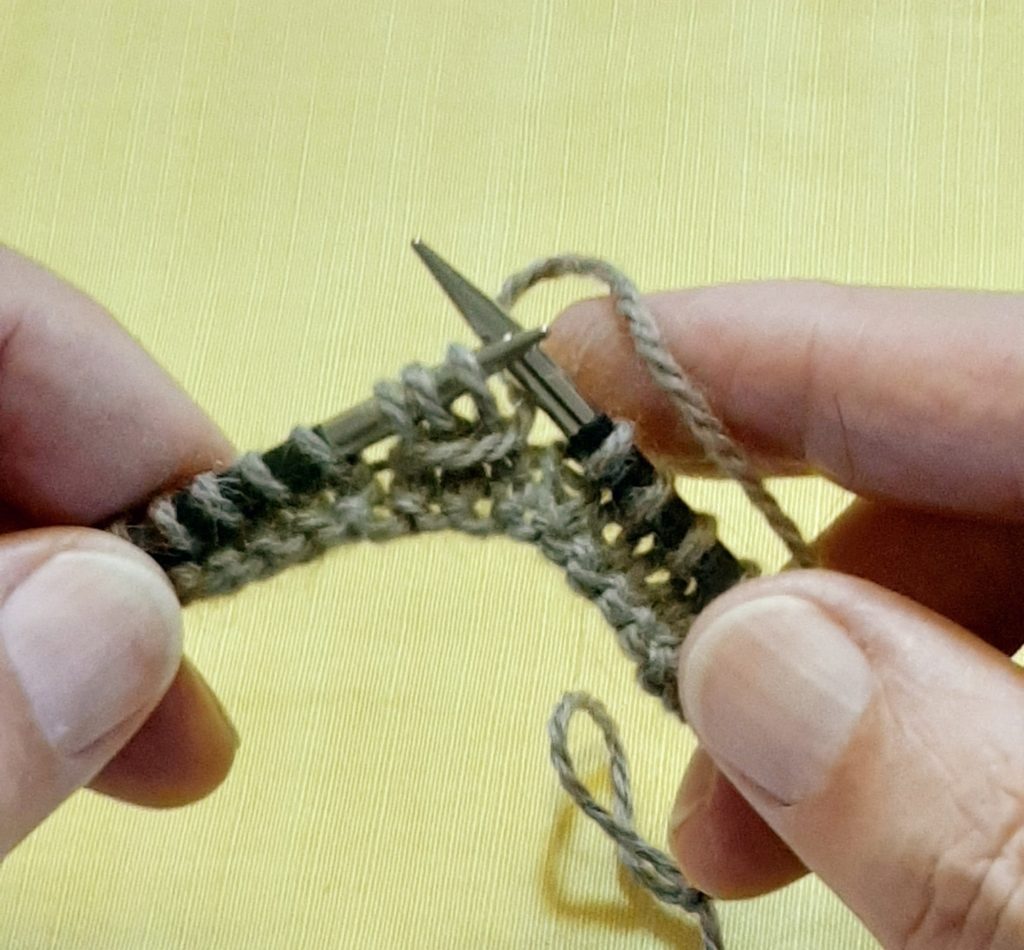
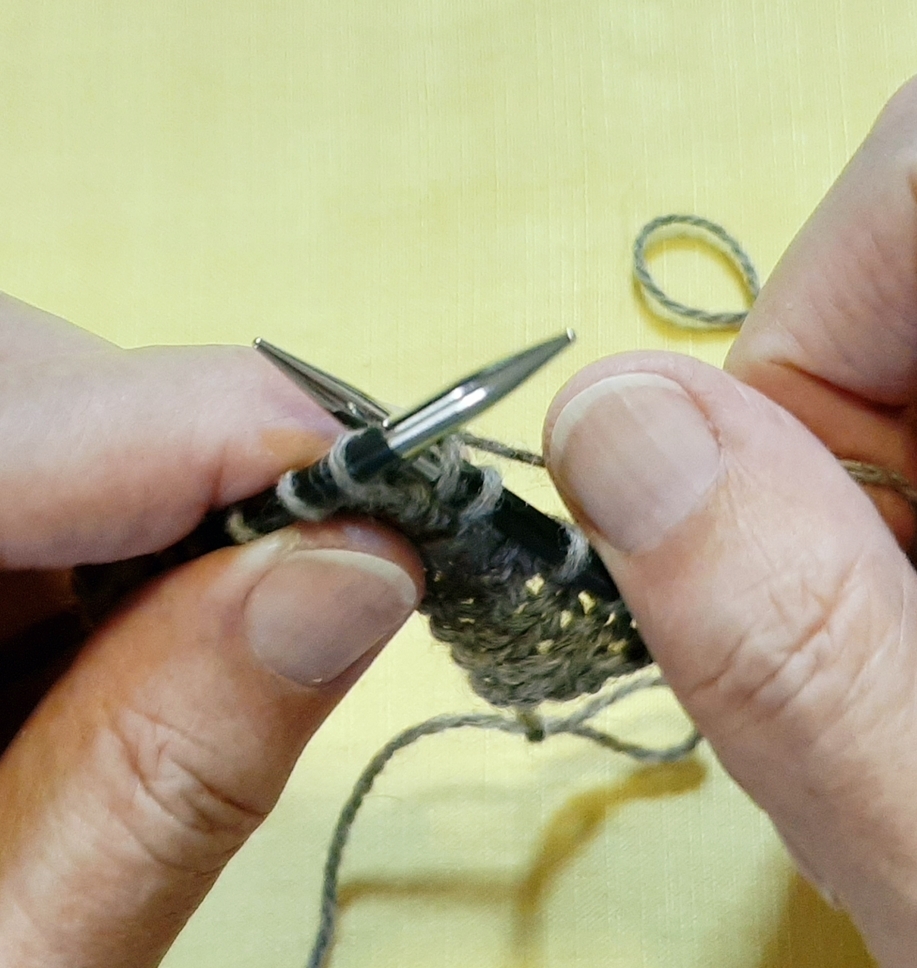
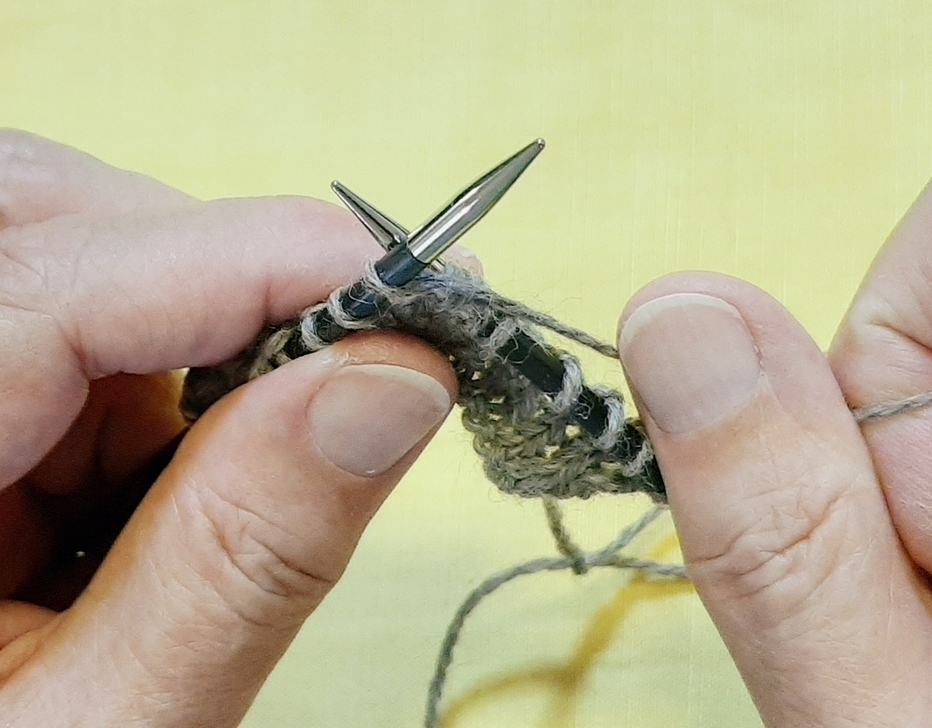
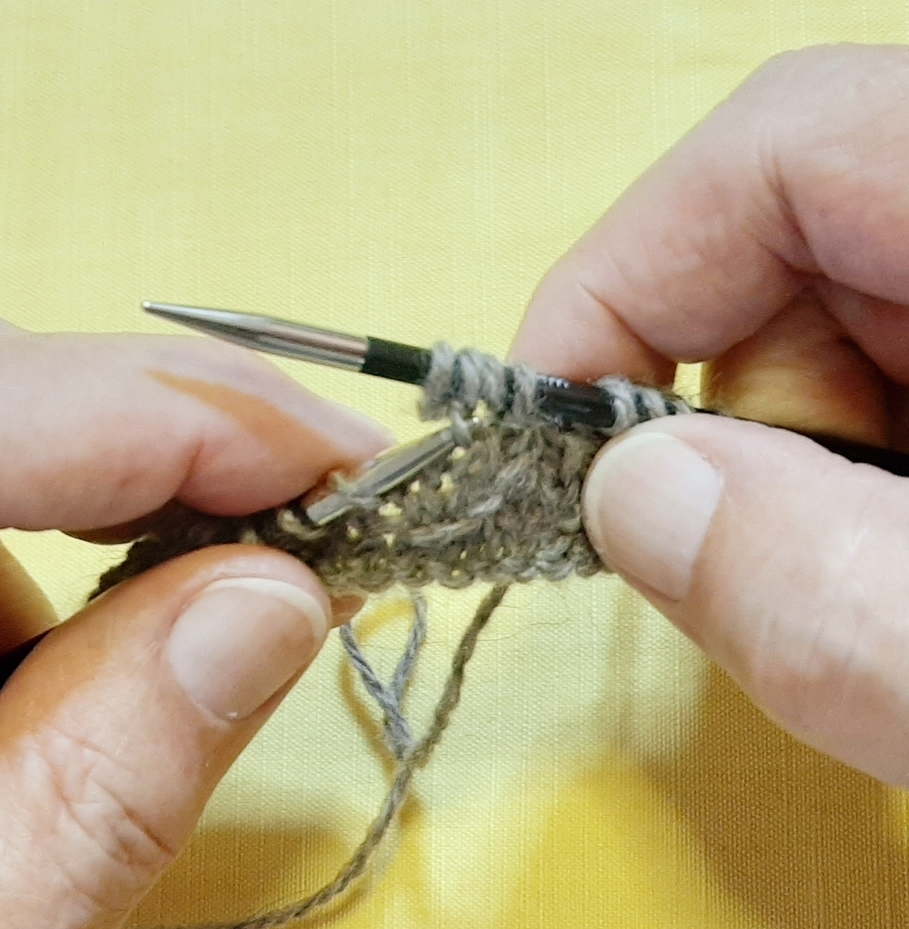
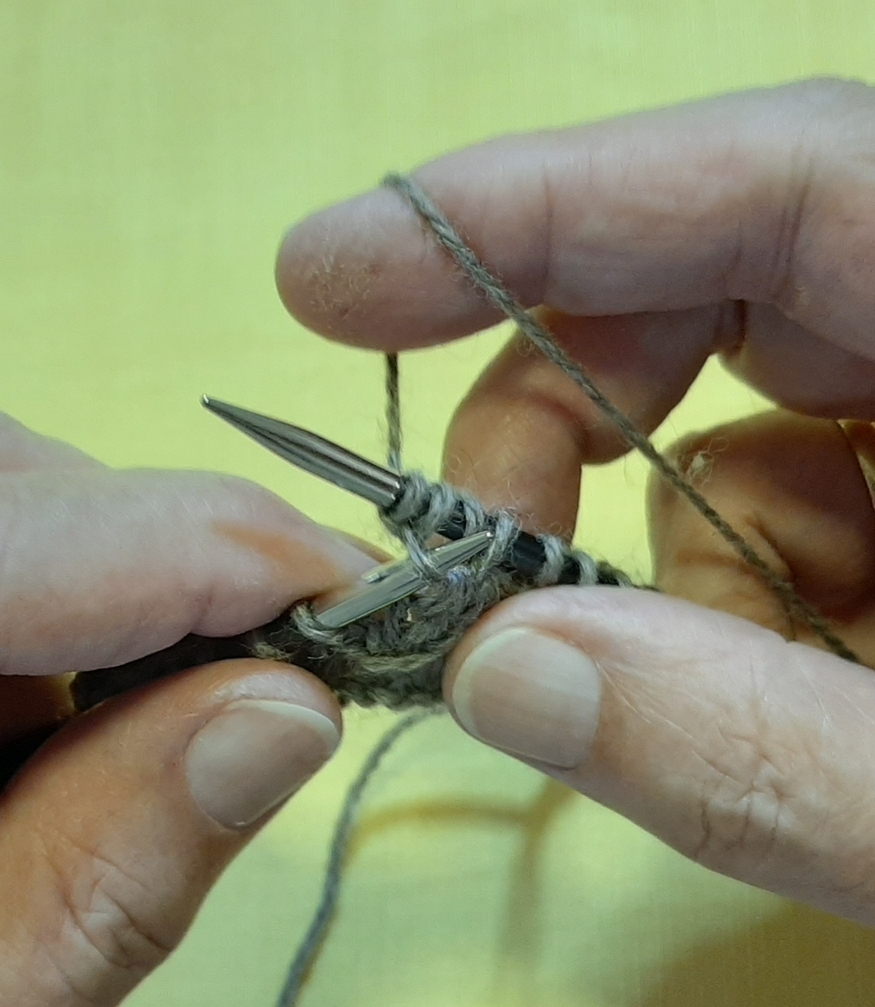
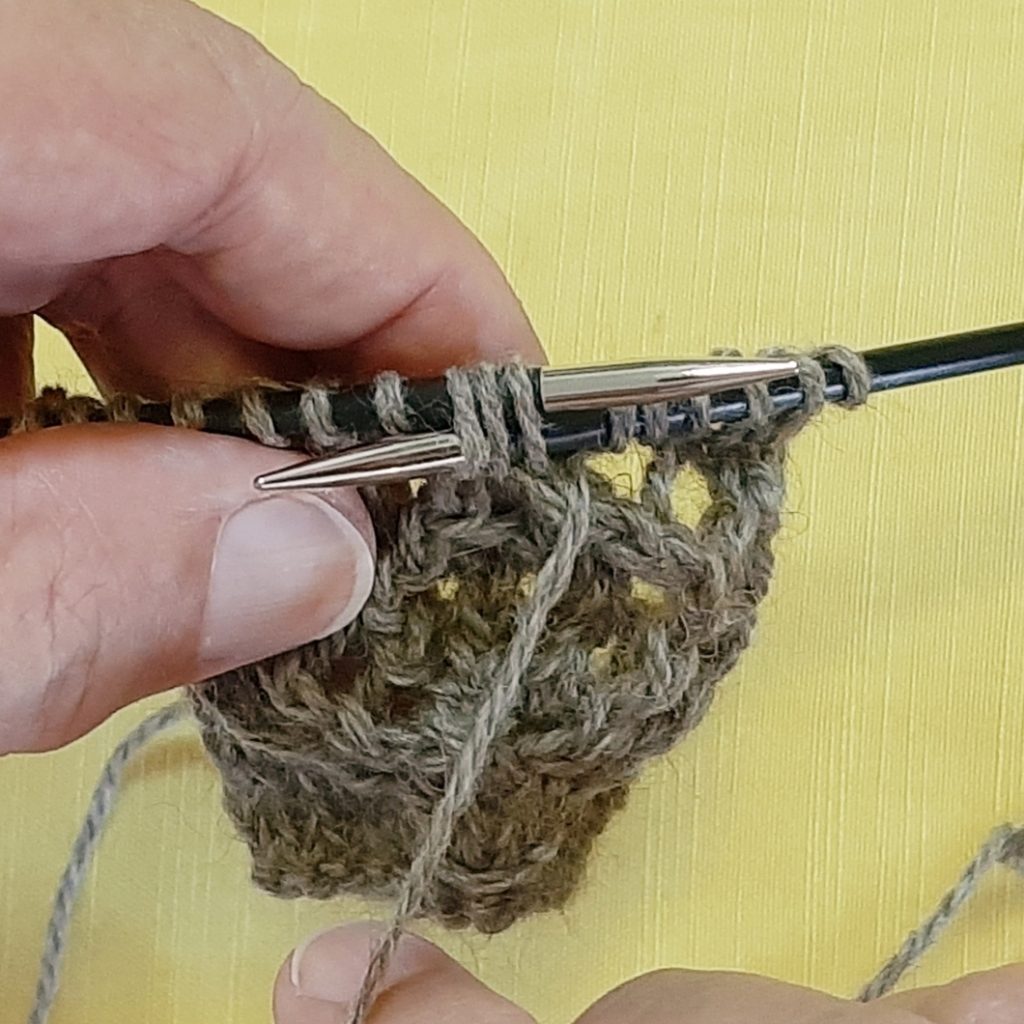
The final stitch I’d like to demonstrate is the central decrease (at the center of Row 13 and Row 15) that takes you from 5 stitches to 1 (5sts tog).
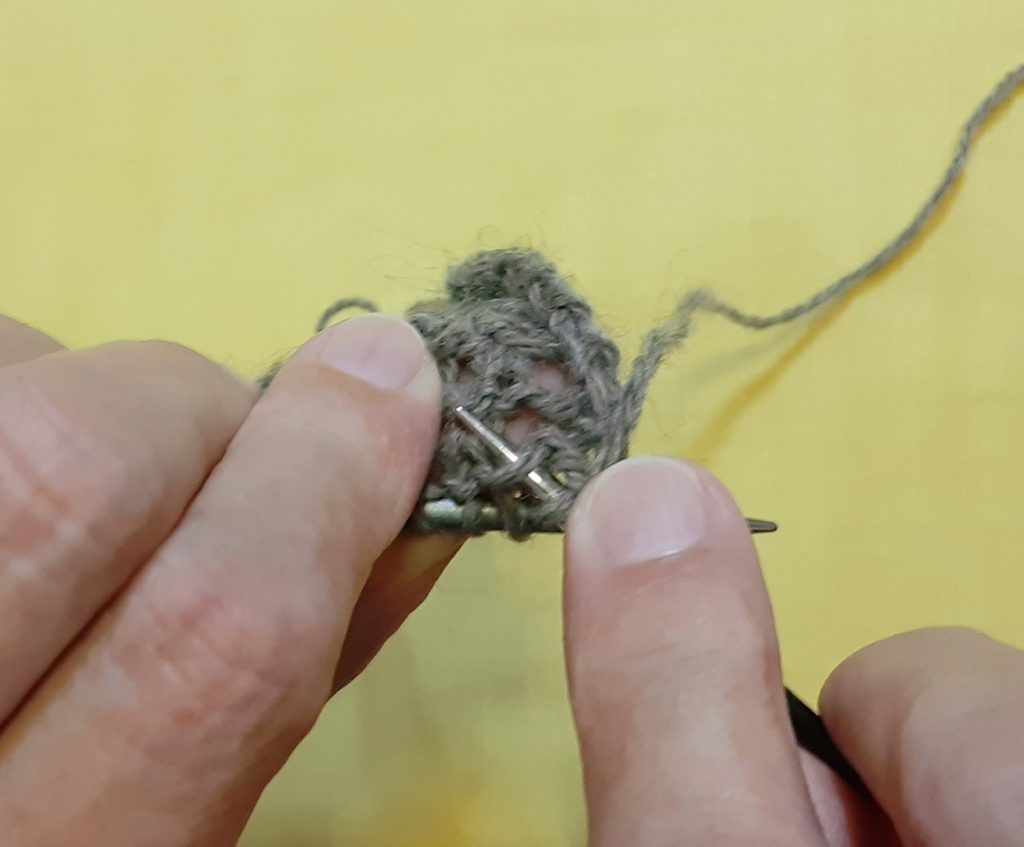
Insert your right needle through 3 stitches, purlwise. You will have just made a yarn over (as you can see with the yarn in front in the photo above). After slipping these 3 stitches to the right needle, move your working yarn to the back (maintaining that yarn over).Pass the second stitch on the right needle over the first stitch (which is the center stitch).Slip the first stitch on the right needle (the center stitch) to the left needle. Pass the second stitch on the left needle over the first stitch. Repeat these actions on the right and left needles once more. Pick up the yarn and knit the remaining stitch, making sure you have maintained the initial yarn over. (4 stitches decreased)This is how the motif should look.
If you have any questions be sure to post them on the KAL site and I’ll respond as soon as possible. Enjoy Week 1!
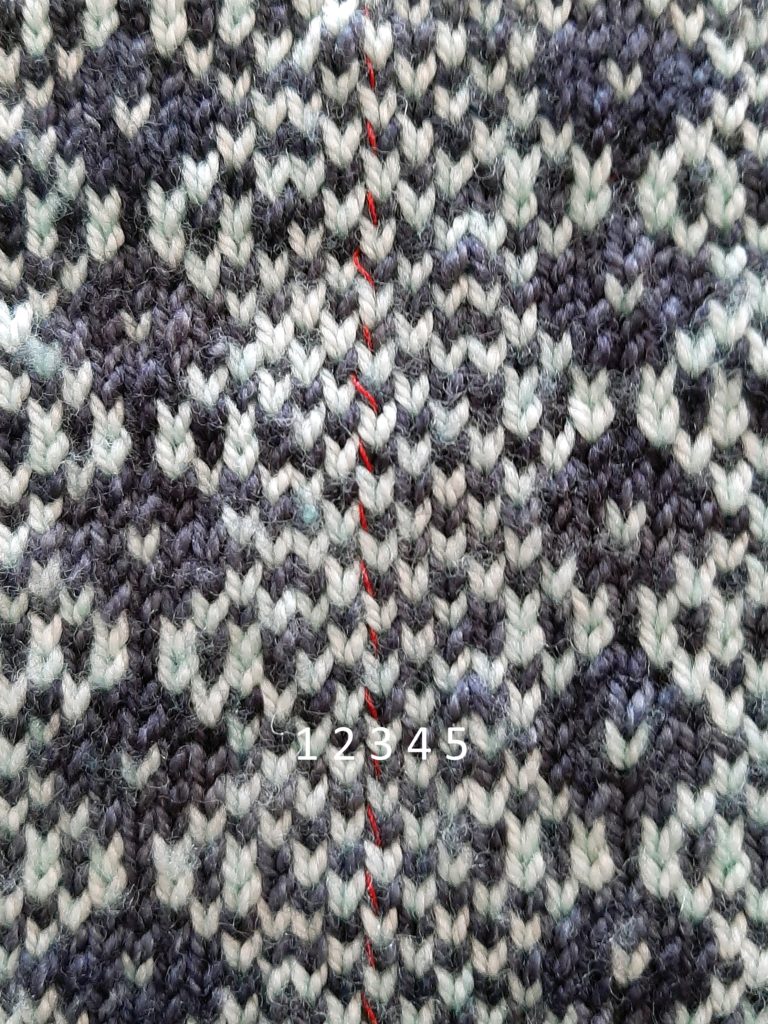
This photo tutorial is meant to accompany my Two-Color Fair Isle Wrap pattern in the Fall 2020 issue of Cast On magazine. It may be useful to others looking for basic information on steeking. In this case, the steek is formed by five stitches of alternating colors.
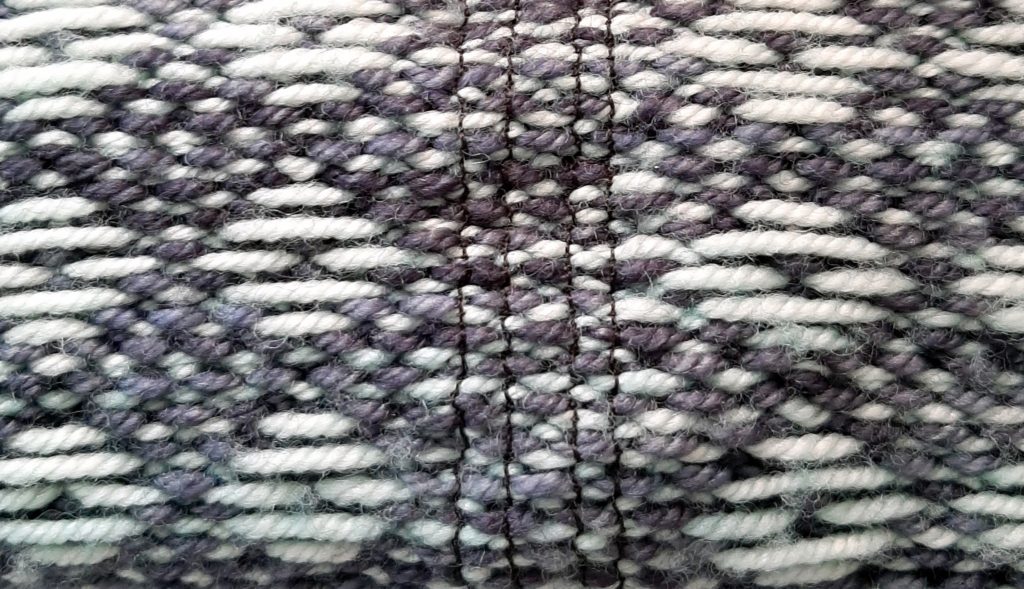
As you can see in the image below, the first step is to mark the stitch column where you will cut. The red thread is run along the left leg of the center stitch (column 3). The actual cut will be made in the center of that stitch, just to the right of the red thread.
After marking the center stitch, it is important to secure the steek so that the stitches do not unravel when cutting. With some yarns – Shetland wool, for example – the fibers “stick” together and little or no securing before cutting is necessary. That is not the case with smoother yarns – such as the ones used in this wrap.
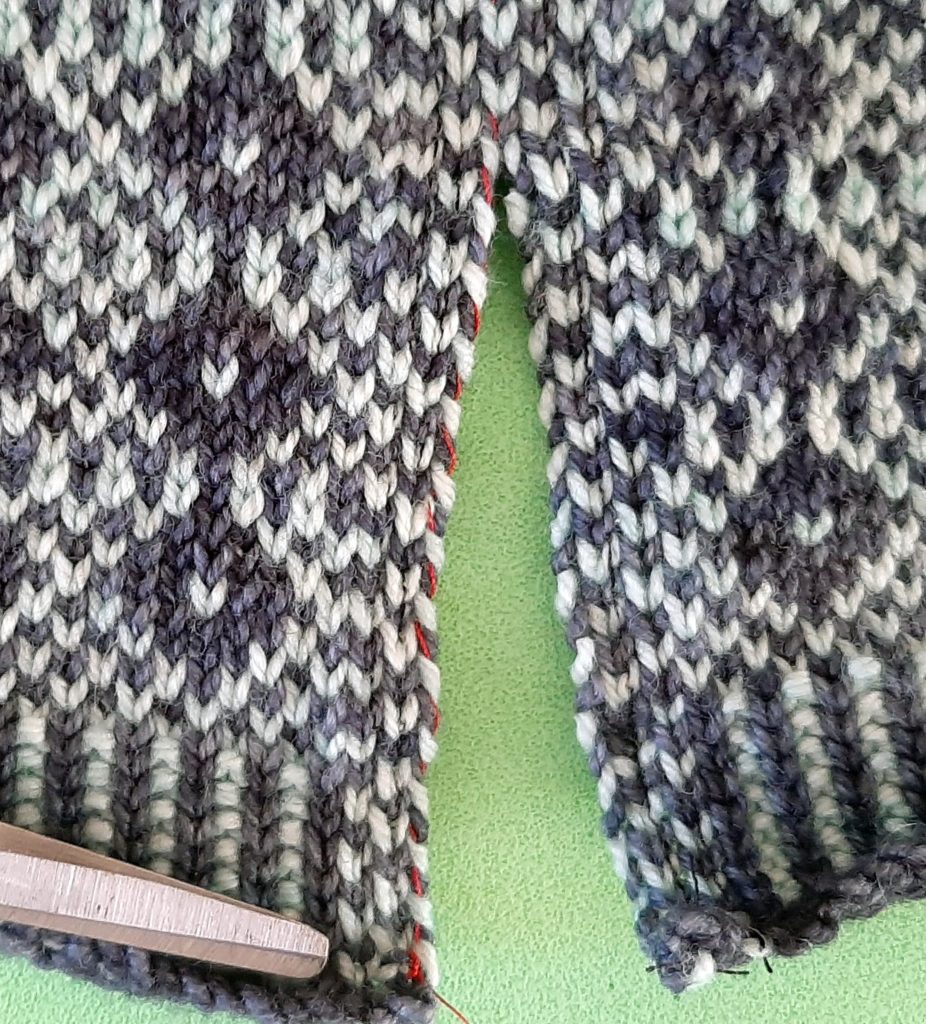
The photo below shows the reverse side of the steek after machine sewing: it is not all that visible from the public side as I used a dark grey/black thread. The reinforcement involves sewing through the center of the stitch column next to the center stitch (numbers 2 and 4 in the photo above), and also through the center of the next stitch column – on both sides of the center stitch (numbers 1 and 5 in the photo). You will have 4 rows of stitches.
Cutting the steek is next. Following along the red line of stitches, cut through the center of the center stitch (number 3).
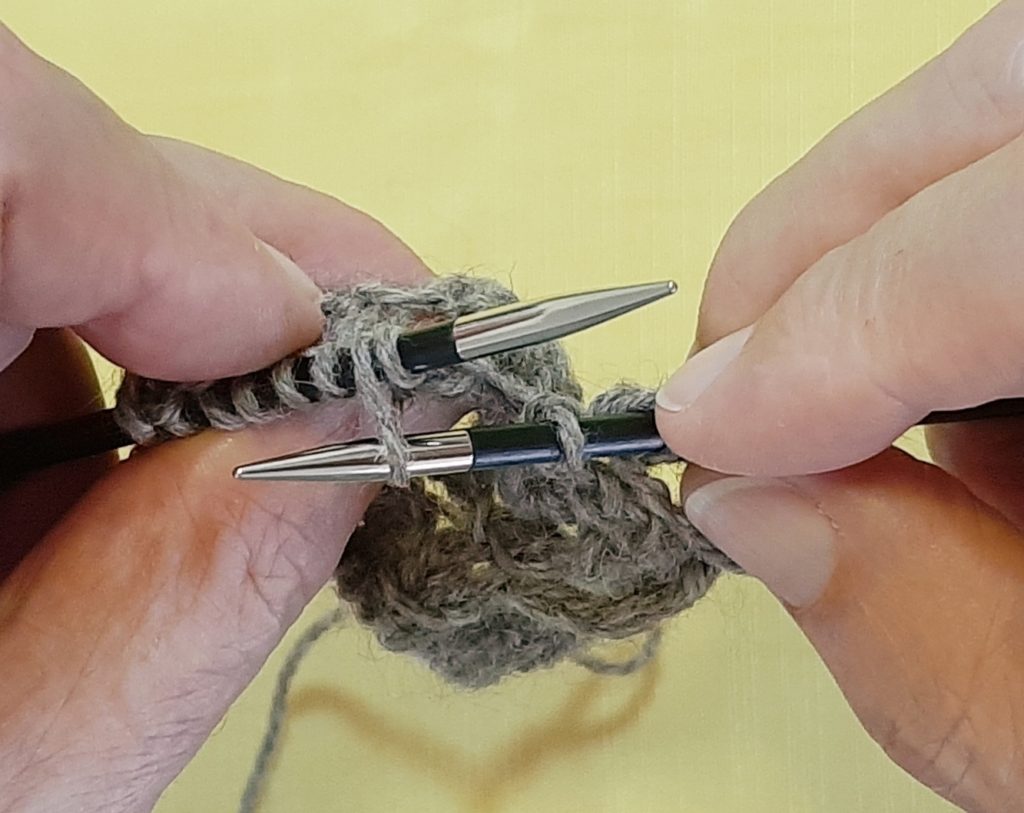
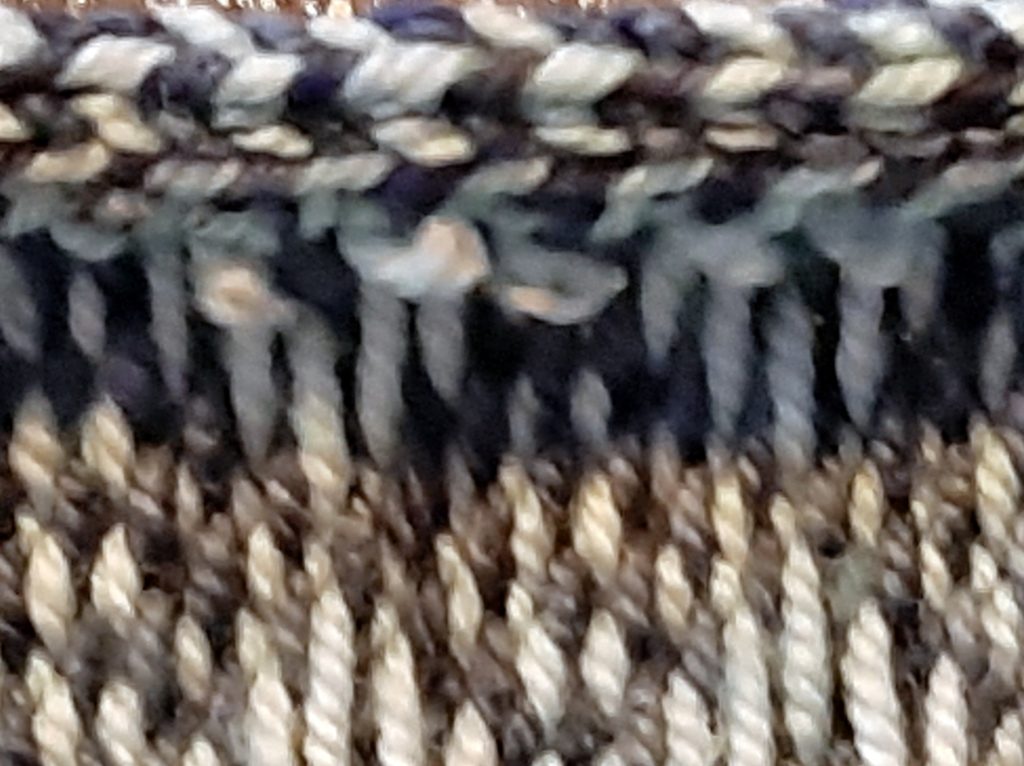
Fold along the edge of the second stitch column from the center column (to the left on one side and to the right on the other (numbers 1 and 5). There will be 2-1/2 columns folded under on each side of the steek.
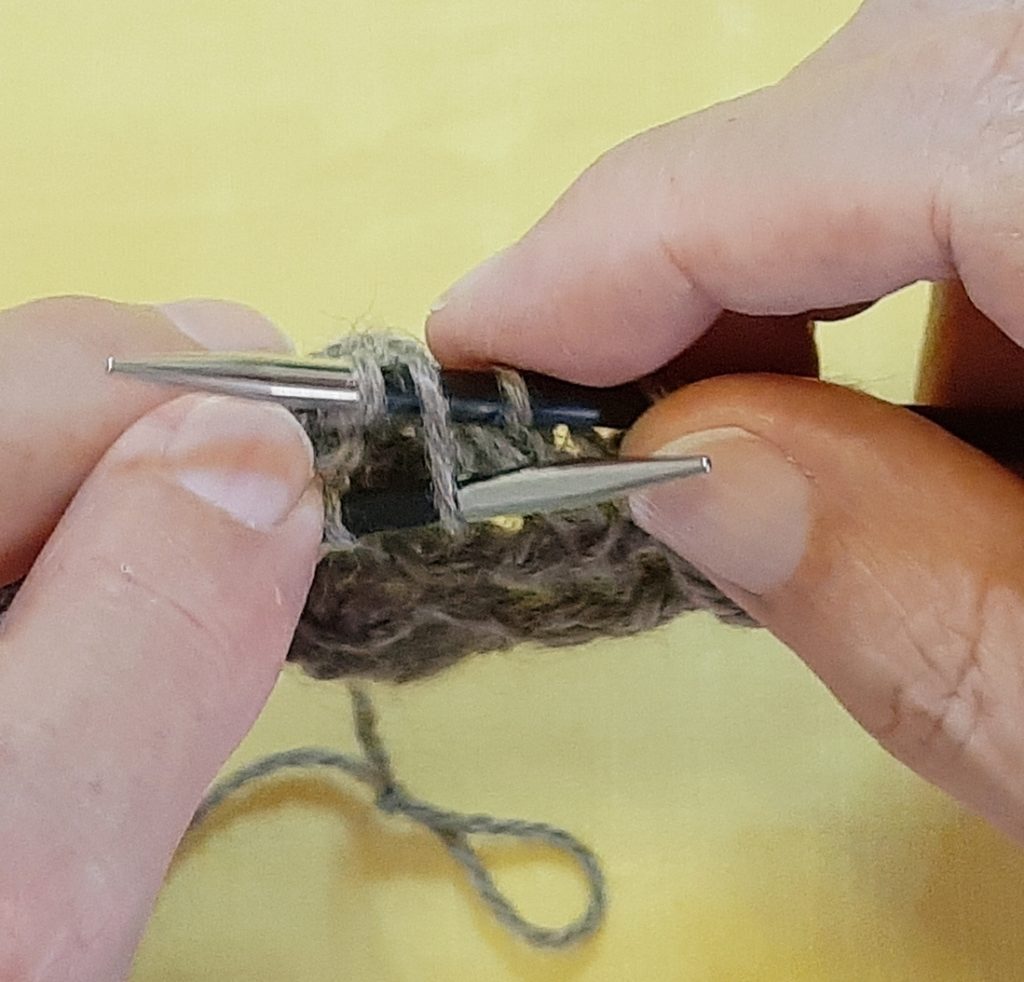
With the lighter color yarn, tack the folded stitches down by hand as shown in the next photo – between stitch column 4 and 5 on one side and 1 and 2 on the other. Run the tapestry needle under the corresponding float and then between the two stitch columns as indicated. keep the stitches snug but not overly tight.
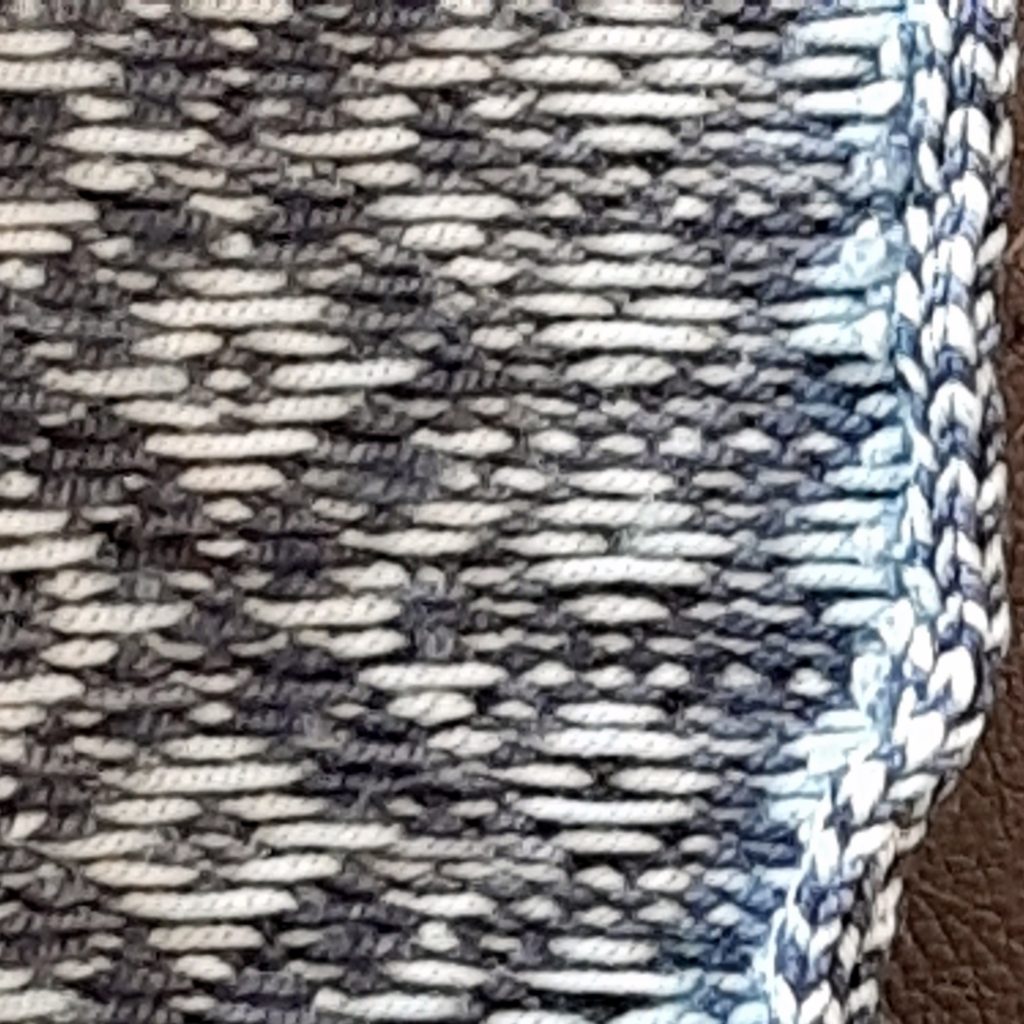
As you’ll see from the photo below, the finished edge with not be straight or flat – yet. This will be taken care of with blocking.
So, now would be a good time to block the wrap. When it is still wet, pin it to measurements, ensuring that the finished edges of the steek are straight and that a column of stitches evenly forms the edge.
I hope you found this helpful. Leave a comment if you have any questions.
Get your pattern now for our Winter Holiday Knit-Along that begins on Sunday November 3, 2019 and runs until the end of the month. The price is discounted from today until the KAL actual begins.
Although I’ve been publishing patterns for a number of years, this is the first time I’ve organized a knit-along. I hope you enjoy it and hope we can enjoy additional projects over time.
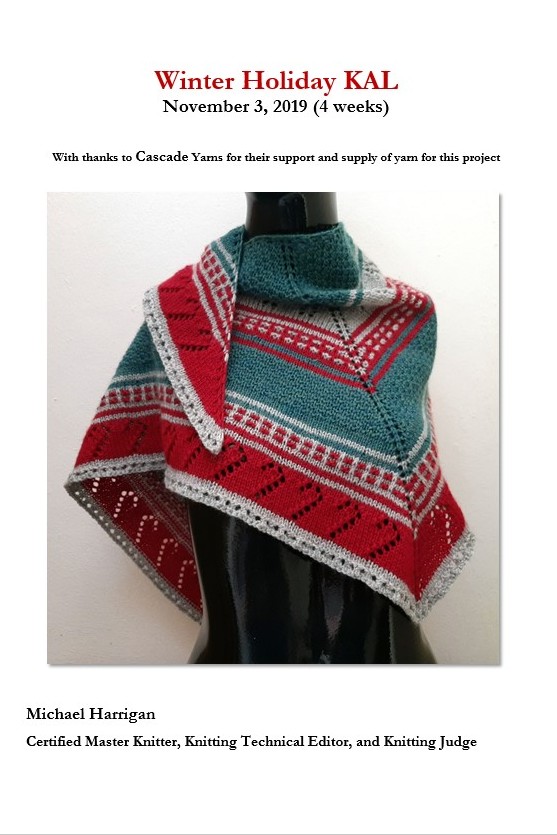
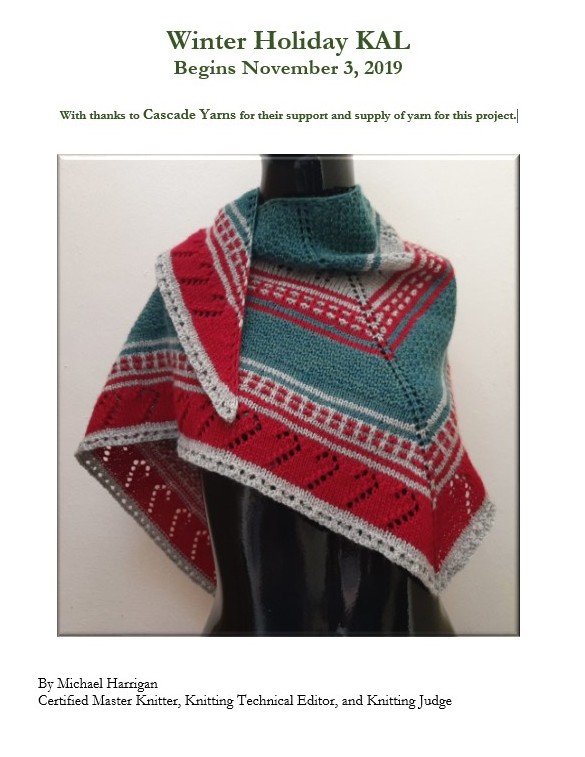
This new pattern – Winter Holiday – was designed to celebrate the winter holiday season. It is a triangle-shaped shawl, measuring around 55×20 inches – and includes knit-purl texture, mosaic, and seasonal and holiday eyelet patterns. The yarn for the project is Cascade 220 Sport: one 50g skein each of Ruby, Lake Chelan Heather, and Silver Grey colorways. My thanks to Cascade Yarns for providing support to this KAL.
On November 1, 2019 the pattern will be published on my Ravelry page. The price on November 1st and 2nd will be $3.50; from the 3rd the price is $4.00
The KAL runs for four weeks, beginning November 3. A video will be uploaded on Sunday the 3rd and on each of the following Sundays in November.
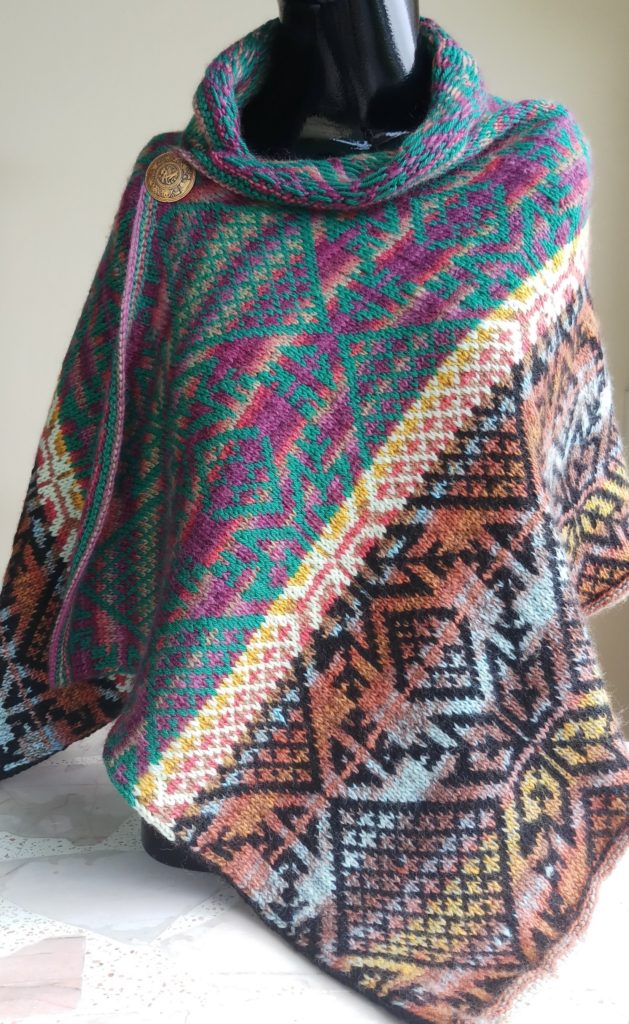
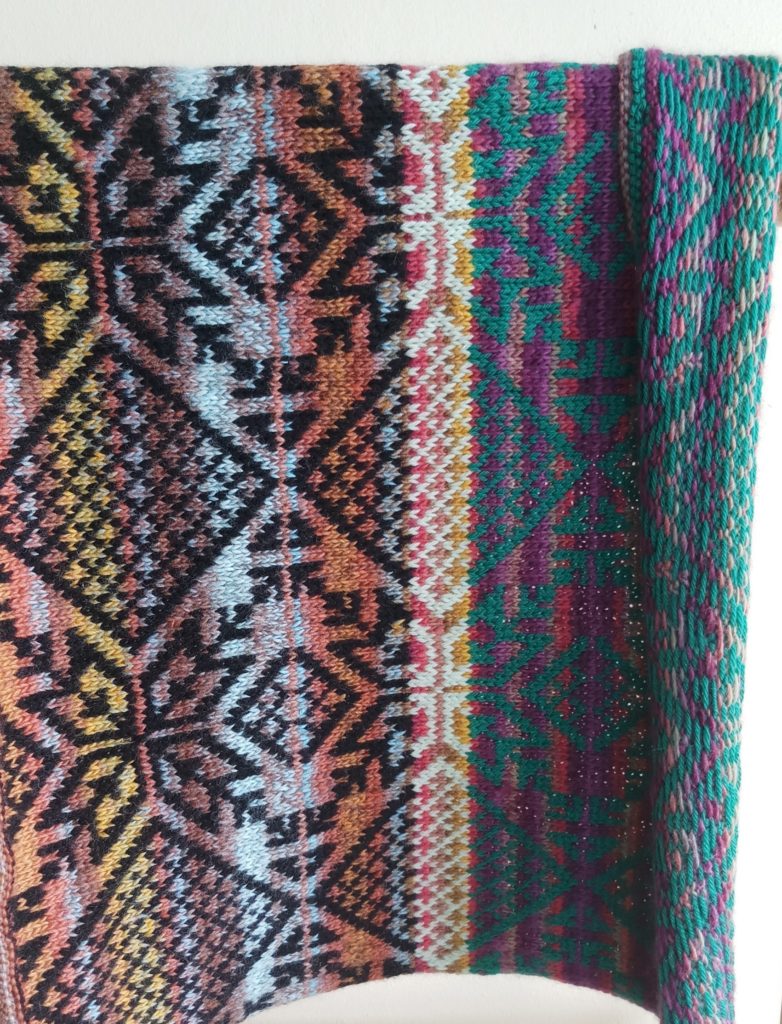
This rectangular wrap features an overall traditional Fair Isle design that is worked in solid colors of worsted-weight yarn. The background is created with variegated worsted-weight yarns.
The accessory is knit in the round with a seven-stitch steek that is cut, folded back, and stitched in place before blocking.
Lighter weight yarns can be substituted, with the stitch and row counts adjusted for the change in gauge.
I realize that the Poems Silk is a discontinued yarn, but it is available if you search online. Any other worsted-weight variegated wool yarn would be a suitable substitute. Just decide on some colorways that appeal to you! You’ll need just over 325 yards / 300 meters of each of the background (variegated) colorways.
I hope you enjoy knitting this – and be sure to let me know if I can help!
Happy Knitting! MikeH
Knitting tips, patterns, tutorials, photos and more.