Lacy Circles KAL: Photo Tutorial for the Circles Motif

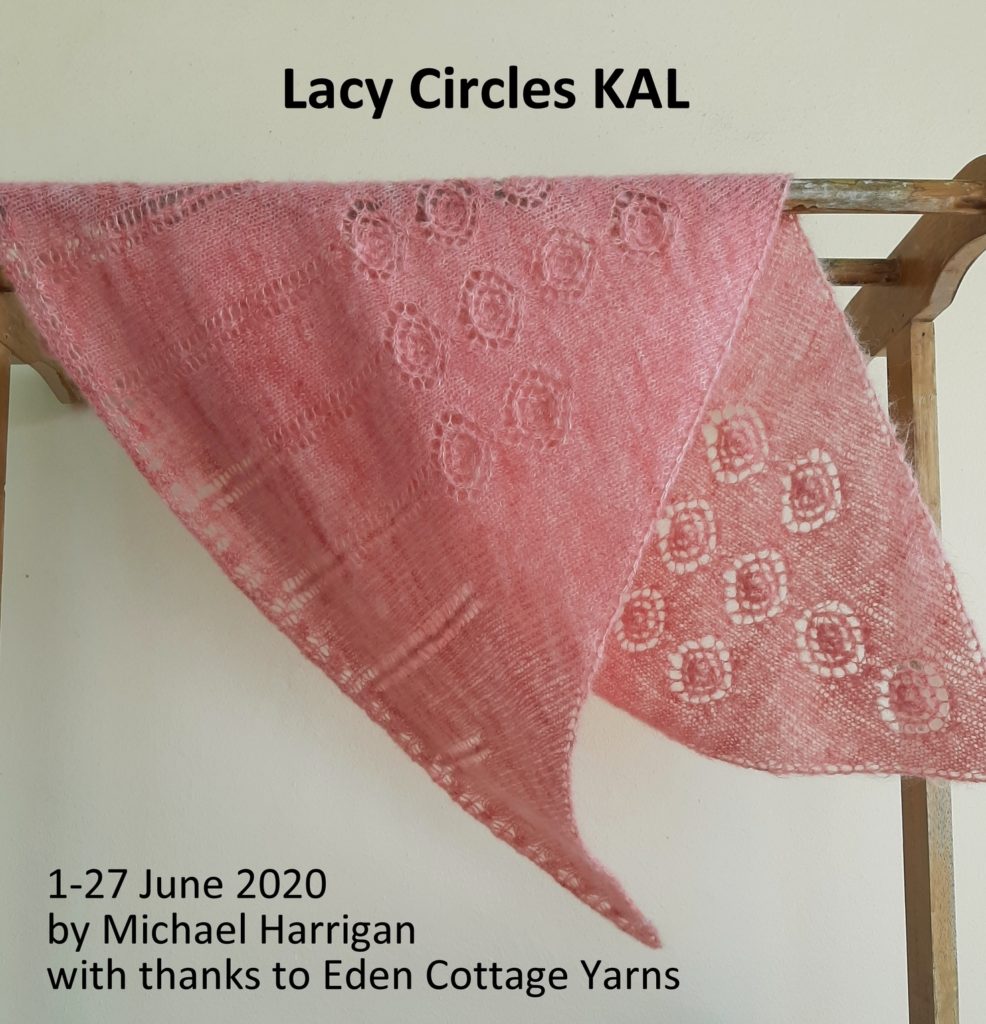
Welcome to the Lacy Circles KAL. I wanted to get us started by showing you how some of the more technically complex stitches in the Circles Motif are worked – and here’s a photo of me so you’ll know who I am!

As you’ll see I’m using a smooth and heavier weight yarn and larger-sized needles for this demo (photo credits: Wiboon Tantirittisak).
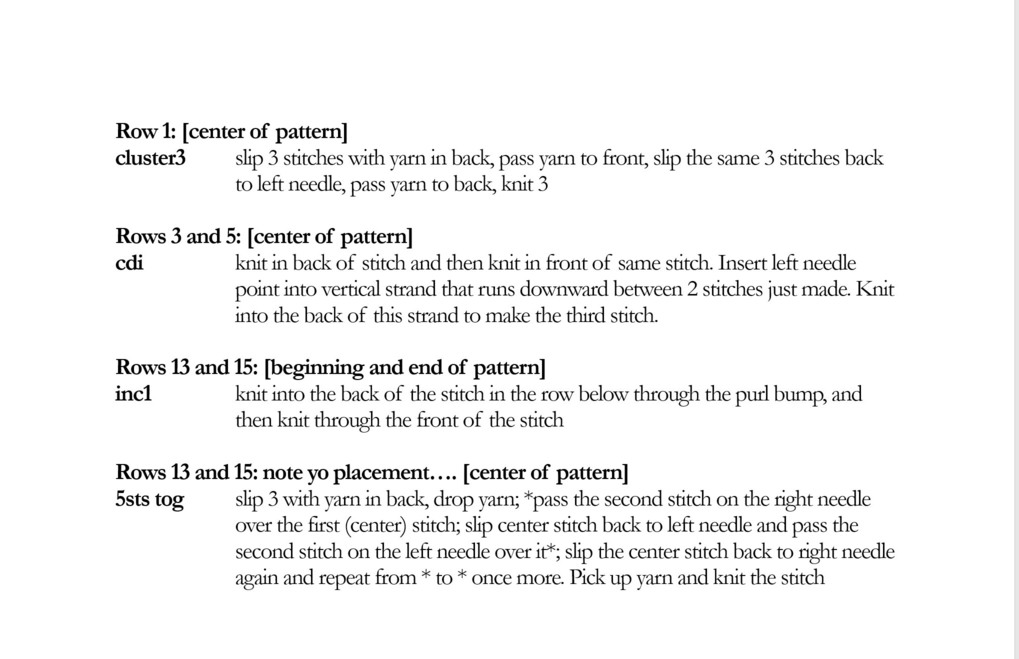
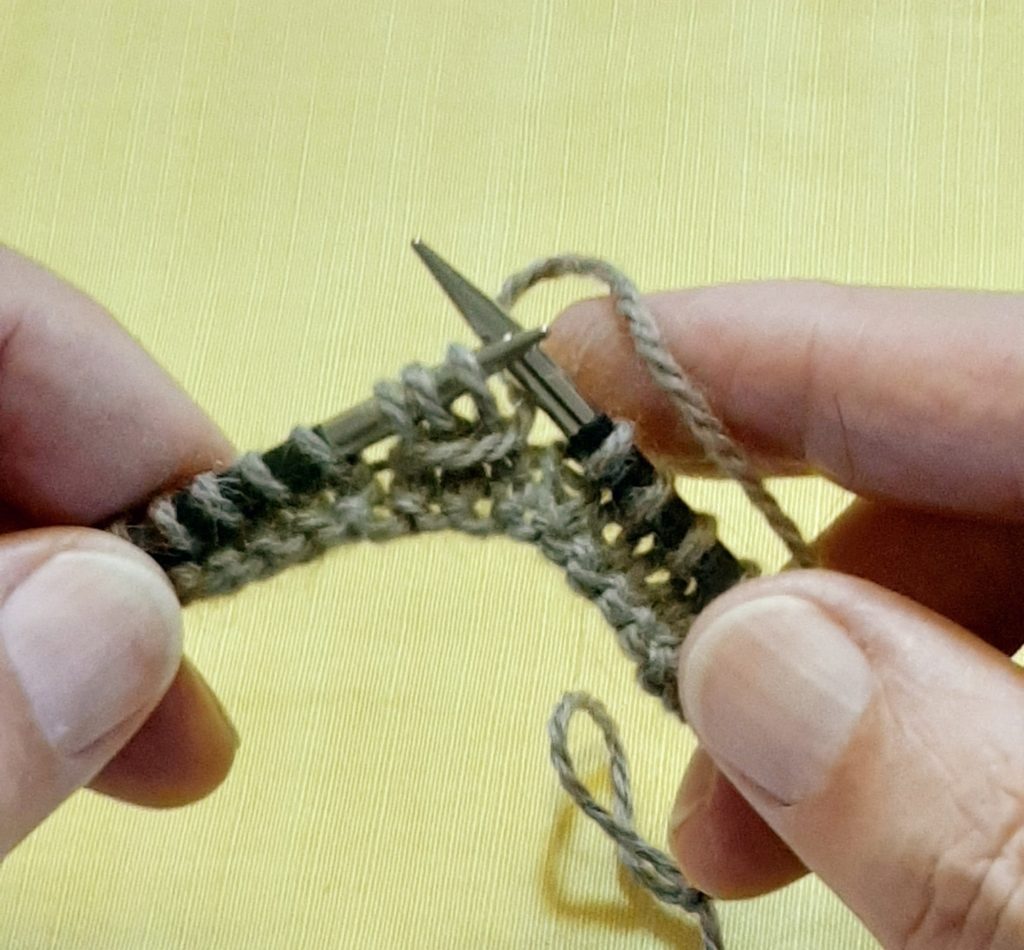
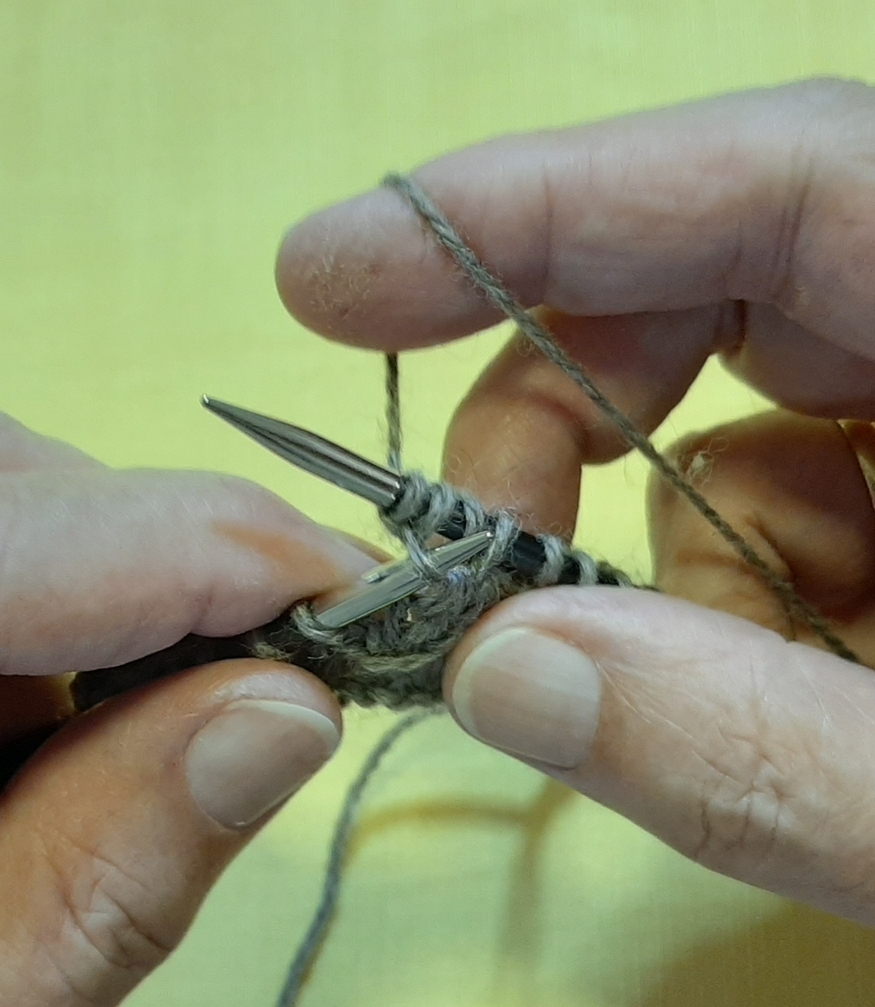
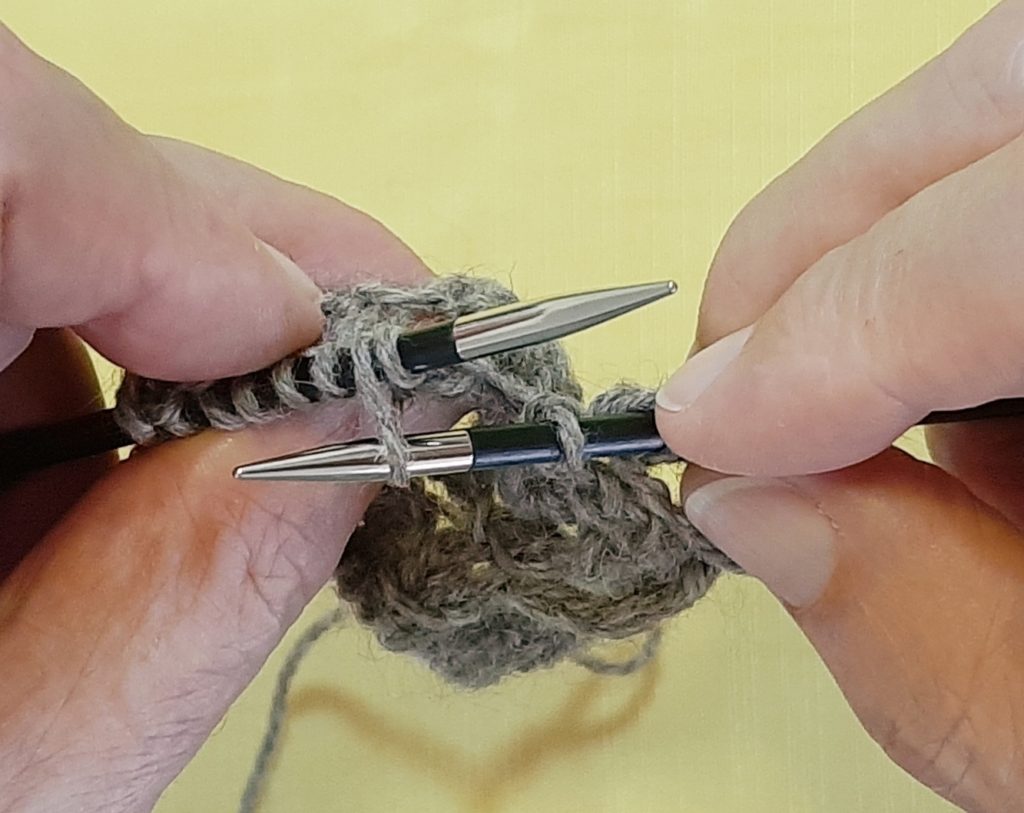
On Row 1 of the Circles pattern chart you ‘ll see an unusual symbol that takes in the three center stitches. This is known as a cluster3 and here are the three steps involved:

Keeping your yarn in back, slip 3 stitches to the right needle, purlwise.
Bring your yarn to the front.
Slip the 3 stitches back to the left needle. Move the yarn to the back and knit the 3 stitches.

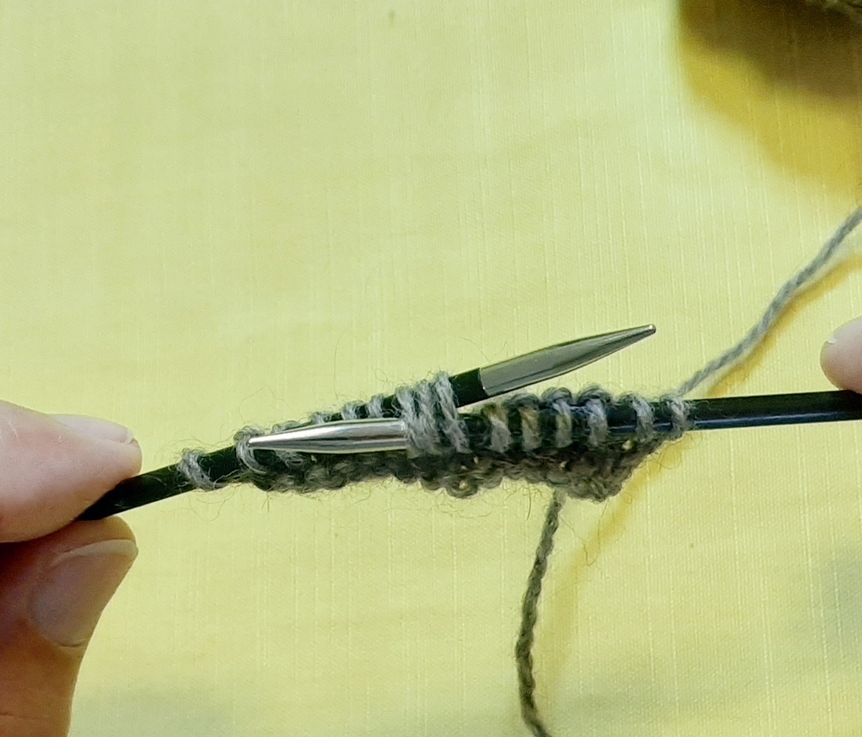
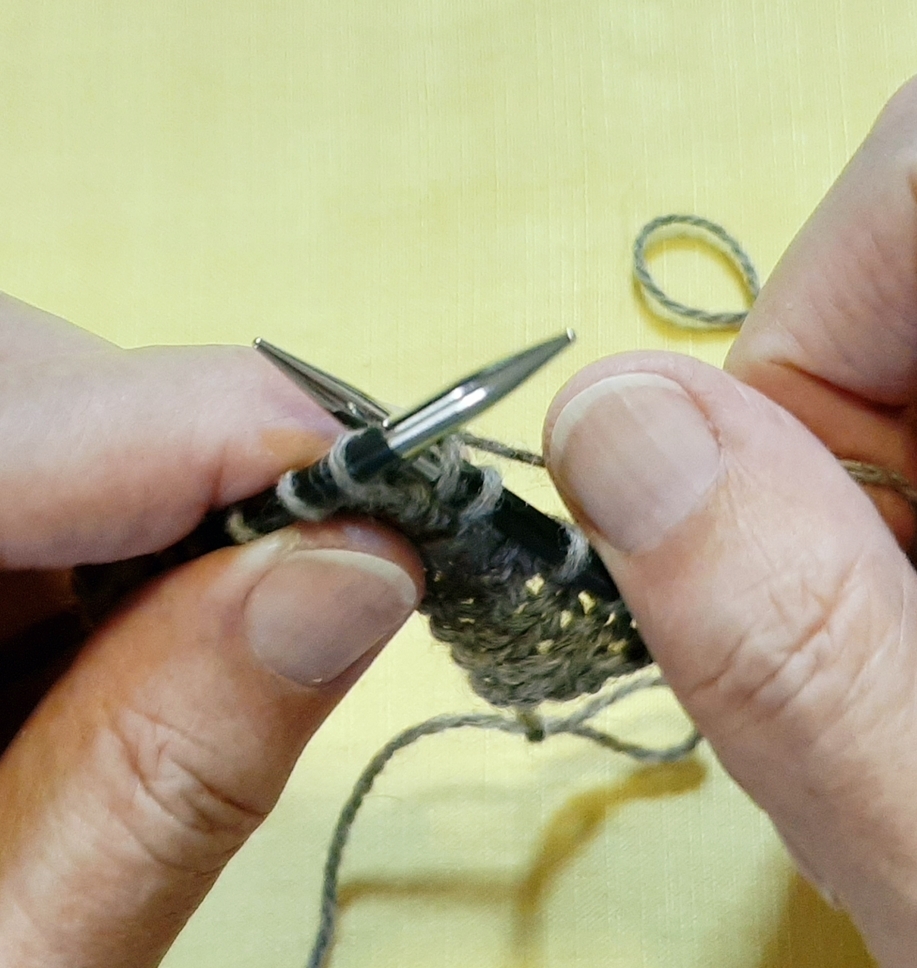
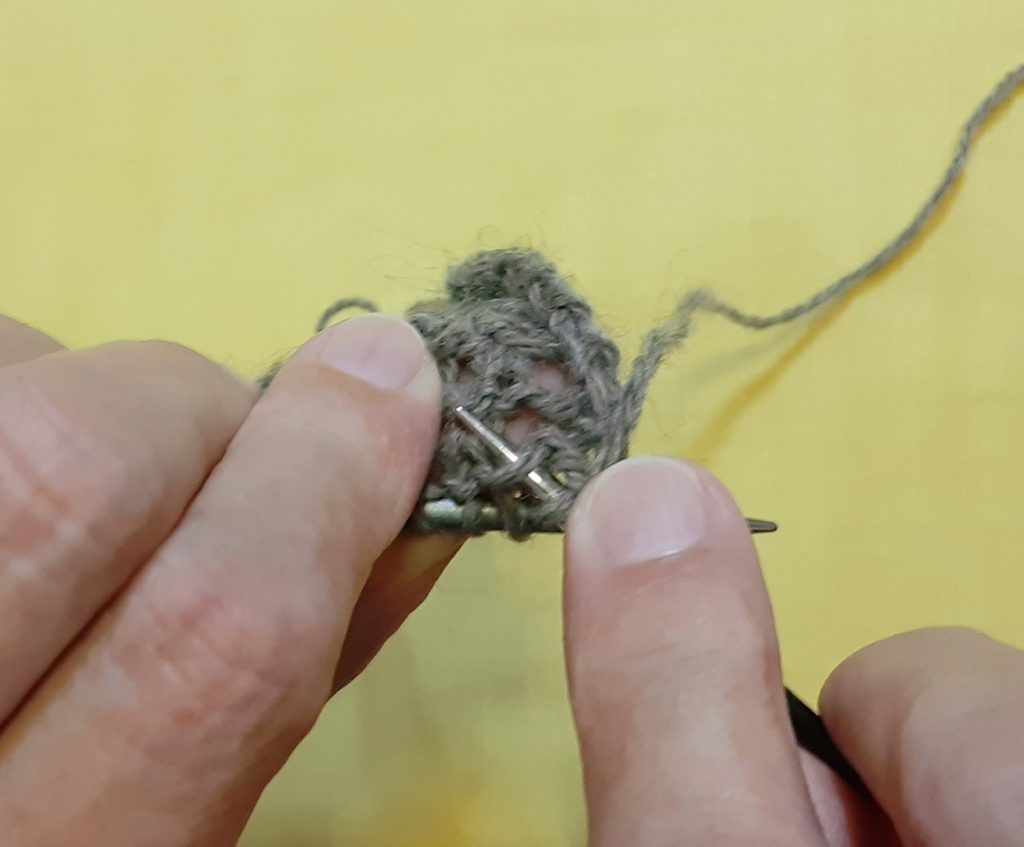
On Row 3 and Row 5, there’s a central double increase (cdi) worked on the center stitch – the 8th stitch of the 15-stitch pattern. Here’s how it’s done:

First, you’ll knit through the back loop of the center stitch.
Next, you’ll knit through the front of the stitch.
Then, you need to look for the vertical bar that’s been formed by these last 2 steps..
Insert the tip of your left needle behind the vertical bar, and then insert your right needle and knit it through the back loop.

Tip: When purling the wrong-side rows it’s a good idea to remember what you did on the right-side, and to count your stitches, ensuring that you have 15 for each pattern multiple. With the fuzzy lace weight yarn the stitches can become clumped together when you’re doing the increases and you need to be sure to purl in each one of them on the wrong side.

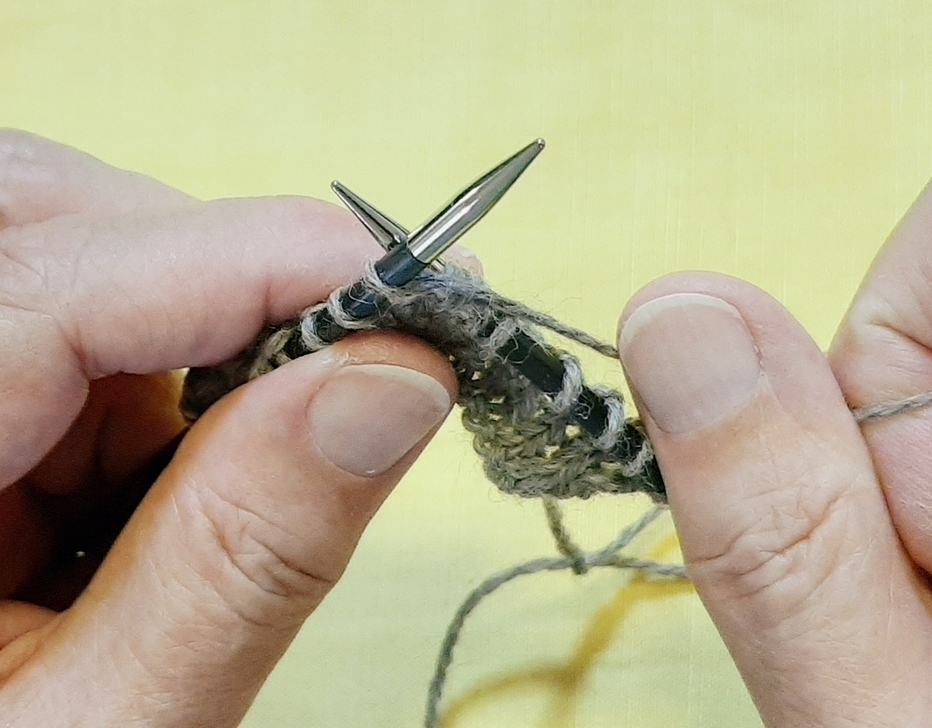
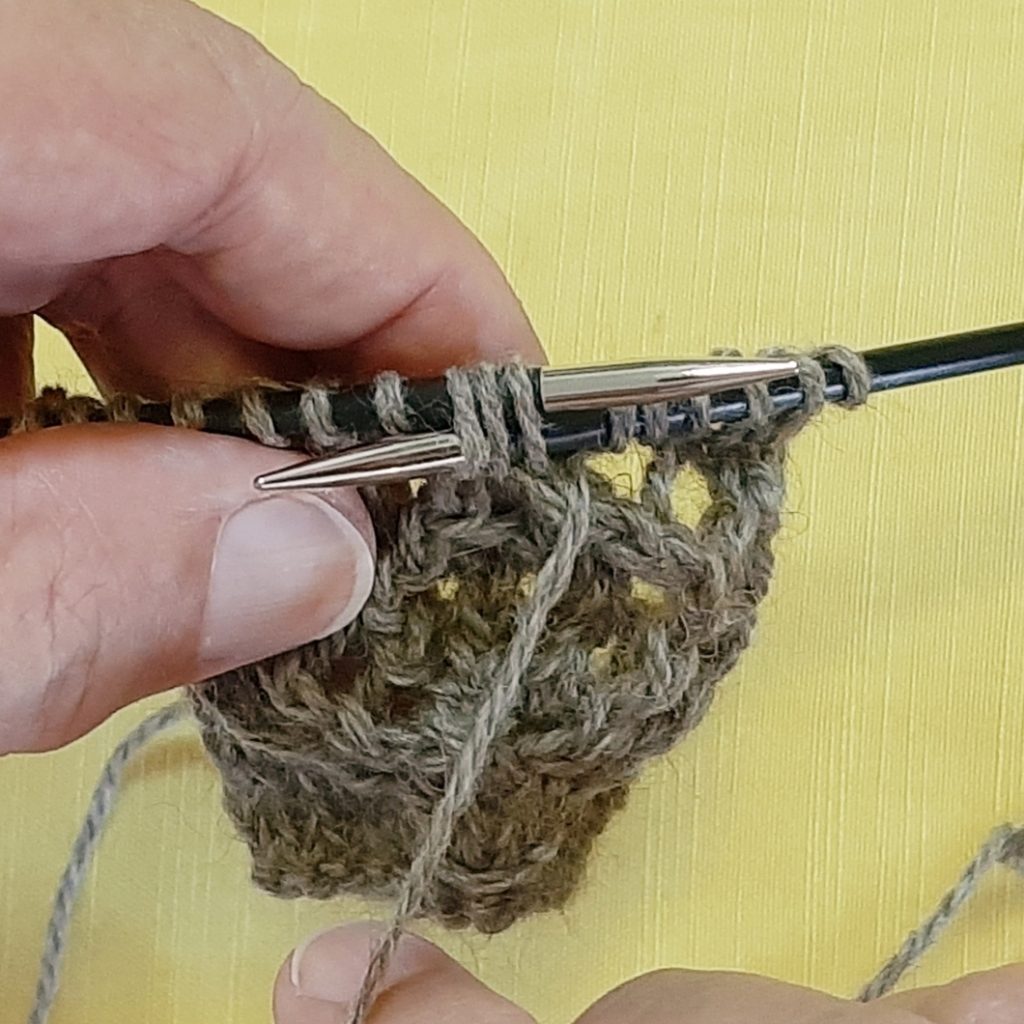
The next stitch that is a bit unusual is the inc1 that you’ll work on Rows 13 and 15 (twice on each of these rows).

First you’ll insert your right needle down through the purl bump of the first stitch on the left needle. Knit into the back of that stitch.
Knit through the front of the stitch to complete the increase.

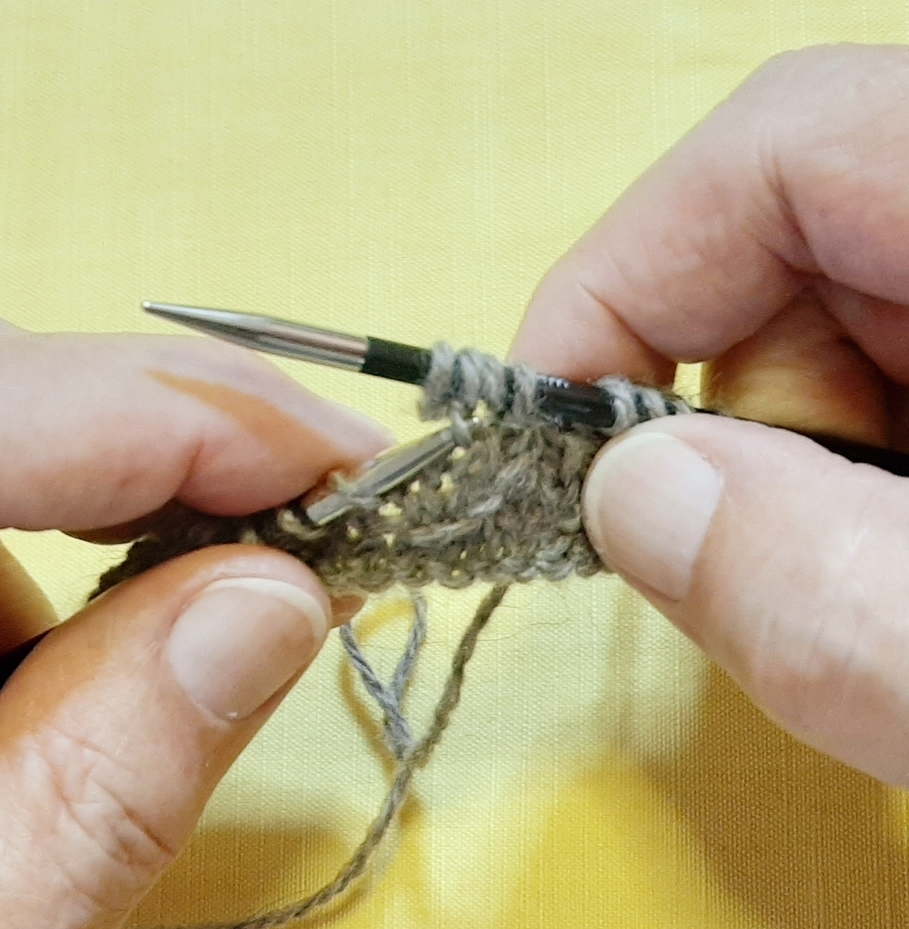
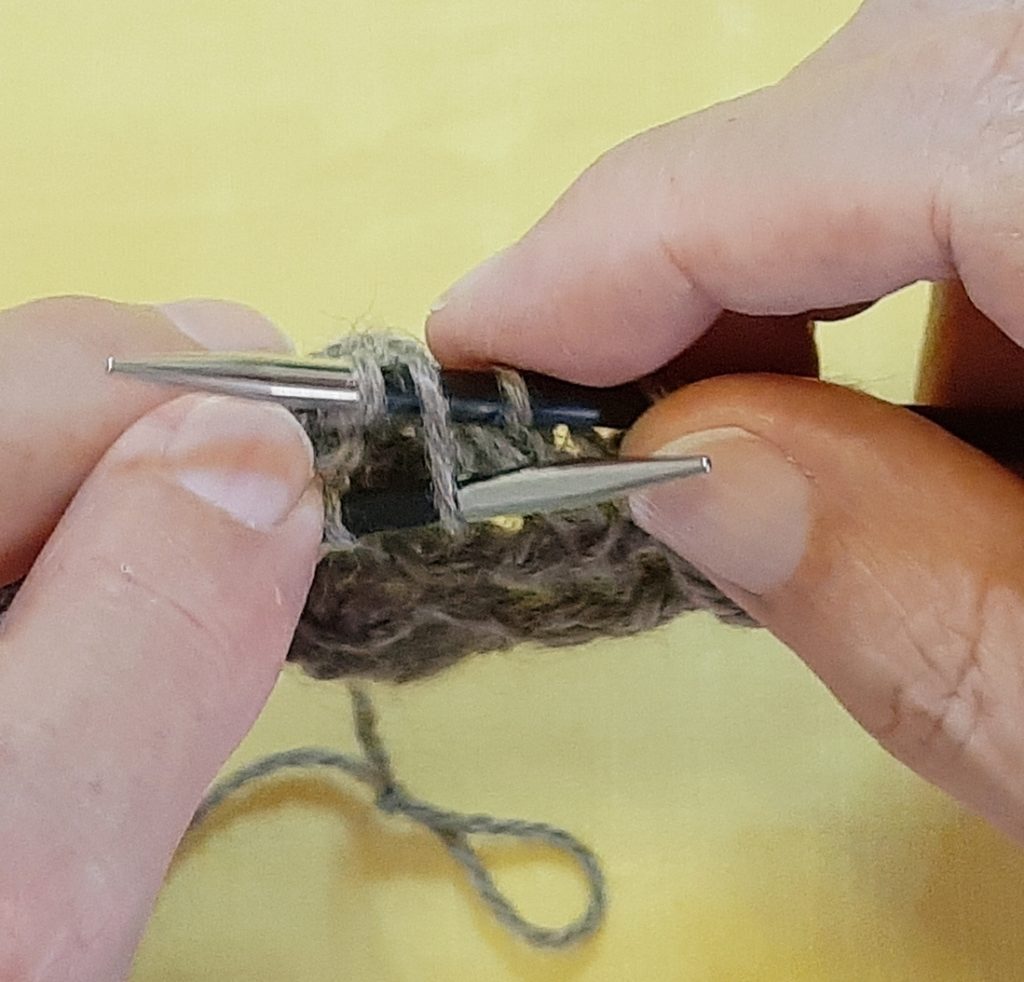
The final stitch I’d like to demonstrate is the central decrease (at the center of Row 13 and Row 15) that takes you from 5 stitches to 1 (5sts tog).

Insert your right needle through 3 stitches, purlwise. You will have just made a yarn over (as you can see with the yarn in front in the photo above). After slipping these 3 stitches to the right needle, move your working yarn to the back (maintaining that yarn over).
Pass the second stitch on the right needle over the first stitch (which is the center stitch).
Slip the first stitch on the right needle (the center stitch) to the left needle. Pass the second stitch on the left needle over the first stitch. Repeat these actions on the right and left needles once more. Pick up the yarn and knit the remaining stitch, making sure you have maintained the initial yarn over. (4 stitches decreased)
This is how the motif should look.

If you have any questions be sure to post them on the KAL site and I’ll respond as soon as possible. Enjoy Week 1!

The Steek: Reinforcing, Cutting, and Finishing

This photo tutorial is meant to accompany my Two-Color Fair Isle Wrap pattern in the Fall 2020 issue of Cast On magazine. It may be useful to others looking for basic information on steeking. In this case, the steek is formed by five stitches of alternating colors.

As you can see in the image below, the first step is to mark the stitch column where you will cut. The red thread is run along the left leg of the center stitch (column 3). The actual cut will be made in the center of that stitch, just to the right of the red thread.

After marking the center stitch, it is important to secure the steek so that the stitches do not unravel when cutting. With some yarns – Shetland wool, for example – the fibers “stick” together and little or no securing before cutting is necessary. That is not the case with smoother yarns – such as the ones used in this wrap.

The photo below shows the reverse side of the steek after machine sewing: it is not all that visible from the public side as I used a dark grey/black thread. The reinforcement involves sewing through the center of the stitch column next to the center stitch (numbers 2 and 4 in the photo above), and also through the center of the next stitch column – on both sides of the center stitch (numbers 1 and 5 in the photo). You will have 4 rows of stitches.

Cutting the steek is next. Following along the red line of stitches, cut through the center of the center stitch (number 3).

Fold along the edge of the second stitch column from the center column (to the left on one side and to the right on the other (numbers 1 and 5). There will be 2-1/2 columns folded under on each side of the steek.

With the lighter color yarn, tack the folded stitches down by hand as shown in the next photo – between stitch column 4 and 5 on one side and 1 and 2 on the other. Run the tapestry needle under the corresponding float and then between the two stitch columns as indicated. keep the stitches snug but not overly tight.

As you’ll see from the photo below, the finished edge with not be straight or flat – yet. This will be taken care of with blocking.

So, now would be a good time to block the wrap. When it is still wet, pin it to measurements, ensuring that the finished edges of the steek are straight and that a column of stitches evenly forms the edge.

I hope you found this helpful. Leave a comment if you have any questions.